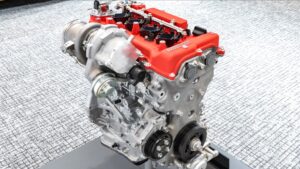
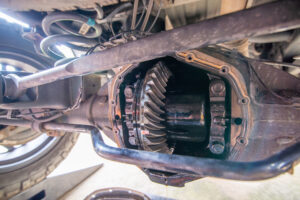
Video Transcript

(Tommy)>> You're watching Powernation!

[ engine revving ] [ Music ]

(Alli)>> Welcome to Powernation Builds. I'm Alli Walker. Let's head over to Detroit Muscle for a high octane episode as we breathe life into a legendary 50th anniversary Hurst Olds.

(Tommy)>> At first glance it's easy to see that an '83 Hurst Olds definitely has a unique personality. The black body with the accents of silver and red stripes could lead one to believe it's a performer. This Hurst Olds has lived a pampered and sheltered life, but the reflection has some imperfections. The graphics are starting to deteriorate and show their age. The paint is clean but needs some serious t-l-c.

(Joel)>> But that's no issue. A little rubbing and buffing will rejuvenate that menacing vibe that these black cars are known for. All these parts laid out on the floor coupled with some hard work is our solution.

(Tommy)>> When we're all said and done, we're gonna have ourselves a bona fide G-body that's gonna do it all, steer, stop and runs like. [ horn honking ]

(Joel)>> Sorry! Dismantling the rear suspension on one of these old G-bodies is fairly straightforward. [ Music ] [ drill humming ]

(Joel)>> You've got a couple of stop lines to unhook, including the parking brake cable. [ Music ] Then once your sway bar, shock mounts, and control arms are freed up you're ready to drop the rear axle. [ mechanical humming ] [ Tommy whistling ] [ Music ]

(Tommy)>> That's what they look like.

(Joel)>> After prying, fiddling, and tossing what's left of our front suspension it's time to lay down some rust preventative paint as well as a rubberized coating for a nice, clean undercarriage. [ aerosol can hissing ]

(Tommy)>> We've been busy. With all of our suspension laying there on the floor we gave the underside of our Hurst Olds what I call a "truckers bath", and even sprayed on some black to dress things up a bit.

(Joel)>> After ripping through the cones in this old G-body it became very apparent that an overhaul to the suspension was in order. There was often times when it felt like we were floating on a pirate ship in the middle of the Atlantic. Our solution was to try and find something that would give us the smooth operation of a luxury sedan but the performance of a track car. This air suspension setup we got from Ridetech gives us the best of both worlds. To make room for our air suspension a little slicing and dicing is required. [ saw buzzing ]

(Joel)>> This is to ensure there's enough space around the air shocks to inflate and deflate as needed. However the new upper and lower controls arms are designed to bolt right into place of the factory originals. [ Music ] Making the installation of the drop spindles a total breeze. [ Music ]

(Tommy)>> Worn steering components can cause several issues. Make your tires wear funny and seem like the steering wheel is a little bit lazy. Now depending on the amount of wear it can also be downright dangerous. With our Olds it's got some age on it and the front components that we took out, well they were on the verge of needing to be replaced. So reusing that old stuff is a bad idea. We've got an upgraded setup from Ridetech. It comes with your aluminum sleeves, rod ends, tie rod ends, center link, and the idler arm. [ Music ] All over the place MO! [ Music ]

(Joel)>> Well guys we're all finished up front. Now it's time to tackle the rear. You know one of the most important upgrades you can do to your project is making sure you've got enough rear axle to support the ponies that you're pushing underneath the hood. This built to order nine-inch setup we got from Quick Performance features a quarter inch walled axle tube, custom aluminum fill plug, 3.50 gear ratio, and of course Wilwood disc brakes. Now we've already done a little bit of pre-assembly and got our brake system already set up because it's easier to do it on the stand as opposed to underneath the car. Our next step's to go ahead and pop out these o-e style upper bushings and replace them with these aluminum spherical style that tie into our air ride system. [ Music ] Pulling these rubber bushings will give us a number of advantages. The larger aluminized surface area gives the rear axle a sturdier foundation… [ Music ] …allowing for less tire wear and more traction. With 540-foot pounds of torque pending from our big block power plant we'll need all the help we can get to keep this G-body between the ditches. [ Music ]

(Tommy)>> Alright hold up.

(Joel)>> With the new rear axle in place it's time to bolt on all the goodies. Just like in the front, the upper and lower strong arms bolt right in with all the hardware included. [ Music ]

[ Music ]

(Joel)>> After a quick once over that everything is high and tight, the car goes up for a tag team install of the new heavy duty rear sway bar.

(Alli)>> Coming up, find out why there's no replacement for displacement.

(Alli)>> We're back on Powernation Builds. It's time for the Hurst Olds to get a mean new power plant and goodies to match.

(Tommy)>> Subject matter for today is plain and simple. That would be power. So, it's out with the old and in with the new.

(Joel)>> That's right, and as many of you know there's no replacement for displacement, and we've been saving this power plant for a very special occasion. This big block 455 was ported and polished by Doctor Olds himself, Joe Mondello. Joe was famous for being an engine whisperer who could squeeze out every ounce of performance possible. His cylinder heads were used by some of the fastest drivers ever, setting several racing records, and he even opened his own school to pass on his knowledge and expertise to future generations. Saying that this engine is special is an understatement.

(Tommy)>> You know it'd be a down right shame to put that pretty gold motor off into this engine bay, but I guess that could be a way to get a few YouTube comments.

(Joel)>> I'll tell you what though, I think we lucked out. There's not a whole lot of rust or anything like that, and it's not even really greasy. It's just dirty.

(Tommy)>> It's gonna take a little rubbing for sure to get it cleaned back up, and it's kinda necessary.

(Joel)>> Pressure washer does most of the work though. That's the best part.

(Tommy)>> Let me get this engine out of the way.

(Joel)>> For the most part this engine bay wasn't too dirty. It just needed a quick pressure wash. With a little bit of elbow grease and a quick spray of some Sonax Engine Cleaner I was able to shine up this middle age motor home to match the shiny Olds big block we are throwing under the hood.

(Tommy)>> With all the grunt that our new engine is gonna be making that old transmission that we pulled out isn't gonna cut it. What we removed is a 200-R-4. It's not necessarily a bad transmission, it's just considered light duty. We're gonna use this 700-R-4-SS from Monster Transmission. It's built to complement engines producing up to 650 horse and 600-pound feet of torque. Their kit comes with everything needed for installation including converter, fluid, cooler, and so on. This is also just a drop in the bucket of what they offer. They can build you anything from mild to wild. [ Music ]

(Joel)>> Keep it coming, keep it coming, there you go!

(Tommy)>> Nobody moves, nobody gets hurt. [ Music ] That's cool sounds.

(Joel)>> Fits like a glove!

(Tommy)>> Fell in!

(Joel)>> Bingo! Think she's gonna fit?

(Tommy)>> Oh yeah, we don't have an option.

(Joel)>> Look at that. And there's the other one. [ Music ]

(Tommy)>> With the flex plate and adapters in I'm gonna go grab some hardware.

(Joel)>> 10-4! [ Music ]

(Tommy)>> Slow down! [ Music ] We're gonna have to tilt that dude. [ Music ]

(Joel)>> Perfect, right there! A couple of the final and most crucial components of an air suspension setup will be your tank and compressor. The RideTech E-5 Air Pod offers an integrated pre-wired solution that comes with dual compressors as well as a high flow air valve solenoid block for smooth air shock balance. The kit also features a three and a half inch l-c-d touchscreen display monitor for user friendly plug and play adjustment. Best part about this whole setup, ease of installation. Drill four holes and she's ready to mount. [ Music ]

[ Music ]

(Tommy)>> With our plans of throwing some serious performance into that Hurst Olds we knew we were gonna need a tire that could handle that power. These Continental Extreme Contact Sports should do the trick.

(Joel)>> Continental Extreme Contact Sport tires are engineered and tested by actual professional race car drivers. They come complete with Sport Plus Technology to help provide responsive handling, better grip, and extended tread life. With its specialized compound and asymmetric design the Extreme Contact Sport is built for the ultra high performance that we need. We'll be running 245/40 ZR 18s in the front 255/45 ZR 18s in the rear to help achieve that iconic hot rod rake. [ Music ]

(Alli)>> There's lots more to come on Powernation Builds.

(Alli)>> You're watching Powernation Builds. Check out how we take a tired interior from old to bold.

(Tommy)>> The next subject that we're gonna conquer is gonna be the interior. Now with what we started with really wasn't all that ripped up, but it needed some attention. We want this thing to be a well rounded project with performance and style from front bumper to back and inside and out. So it's time for an update.

(Joel)>> We wanted something that had the style and appeal of the original velour interior with a modern twist. So we got a hold of our buddies at TMI to help bring that vision to life.

(Tommy)>> Ahhhh!

(Joel)>> It's like Christmas.

(Tommy)>> Little brother needs to hurry up and get the wrapping paper off of here. I like those! Those are gonna look killer inside that car, yes sir! We've used TMI a few times here in the shop, and if you're looking for a custom style upholstery that's ready to install you may want to check them out. What we chose to go with is their low back pro series style bucket seats. This double diamond pattern really elevates the appeal of this seat at first glance. It looks elegant and aggressive all at the same time. And to up things even further we even opted for the dark silver stitching. Now we've poured performance all over our G-body and we want to continue doing that here in the interior, and that's where these bolsters are gonna come in.

(Joel)>> Before we get too crazy laying in carpet, sound deadener, and all that fun stuff now's the time to go ahead and start mocking up our seat brackets. And to keep this process simple and efficient we're gonna use the factory mounting studs as our anchor point. When building your seat brackets you want to make sure everything is properly aligned. Shifting one or two degrees in the wrong direction can throw everything out of whack. [ welder crackling ]

(Joel)>> Once your measurements are good to go you can just spot weld the brackets into place and you're ready to line it all up. Sometimes these things can be trial and error. So it may take a few attempts before you can get it dialed in. Feels good, plenty of adjustment. I think we're ready for some carpet.

(Tommy)>> We picked up some restoration components from Original Parts Group to doll up the interior on our Oldsmobile. We didn't realize how bad our original carpet was until we compared it to this new one. Changing out your carpet is an easy upgrade, and it's a big bang for your buck cause it doesn't cost you a whole lot of money, doesn't take a whole lot of time to install, and it can drastically improve the appearance of your interior. However I would suggest you get a molded unit, kinda like this one that we got from OPGI, cause it makes installation way easier. This interior we got from OPGI is heat pressed and precisely molded into a high quality G-body floor pan die. It's manufactured from 100 percent nylon for a durable and long lasting carpet. A good tip before you go to install is to lay it out in the sun for a few hours. This helps to relax the material, and also makes it easier to fit. [ Music ] [ drill humming ]

(Tommy)>> Once we got that and our center console locked into place we popped in our new seats and put the icing on this red velvety cake, taking our Hurst Olds from a worn out ride to a rejuvenated retro rocket. Our carpet from OPGI gives our Hurst Olds a long overdue upgrade that will last for years to come.

(Joel)>> If Barry White were alive today and narrating this footage he'd say! [ Deep Voice "Oh yeah" ] [ Music ]

(Alli)>> Street tires versus sticky mickeys, coming up next!

(Tommy)>> After Pat made a couple of passes it was time for me to give it a go in our Oldsmobile. I'm by no means a pro driver, but I do enjoy stomping on the throttle. This Olds makes close to 550-foot pounds of torque. Combining a number like that with a street tire it usually means significant slippage. Well, it didn't hook. We knew that basically from the beginning, but it's just kinda fun to launch it down the track with those street tires on it. After putting those sticky mickeys up under the back side of this thing its gonna be a completely different story. Now cool thing about this car is it's got a pretty good size trunk in it. Those things can ride to the track with you. Next thing you know you jack the car up, reskin this thing in the back, make that hot lap. There's nothing wrong with having a track car but I'm a way bigger fan of having a car that's track capable. Swapping a couple of tires isn't that big of a deal. To me being able to drive out and grab a burger and raise a little Cain, you get the best of both worlds. Now this swap is very basic and will absolutely help our traction problem, which will directly improve our e-t. I would also bet with a little more tweaking and tuning here and there we could drop our time even further. This old helmet's been through quite a bit. A few cars smashed, a few cars trashed, most of all it's been a whole lot of fun. This by no means is a race car, but I have to say it looks like it could be now. To say that the sensation of this fire breathing dinosaur burning old school power plant vibrating through the car is pegging my meter is an understatement. Once this light turns green we're gonna see how much more fun this ride is going to be. [ engine revving ] [ Music ]

(Tommy)>> Yep, that's way better. Conclusion for the day I'm gonna say is an absolute success. We started off just riding around in a cool car and we wound up at a racetrack. So with this project I'm gonna say mission accomplished. We've got stunning good looks, we've got speed, and we've got cruise-ability all in one package. It's time for me to go find something cool to drink and soak up plenty more of this fun. Yes sir, you did good. We never want to put our play pretties in harm's way. Over the years of hauling some of these hot rods around it teaches you a thing or two. Inside of an enclosed trailer people think it's in a sterile environment. Often times that's not the case. There's quite a bit of dust and debris that's floating around on the inside of these things. Simply installing a Covercraft car cover during transport can keep a lot of that unwanted debris off your ride. [ Music ] A lot of us go to great lengths detailing our pride and joy to show them off. Hours upon hours are spent washing and polishing them for a perfect reflection, and it can be frustrating to do all that, and in a commute a lot of that effort can be lost or potentially damaged. [ Music ]

(Tommy)>> Just a few seconds spent installing a high end cover like this one from CoverCraft can have you show ready when you're on the go. [ Music ]

(Alli)>> Nothing beats taking a fresh build to the strip. Keep up with all our latest projects at Powernation TV dot com. I'm Alli Walker, and I'll see you down the road.
Show Full Transcript