More '53 Ford F-100 "Old Skool" Episodes

More Project Old Skool Episodes

Trucks! Builds

Parts Used In This Episode

Advanced Plating
Chrome plating service.
Delta Tech Industries
Xenon light SkyBar, Combo Ground Bar, Back-up Bar for 97-06 TJ's.
Haneline
Stainless steel insrument cluster plate.
LMC Truck
Front and rear chrome bumpers, outer door handles, and handle to body gaskets.
LMC Truck
Stainless steel rocker trim/scuff plates.
LMC Truck
Windshield, front and rear window seals/gaskets.
Mac's Antique Auto Parts
Hood emblem, door strikers, window cranks, inside door handles, weather seals, glove box liner, window channel runs and seals.
Mid Fifty
Fuel door.
Moon Eyes
Instrument cluster gauges.
Pros-Pick
Wood bed kit w/ polished stainless steel strips.
System Three
Mirror Coat, two part epoxy.
The Eastwood Company
Engine turning dowels.
Video Transcript

Today, schools nearly out as we put the finishing touches on project old school,

we'll stay in the bed floor and do some old school engine turning before adding new glass. Then

it's chrome chrome and more chrome as we take you on a trip to show you where all our custom shiny stuff comes from.

It's all here today on trucks.

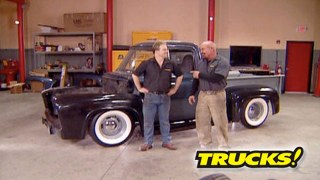
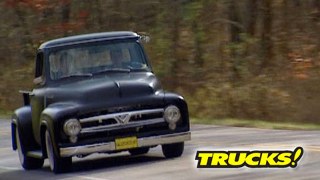
Hey, welcome to trucks where we are deep in the throttle of project old school. Now, anyone that's gone completely through a vehicle like we've done this 53 F 100. Well, you know, there's a lot of loose ends to tie up because basically we brought this thing back from an empty shell. Now, I know you guys want to see this classic finished and we are chomping at the bit to get this thing back on the road where it belongs and hey, take a look, we are close.

So today

we're going to take care of the rest of those loose ends starting with these chrome bumpers from L MC truck.

Now, they're designed to bolt right to the frame in the factory location.

But if you want to tuck them up tighter for a cleaner custom look. All it takes is drilling a few new holes.

We relocated our holes a little higher up and a couple inches further in to tuck the bumper into the bed.

But now this front bumper presented a little bit more of a challenge because the original bumper arms are long gone. And what was holding up the bumper when we got the truck? Well, that was made for a homemade bumper, So that wasn't going to work either. So Ryan went to work and fabricated us up a set of mounts that not only center the bumper better than what the factory did but Incorporated tried and true custom technique that tucks the bumper in tighter to the body work just like out back.

Now, running boards are fiberglass parts from Bebops glass works and come just like you see them. Now we thought they could use a little dressing up as well as some protection. So we opted for this custom runner kit from mid 50 f 100 parts.

All you have to do is cut them to length and they mount on top of the ribs of the running board.

It just takes drilling a few holes and the change is pretty dramatic.

Step two is pushing the rubber inserts into the rails channel

when you're restoring a vehicle or is in our case, paying tribute to the original style. The idea is to retain the character of the original truck. Well, with parts more than 50 years old on our truck, we just had to find a place for quality replacement parts.

Well, Max antique auto parts has one of the best reputations around for quality original replacements

like this new chrome V8 grill emblem, door strikers, window cranks inside door handles and a complete set of door weather seals. Now, we're doing something unique with our glove box, but if you're going back original, they also make an original glove box liner

and these window channel runs and weather seals, they'll make your windows close like they're brand new.

These lock cylinders are factory stainless steel and they still look great. So we'll just pop them right back in.

We also picked up a new set of outer door handles and body gaskets from L MC.

Yeah,

that's it.

These weather seals obviously keep moisture and any unwanted breezes out of the cap, but they also prevent metal and metal contact between the door frames and the cap. It's pretty simple to apply. You just put your adhesive on both surfaces, wait for it to tack up and then press them together. I always like to reach for the black adhesive even though it comes in different colors because, well, I just think it looks better

check out this cool spot. We've got picked out for our AC controls. It's just a simple metal bracket. We
fed out a 20 gauge steel and screwed in place. The original glove box. We've even got room for a radio to go in here.

Now, here we painted the dashing interior, the same flat black base clear as we did on the outside.

And while this looks great,

it could use a little dressing up.

So we thought we'd get a little creative and do some old time styling on some aluminum called Julie or what most people know is engine turning. Now, we start with this flat two inch by eight inch aluminum stock. I picked up from a local metal supply

and using these turning dials. We got from the Eastwood company. I started to make a pattern.

It just takes a light touch to make a swirl on the aluminum. You can experiment to find a pattern you like before committing to your actual parts

for a more precise pattern and a professional look. Use a jig as a guide.

Now, the time investment is huge,

but so are the results.

Now, here's what you're gonna end up with when you're all done. Something that looks great and it totally custom,

but we got a bit of trimming to do to make our turn pieces fit. So you guys take a break and when we come back, we're gonna take you on an incredible tour of a shop that has a list of customers that includes Occ Gibson Guitars, foose and well trucks stick around. You don't wanna miss it.

Hey, welcome back to trucks. Chrome is as much a part of hot rotting as the smell of burning rubber. And it's also a great way for us to individualize our trucks, make them truly our own.

But sending your parts off to the chrome shop can sometimes lead to disappointing results if that shop doesn't care about your chrome as much as you do. And good chrome plating requires skill and some serious craftsmanship to get this ultra smooth deep luster. We thought it'd be pretty cool to show you guys at home what goes into the chroming process at advanced plating.

We met up with Steve Tracy, owner of advanced plating in Nashville, Tennessee. And he gave us a grand tour of his 60,000 square foot facility starting with a showroom that looked like an automotive candy store and it's not just metal parts that they plate, they can chrome fiberglass plastic and some things that you never expect to see plated. Now, this is actually a coyote skull,

they can plate almost anything here.

The first thing that happens to a part when it comes in here, I mean, what, what do you do with it?

Well, after the uh job is estimated, it comes from the showroom out here to be engraved.

Uh after the jobs have the numbers engraved, they're inventoried and then they are put on the whole shelf and then they go from here over to the plant to be processed.

Steve showed me some of the incredibly rare and valuable parts ready to be plated, including these aluminum bumpers. From a 1955 Cadillac concept car

advanced also powder coats parts and takes just as much care with that process as it does. Chroming

Steve then took us out to ground zero where the whole chroming process starts.

There are different types of strippers for different type of metals.

Steel parts are acid dipped to remove any plating paint or rust.

The next room is where they straighten and repair parts and we actually found our grill in the process.

After it was stripped, we had a lot of body filler in there.

It's all sanded. Copper all soldered in

copper plated again, sanded copper plated. You've got

three trips to the copper tank with a total of 12 hours of copper plating on your grill here. Wow, this looks fantastic, Steve.

That's amazing.

This bumper is being straightened by Clarence who's been doing this job for 30 years and has the touch of a surgeon.

The pieces are continually sanded in shape until they're ready for copper plating, which acts as a filler to be further leveled and smooth

before copper plating. The parts are chemically cleaned,

then rinsed, cleaned several times before going to an alkaline acid edge. This removes any cleaner film, opens all the pores up and allows the copper to bond to the base metal.

The copper plating looks like something out of a horror movie. And what you're watching is hydrogen form on the surface and copper being deposited,

the copper is then leveled and replayed it until it's ready to be buffed. Finally, after three stages of quality patrol, it's ready to move down the line.

Nickel is what gives chrome plating its gloss and shine.

Everything is built on a foundation including the gloss and shine of chrome and it starts with hand buffed copper plated by nickel.

And after about two hours in the nickel tank, the color has changed and a glossy, highly reflective part appears but it's not finished yet.

So this is the big one. This is the chrome tank right now. This is the crew hex

valent chrome.

This is what gives you the beautiful

deep silvery blue deposits.

The depth inflating comes from nickel. The smoothness inflating comes from all that work. Those guys in the policy department did all that

contemplating and sanding

the nice clear deposits from filtration and chemistry.

But what gives you corrosion protection is the chrome itself

and it deposits, it's a silvery blue transparent deposit over the top of the nickel.

You are actually looking through the chrome and seeing the nickel. That's the depth right there.

After the chrome bath, the parts are rinsed in a sodium bi sulfide, rinse. Basically, it cleans all the excessive chrome residue off the parts and reveals the luster that we know and love

every single nut bolt and part gets the same craftsmanship and attention to detail. And that is what makes advanced plating ahead of the pack for custom plating.

Next, we'll pick a wood stain to match our old school paint job.

And later we'll show you how to pop new glass in an old truck. Stick around.

Hey, welcome back to trucks

and project old school. Now, one of the coolest things about these old vintage trucks

is they came with a wooden bed floor. Yeah, but those original wood bed floors seldom stood the test of time. And even though this wood here is obviously been replaced, along with the original metal strips, you can see it's obviously warped in places and there's definitely signs of moisture penetration. Under. What I'm assuming is some sort of polyurethane clear coat.

So if you remember, we had pros picks, send us one of their wood kits when they shipped us our new bed along with these polished bolt, less strips to hold the boards down.

This wood is red oak and it has a beautiful grain with a black color on old school. Any color stain would look good, but the most important thing here was to finish this wood. So we never had to think about it again.

So I did some digging around and found this really cool black stain. It's gonna bring out the grain of the oak as well as give it some great depth and character. Now you can use automotive finishes to refinish wood, but wood is more porous and thereby more prone to moisture damage than fiberglass or metal.

So we decided to go down a little bit different road and found this two part epoxy coating that is going to seal the wood look like glass and last practically forever. But before we can start to make our bed floor look good. Remember that we've relocated our fuel tank under the bed. So we got a little bit of cutting,

we measured to find the center of the fuel cap on our tank and transferred it to the board.

Then we used the fuel door. We got from mid 50 f 100 parts as a pattern for the opening.

This is an expensive piece of red oak. And if woodwork is not your thing, you can take it to a cabinet shop and have them cut it for you.

Now, there are different tools you can use for this, but we decided to do a free hand cut with a router

almost

there. It is.

Now we can prep the wood.

We're using 320 grid paper and a soft face sanding block

sand with the grain, not against it and stay away from D A Sanders. The pattern they make can map through your stain and show through your top coat.

The final tone of the stain is your preference. So like we did, you can use the underside of one of your boards as a test panel to see how long your stain should sit and how many coats you should apply.

We used a single coat left on for five minutes and wiped it off, using a cotton cloth wrapped around a paint roller,

using a light touch wi with the grain of the wood over the whole length of the board.

After a couple of hours of dry time, the first coat of epoxy is poured on

left for 30 minutes

and the excess is then squeezed off. This seals the pores of the wood. It stops any air bubbles from coming up and getting trapped into your finish coat.

After the first coat is cured, then you can apply the second heavier coat for your final depth and gloss.

Well, while we let that stuff dry, let me show you some of the details. We got cooking in the cab

starting with the stainless steel scuff plates we got from L MC

and this is the finished product of our engine turning project, which is perfectly complemented by this stainless steel engine turned dash face plate. We got from hay

line that is loaded up with what else? Moon eye gauges. Now, this is old school. Well, we're going to take a little break but don't go anywhere because when we come back, we'll show you how to pop a windshield in one of these old trucks and don't worry, it's not as hard as you think it is. Stick around.

Hey, welcome back.

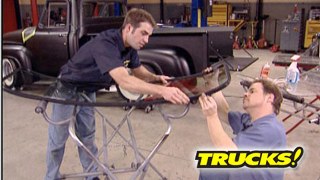
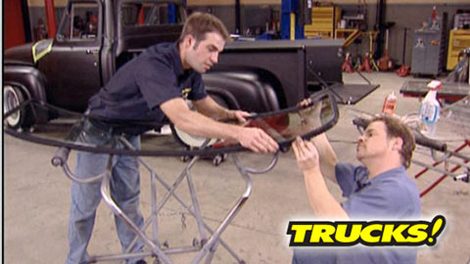
The glass in your truck can be as intimidating to work. On as it is important. Now, you saw how easy it was to get the glass out of this thing. Well, putting the windshield back in is almost as easy.

Now, like you saw before our original windshield is not broken but it's worn out. So we're going to replace it with a brand new one that we got from L MC truck. Now, they also sent us front and rear seals to put in with the glass. Now, this is what I used to call an eight style donut gasket. There's one channel for the glass to go in and one

for the pinch weld.

But before any of this can go in place, this glass has to be cleaned thoroughly. And the best thing I've ever used for cleaning glass is regular old newspaper and household glass cleaner.

Now, there's a couple of things you're gonna need for this project. Pick up some quarter inch nylon cord

as well as some silicone spray lubricant and the uh, little straw comes in handy

on your new gasket. You can usually find a mark where it's molded together. Yep, right there. I use this as an indexing mark and put it right at the center in the bottom of the glass. But before we can put this gasket on, it's got to be lubricated.

Stay away from petroleum based lubricants that can damage rubber gaskets and seals,

touch it.

There it is

use the same silicone lube on your rope before you insert it into the inside of the seal.

Ok. With the rope moved up, we're going to start in the center at the bottom and leave yourself a pretty good tail. I'll show you why in a minute,

you just want to tuck your rope inside the weather strip channel.

Make sure you keep your gasket steady too.

Now, here's the fun part with one person on the outside supporting the glass with light pressure starting to pull the rope inward, one side at a time.

Take your time and slowly work your way up the sides to the center of the top.

Come

there. It is

cool, man.

Yeah, no kidding. This is actually the last step in seeing this glass. This is actually seeing it all the way around the pinch weld open hand, take your rings off too.

The rear glass uses the same process but is installed on the inside of the cabin.

Wow.

And it,

it

now with the last coat of epoxy dried, this is what you're gonna see. This looks phenomenal man. It looks like you could sink your hand down into it. I can't wait to see what this looks like in the truck.

Yeah,

that finishes up the bed and that looks sweet man. It really does with the glass installed. We can finally take old school out on our maiden voyage. So the next time you guys see project old school, it's graduation day. We take this thing out and put it through its paces and turn a few heads along the way. Hey, you missed a spot.

Hey, I want to show you something from the guys at Delta Tech industries. This is their Delta Sky bar backup bar and combo ground bar for 97 through 06 TJ S.

They all use waterproof Xenon lights and the sky bar mounts above your Jeep's windshield and uses long range narrow beams for powerful illumination.

With this sky bar. You can run 24 or all six lights at once.

Their delta backup bar comes on automatically in reverse cranks at 220 watts in a wide flood pattern behind you. Delta's combo ground bar has three driving lights, two fog lights and a floodlight on each side. So you can see what's right in front of your tires.

You can run each light group separately and it bolts right up to your front bump or using the existing bolts. The combo bar runs you about 750 bucks. Their backup bar about 650

the sky bar about 870. Thanks for watching trucks. See you guys next week.
Show Full Transcript