Trucks! Builds

Parts Used In This Episode

Castrol
Castrol Syntec and Castrol Syntec blend.
GM Accesories
Dual DVD headrest monitors.
Kelderman Mfg.
Air Ride component set.
Matco Tools
Slide hammer, stud gun, egg shaped dolly, metal hammers.
Skyjacker
Rock lock sway bar system.
Tire Rack
24X10 ZINIK Z-12 Mazotti black with machined lip, pirelli 305/35R24 with smaller 21MM thin wall socket.
Video Transcript

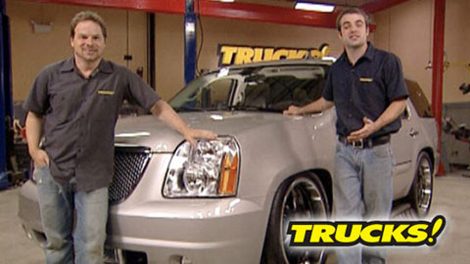
Today we're using a new air suspension system to get this Denali rolling in the weeds and riding on 24. Then it's a segment we call rewind. We'll roll the tape back to a past project and give you even more how to know how

that's all today here on trucks.

Alright. You good.

Keep coming. Keep coming.

Perfect.

Hey, welcome to trucks. We're here at the shop. If it's got anything to do with the truck, we're gonna tackle it, whether it's restoration customization, Street Rod off Road, late Model, whatever. We've got projects that range from body bag to old school all the way across the spectrum to D Os Bronco in the YJ redemption project all the way back again to the Haland S 10. In other words, if it's a truck, it's gonna get covered on the show.

Now, everybody has their thing whether it's off road or on,

but cool is cool no matter how you slice it.

And today we're gonna take on a project that's a mix of late model technology and a very popular custom treatment for any vehicle.

Now, you've seen the Kelderman name around here on more than one occasion. And they're well known in the aftermarket for the Radical Lifted street trucks with huge long travel bag systems, the custom F six fifties with bed lifts and even matching Harley's. And if you pay attention to the show circuit, you see the

Kerman truck on display at one event or another.

But today, we're not going for 12 inches of lift, kind of the opposite.

In a case, you didn't know Kelderman also makes lowering systems for late model full size trucks.

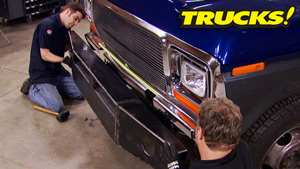
Now, it's no secret that the newer your truck is, the more it relies on internal computers for things like ride control and throttle and braking, even torque management systems that can be extremely complex and to be honest, it can kind of take the fun out of customizing a new truck. But the engineers at Kelderman have designed a system for the new, the GMT 900 series chassis that includes suburban Escalade Tahoe and Avalanche that utilizes the stock suspension mounting points and basically just replaces your stock coil springs with some new custom air springs and it'll get this Denae

down into the weeds while rolling on 24 inch wheels.

Now, we think GM did a pretty good job in the Restyling department of their new truck designs, but there is nothing wrong with a little more attitude. And for this system, it starts with these hybrid air springs that utilizes the stock front strut and bolts right in place of the factory coil spring and strut assembly. Now out back, the coil springs go away in favor of these air bags that bolt in using factory hardware.

The standard kit comes with 112 volt air compressor quarter inch airlines fittings, relays, harnesses a valve block and controller. Even an optional key fob remote plus all the hardware it takes to mount this whole system.

Starting with the front half of this system, you'll need to remove the left and right front strut assemblies

using an external coil spring compressor, compress the spring enough so you can loosen the nut on top

and separate it from the strut body,

then remove the factory bump stop

and separate the spring seat from the strut.

Now scuff the upper shock body with the red pad.

This will allow the new air spring to seal, better

apply a thin layer of petroleum jelly to the inside of the air spring

and then assemble the spacer,

new spring seat.

And finally the new air spring to the original strut body,

a new washer and hat

and finally a new upper mounted plate are attached and bolted together.

Now, the newly renovated air strut goes back into the stock location the same way it came out.

And this Kelderman system is interesting and very different from a conventional air bag system

that utilizes an upper and lower bag mo and

acts as its own spring. Whereas this uses the original strut tube and integrates an aftermarket bag that seals with an or on the outside of the strut tube here and on the strut rod here. Now, this is an interesting mix because you don't have to fabricate an upper, lower bag mount and it integrates easily safely and effectively utilizes the hundreds of hours. The GM has already put into R and D on this late model system.

Now, the mounting brackets and tanks are integrated and bolt right in place for your factory

plastic skid plate used to go

and they're very much at home in the cavernous space that resides between the bumper cover and the front cross member. Now, the kit comes standard with a single 2.5 CFM compressor.

But if you like messing around with the ride height settings or you just want faster recovery times, well, you might want to opt for the second compressor.

Now, Kelderman has done a nice job of utilizing factory hardware in bolt locations with this system and the brackets for this assembly

bolt right into the existing skid plate mount.

And since there's plenty of locations in any late model vehicle to route cables and wires through the firewall, it's just a matter of dropping your harness from the control unit in the cab down to the sensors.

As with any air system, brake line, electrical line or fuel line, make sure that everything gets routed away from anything that moves or gets hot and it's tied securely in place

for the rear springs, we'll start with removing the splash shields for access and disconnecting the factory ride height sensors.

Next, the rear shocks were unbolted from the axle

and then the rear end is lowered out of the way.

Factory coil springs are dropped out

and the brake lines get unbolted from the axle assembly. Since the threaded mounting holes also serve as locators for the new air spring base

and that gets us ready for the new air spring.

When we come back, we'll finish up our install and lay this

dili out

and

hey, welcome back to trucks. Well, one of the easiest and most effective ways that you have of customizing your vehicle and setting it aside from the pack is by throwing on a set of aftermarket wheels and tires. Now, these are the stock wheels and tires. We pulled up our Denali and it's an 18 inch aluminum alloy wheel, not a bad looking wheel and tire package, but it looks stock. So we went to tire r.com pulled up their upgrade garage and an image of our

dili shopped around, tried on a bunch of different sets of wheels and tires until we found something we liked. And here's what we came up with. This is a 305 35 ZR 24 inch

Pelli Scorpion wrapped around a Zenne

10 inch wide cast aluminum wheel with a powder coated center and clear coated outer ring. Now, these things are gonna look awesome on this dina.

But before we throw these on, we got to get the rest of the system in place.

Now, before the break, we removed the stock at coil springs, disconnected the shocks and dropped the axle.

The new air bags are a drop in replacement, but you need to pre ft the bags

and make an alignment mark that you're going to need for the correct orientation of the mounting plate before you tighten the low retaining screw.

That's good.

What this mark tells us is where the bag mounting plate sits in relationship to the airbag when it's installed in the truck.

That way we can tighten down the mounting plate. So there's no unnecessary twisting force on the air bag causing premature failure.

Don't forget to use thread locker on this fastener since there's no way to get to it with the air bag on the truck.

Now, with everything locked down, the bag goes back in the same location as the factory coil and this is where the brake line bolt serves double duty as a locator for the new mounting plate.

The airlines are then connected to the bags and the excess is tucked out of the way and zip tide.

Now you're ready to lift the axle back up and reconnect the shacks using the factory hardware

one more.

There we go.

You're going to have to slice into the factory ride height circuit right here with your new harness

and then it's just a matter of reconnecting the ride, hide sensors and throwing the splash shields back on.

Now, throwing on a set of wheels and tires is no big deal. Just make sure that you use the correct bolt patterns to get a solid seat to your hub

right there.

All right. Drop it down.

Well, there you have it with the help of Kelderman and a few hours of your time, you can take a late model escalator, Denali throw an adjustable air suspension system on it that uses stock mounting points

and will give you lock to lock turns on 24 inch wheels with no interference that my friends is instant attitude. It's like these trucks were made to be customized and that's the beauty of a system like this. It's easy to install and just as easy to return to stock. So you guys running around in leased vehicles. Well, this could be an option for you

up next. We're rewinding back for more detail on how we fix the dented fender from project Dos

Bronco and later our lower Dina

gets new DVD headrest so we can watch our favorite show. Stick around.

Hey, welcome back to trucks.

Now, we've been getting a lot of email asking us about D Os Bronco. You guys have been wanting more detail on some of the projects we tackled like that dented quarter panel that Kevin fixed. Now, it's no secret that a half hour show can go by in a hurry

and sometimes we just don't have the time to show you every little detail. So we're going to start a new segment. We call rewind where we roll the tape back, slow down and take a closer look at a particular project during the course of a vehicle build up. It's going to start right now.

Now, if you guys remember this panel was pushed in pretty good,

but the metal was solid and it was definitely worth saving.

I used a king size slide hammer with interchangeable hooks on the end since our tail light opening allows us in behind the sheet metal.

What you want to do here is start at the lowest or deepest point of the dent and work it out from the middle

as the metal is stretched in a collision, it gets pushed outward from its point of contact and even though a slide hammer or body hammer won't shrink the metal back, it will guide it back closer to its original location.

Now, we've even got enough room in the tail light pocket to slide in a dolly, but you don't want to just grab the first one you see.

And when you're deciding which dolly to use, find a shape that matches the shape of the metal that you're working with. For instance, this heel dolly with its flat edge is not gonna work with this curved piece of metal. Instead

choose a dolly that closely matches the shape of the panel you're trying to recreate.

Now, when you're choosing a hammer, first of all, don't use this, it's not made for hitting metal and it doesn't have the flat contact area in the large surface that a body hammer has. So once you've chosen your tools,

what you wanna do is support your hammer blows with the dolly and just work your metal slowly.

Now, since there are places I couldn't get to with the slide hammer we brought in the stud welder, which allowed me to grab the lowest point of the dents and this time pull them out instead of hammering them out from the back.

Keep this in mind too. Blind panels can house all kinds of debris, nests, leaves and even dust can ignite if the conditions are right.

So the rule in our shop is that there's no welding after four o'clock in the afternoon and we do a touch test on every panel before we shut the lights out just to make sure it's not still hot and won't start a fire.

Now, a stud welder is a very versatile tool. You can use it like we did and weld on studs for pulling your metal out with a tea handle or a slide hammer. Or you can weld in these T studs if you're using clip style moldings and recreate an original look, or you can change tips again and do shrinking and stretching with this tool. Now, if you think about the versatility. You'd think it would cost a lot of money, but you can actually get your hands on a stud gun for about 200 bucks. If you think about what kind of a high quality repair that this can give you without drilling holes. Well, it's well worth the money.

Now, when you're smoothing on your body filler, keep in mind that it's better to apply several light coats rather than one heavy one.

There's less chance of trapping air shrink back or cracking due to excessive milk thickness.

Now, once your filler is applied, what a lot of guys like to do is wait for that perfect magic moment where the filler is hard enough to stay on the panel, but soft enough to where it can be manipulated easily and come back with a cheese grater or a rasp and do the shaping with a filler on the panel and shave it down. Now that works, but it doesn't work best for me. What I like to do is use 40 grit paper and an eight inch dual action sander and do my rough shaping with one of these. You want to keep the pad as level as possible, holding the sander firm but not pressing it into the body.

This way, you'll grind down the filler to a flat even surface.

The second stage of filler is to smooth over the rough scratches, fill in any pinholes that may have formed and give yourself a finer surface to apply primer surface too.

Ever coat's metal glaze is perfect for this. And with its fine tout, you can send it down to 180 grit, which is then ready for primer surface and then on to paint prep.

After all that work, the final steps were blocking our finishing putting with 180

that gave our panel its original shape back and you can look at this. You would never know that that nasty business was there in the first place

after the break. We'll swap out our stock headrest so we can watch a little TV. Stay tuned.

Hey, welcome back. Well, we did a little rewind in the body work project of the Bronco. So while we're still in video mode, we're gonna fast forward back to the Denali project, which has already received an adjustable air suspension system that's very easy to install and some 24 inch wheels and tires. And these Denali

come fully loaded with leather interior, dual air great sound system. In other words, they're chock full of the good stuff,

but it wasn't long ago that DVD systems were only found in the most high end customs, but the aftermarket catches up fast. And lately the oe manufacturers have been catching up even faster. The GM accessories now offers a headrest DVD system for several vehicles including our Denali. It'll tie into the factory sound system, just replaces your existing headrest.

It goes a little something like this.

The DVD headrest swaps places with the original ones and the wiring gets fed down through the top of the seat

with the seat back removed. You can route the cable harness through the back of the seat and out towards the center console with the cup holder and rear air controls. Out of the way, feed the main harness through the console to the front.

Then you're done with the seats and the back panel can go back on

the harness in the console gets plugged into the FM transmitter which allows you to tie into your truck's audio system through the radio.

The transmitter is then plugged into an open vehicle circuit in the kick panel.

The DVD monitors can be used independently or tied together.

The

system even comes with wireless headphones. That's cool,

man. What happened to that truck? It was so nice and clean. It was only that clean once.

Hey, attention to all you off roaders. Here's something you've got to check out.

Now, we're all well aware of the advantages of disconnecting your sway bar. When you're off road, it really lets the actual articulate keeping all four tires in contact with the ground. As you might know, it can be a real hassle to hook your sway bar back up when you're

ready to hit the streets and return home. But Skyjacker's New Rock Lock Sway Bar incorporates this unique hub design that allows for articulation while off road and with a simple turn of the hub dial will lock your Sway bar back in for a nice stable ride. While on the street,

skyjacker's new rock lock sway bar starts about 400 bucks

with today's engines. It's not uncommon to see operating temperatures more than 200 degrees and that can punish your engine's oil. You've seen us do tests with full synthetics and they've proven themselves to give you superior protection at those higher operating temperatures as well as on cold starts where most of your engine damage can occur. Now, Castrol also offers

a Syntech blend which is a blend of synthetic oil as well as conventional oil that's going to cost you less but gives you a greater level of protection and more durability at those higher operating temperatures. Both of these oils are fully compatible with conventional. So swapping over is just a matter of a simple oil change. You can pick these oils up just about anywhere.

Now, it's no secret around here. We're pretty big fans of air suspensions due to their versatility.

You guys that live in colder climates, you could run into a problem as air compresses, it creates moisture in a frozen valve or line could sideline your truck. So look to the big rigs for what

they used to keep their air brakes from freezing up, pour a few ounces of their air brake system, antifreeze into the tank and as your system operates, it'll distribute the antifreeze, keeping your lines and valves working like they should no matter how cold it gets. Thanks for watching trucks. See you guys next week.
Show Full Transcript