More '66 Chevy C-10 Episodes
More One-Half A C-10 Episodes
Trucks! Builds
Want more content like this?
Join the PowerNation Email NewsletterParts Used In This Episode
Bushwacker
Pocket Style fender flares for Jeep JK.
LMC Truck
Fender patch panels both LH and RH.
Powder-X
Powder coating of Chevy C-10 frame.
Strip Masters of Nashville
Media blasting of Chevy C-10 frame.
The Eastwood Company
Eastwood soda blaster, M-XL media, aluminum oxide media, M media, two faceshields and headgears with deflectors, prep aerosol, nitrile gloves, prostream wet sand surface sprayer, painter head sock, bristle disks, cleaning discs, 1/4 inch mandrel shank wheel arbor.
Woodward Fab
Sheet metal bending equipment of all sizes and shapes. Forming equipment for sheet metal working.
Video Transcript
Today, we're fighting the good fight against rust. First, we're blasting the old skin of our seat 10 Daily Driver project with just baking soda.
Then we're fixing the left over 10 warm scars and even showing you how to make your own patch panels. And finally it's how to block primer the right way. It's all today here on trucks.
Hey, welcome to trucks. Well, today we do battle with one of the age old enemies of every gearhead and restoration freak that's ever lived rust. Now, you've heard the saying rust never sleeps. Well, it happens to be true because unless you do something to stop the rusting process, it's going to keep going until it destroys your vehicle from the inside out.
Now, the Rust repair techniques we're
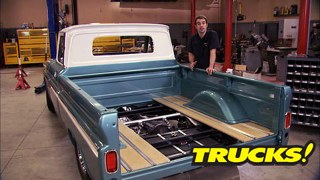
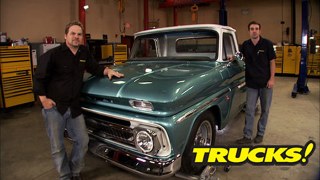
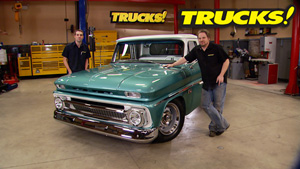
show you can be used on any vehicle, but what we're going to focus on is our 1966 Chevy C 10 here. Now, if you remember this thing started out as a mostly original V8 3 on the tree two wheel drive long bed truck. And now, well, it's obviously the short bed version. So let's take a look back and get you caught up on what it took to get to this point,
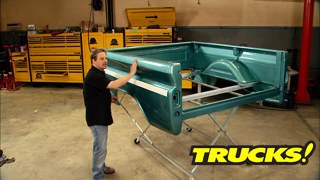
we went to work with one main goal in mine to convert our long bed truck into the more popular short bed version. So we sectioned the frame under the cab
and the bedside at both ends and ended up 20 inches shorter with a factory correct short wheelbase pickup.
Then it was off to have our frame media blasted and powder coated,
followed by a trick air suspension system from air ride technologies.
And since there's nothing wrong with the 283 we pulled out of here,
that's exactly what's going back in
because the 283 is actually a pretty respectable engine. Plus it'll just help retain the character of this truck.
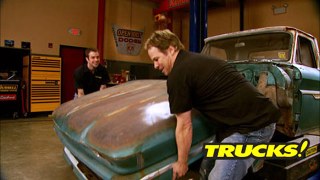
Now, thanks to Mike Cranford, we ended up getting our hands on a truck with almost no rust through, but like most mid sixties 10, there's specific zones that have typical rust and almost every truck that I've seen with this body style has got the typical rust right here at the back of the hood and right down here,
the bottom of both fenders, we're lucky enough to have LM C's premade patch panels for most of the rusty spots on the C 10. But in case you guys are working on a vehicle, you can't get premade patches for. Well, don't worry because later on in the show, we're gonna give you some metal forming tips so you can make your own.
Now, before we start cutting out a bunch of rust. We're gonna strip these panels down because this might look like the original paint job, but you never know for sure until you get it stripped down to bare steel. And one of our favorite media blasting facilities is strip masters. Partly because these guys get creative and they use types of media that don't damage the substrate that you're blasting. They're also socially aware and they use things like recyclable plastic, dry ice and baking soda media that doesn't hurt your lungs and it won't leave a footprint in the environment.
So when we saw this soda blasting kit from the Eastwood company, well, it got us asking some questions and what this system uses as a media is really pretty interesting. It's just baking soda.
Now, the last time I saw somebody eat sand was way back in the second grade and it didn't go so good for that guy. As a matter of fact, I think he rode a different bus to school after that, but baking soda doesn't settle in your lungs like sand.
It won't warp sheet metal like sand, it won't destroy chrome plastic or glass, like sand. But unlike sand, it'll just wash right back into the soil and won't leave an environmental footprint and
tastes pretty good too.
Save some for the trunk. Will you
crap can't taste that good?
Media blasting has been used to remove coatings from vehicles for over 100 years. So it's no surprise that there have been improvements and advancements with this type of equipment,
soda blasting, using bicarbonate of soda ie baking soda was developed in the mid 19 eighties, mainly for the purpose of cleaning the Statue of Liberty without damaging the valuable copper coating.
We're using a small water feed directed at the blast nozzle to help keep the dust
down.
We've also got a honking big compressor that'll give us clean dry air all day long. So this system is rocket. Just remember that the performance of your soda blaster is gonna be tied to the performance of your air delivery and your compressor.
The biggest problem with sand, other than health risks is that it profiles the metal leaving pits in the outside
and digging down into the base metal, which can allow moisture to attack the surface faster than normal.
Now, even though it just started to rain, we're still ok because the baking soda leaves a residue on the metal that takes a lot more than rainfall to wash it off. So we can continue blasting without the danger of flash rusting. Try that with sand.
Another huge benefit is that the soda itself is water soluble,
totally disappearing into the environment without introducing sand, coal or glass into the top soil.
Of course, proper steps need to be taken to clean up any paint particles left over. So be aware that you should sweep up and dispose of any leftover residue responsibly. The original paint that we're blasting is flying off the panel leaving an incredibly smooth surface to the metal.
But on the top of the hood where there's surface rust, it slows down a little.
The Eastwood kit can be modified to accept a more aggressive media in a couple of minutes and using something like silicon carbide or aluminum oxide will cut that surface brush in a hurry but be aware that these medias can warp sheet metal pretty fast.
Now, the soda did a great job. And right here where the paint was still intact. Well, the surface of the metal is perfectly smooth but it didn't do too much with this pitted surface rust. So you got a couple of choices, you can come back and blast with something a little bit more aggressive or you can remove the rust with something mechanical and then treat it.
Now, I like to use these bristle disks better than sandpaper because they won't dull out like sandpaper and the space between the spines keeps the surface of the metal cool.
But check this out. We blasted right over top of this chrome emblem and it didn't even phase it.
And the baking soda residue left behind will keep the sheet metal from rusting pretty much indefinitely, but it's got to be cleaned before any coatings gone over top of it.
And that's no big deal. Just wash it with some hot soapy water, then use some of this Eastwood fast edge to prep the metal. Then you can safely repair and prime anything that needs to be done.
We've got our work cut out for us here
up next, we're fixing what the baking soda couldn't get and what it couldn't get too.
And later, there's only one way to get a smooth foundation for paint. A little sandpaper and a lot of elbow grease stick around.
Hey, welcome back to trucks. Today. We're fighting the good fight against rust that is now before we started cutting out the obvious rust spots, we wanted to see what was under the old paint. So we fired up our Eastwood soda blaster and stripped the doghouse down to bear steel
and let me tell you, there's no TV magic going on here that baking soda stripped all of the paint off, but it left the base metal intact and very, very smooth.
And as a bonus, it didn't damage any of the moldings or the lenses that we left in place. And it told us what we suspected right from the start that this is the original paint job on this truck and that we've got rust in the typical zones. We've got L MC trucks patch panels for our lower fenders here and the stamping is actually pretty accurate,
but just because they give you a panel, this big doesn't mean you have to use it. All.
One of my favorite things is that rust is like an iceberg you only see a third of it from the top.
So make sure you're cutting all the rust out and exposing good metal to patch to
Brian's also prepping the inner brakes with a fiber wheel to help stop further rusting.
All right, with our template cut out, we can use it to trace a pattern on a replacement panel. Now, you can see we got good solid sheet metal here to weld to get rid of all this rust. And that way we can keep as much of the original fender as possible.
Using your rusty metal as a template doesn't just work as a cutting guide.
It also allows you to see how the original metal was stamped and shaped around the braces
and using pretty basic tools. You can recreate the original contours of the sheet metal before it's welded in place.
Well, Ryan's taking care of the fender, check out the hood, obviously, the metals rusted through. We know what to do with that patch. It just like the fender, but look at the other side.
Now, over here on the driver's side in the same spot, the metal looks really solid, but we know why this hood rusts right here. It's because gravity carries all the moisture and junk down in here and packs it in behind this support brace, rusting it from the inside out. So now you have to make a decision. Do you trust what looks like solid metal or do you cut a big giant hole in it just to check. Well, I'm gonna make a couple of you guys mad by cutting a hole in what looks like perfectly good sheet metal.
Remember the iceberg analogy? Well, get ready to see some hidden rot.
You see that?
That's why I don't gamble this rust was gonna eventually come through and it's a heck of a lot easier to fix now than with an expensive paint job on it.
All right, I got my patch panel trimmed using the old sheet metal. I cut out as a template and it's ready to be welded in.
Now, there was no way we were going to cover up this rusty nasty fender brace. That's what caused our rust to in the first place. So after we knocked off the loose rust, we hit it with some of this fast edge which converts the iron oxide rust into zinc phosphate, stopping the corrosion.
Now, this black primer is E coat that stands for electro deposition primer which is bonded to the pores of the metal, not just sprayed on.
So while I've stripped the paint where I'm gonna weld, I'm leaving most of this E coat on to protect it from rusting again
on the exposed metal that we won't be able to get to. Once our patch is welded in this zinc weld through primer helps as a moisture barrier for long lasting repair.
The template from the old metal leaves us with an almost perfect fit.
The new metal gets tacked into place
and then more tacks are spaced apart to keep the metal cool and straight.
The bottom gets plugged well into the inner brace
and the rest of the seam is filled and then ground plush.
We're using the metal edge to stop the ring process on this brace just like we did on the fender brace. So now the next step is to patch the hole and we're not going to use this metal that we cut out because it's just too rusty. We need fresh metal. The problem starts. It's because we don't have a prest patch panel for this because nobody makes one yet. So what do you do? Well, the solution is you make one and if you stick around, you'll find out that making your own patch panels is not as hard as you think.
After the break, we'll show you how to make your own patch panels from simple bends to compound curves. Stay tuned.
Hey, welcome back to trucks. Thanks for sticking with us today. We made some pretty good headway on the doghouse of our 66 Chevy C 10 pickup. We soda blasted the paint down to bare steel and replaced some metal in some common rust zones for these trucks. But we ran into a situation that I'm sure a lot of you guys have run into. What happens if nobody makes patch panels for the rusty places in your truck.
Well, the simple answer is obvious you just make your own. So we're gonna give you some pointers on how to do some basic metal forming. Now, one of the most common shapes you're gonna need to make is a 90 degree bend, which is easily done on an expensive break like this one here. But you can keep that money in your pocket by making your own metal break.
Just use a piece of angle iron and two C clamps to hold your metal to the table. Now, in this case, we're using 20 gauge sheet metal just like we did on our high quality brake, then just bend against the edge of the table
to get your 90
turned out pretty good, didn't it?
But you can also use the same set up to make a contour or a curve
using the clamped metal as leverage.
You can either hand form your work piece like this
or use any number of items like a piece of PV C pipe or even steel tubing to guide your metal into the shape you need.
Now something a little more complicated to make is a panel like this. That's because it curves in two different directions.
But with a little bit of practice and some simple hand tools, you can make those compound curves out of just a plain piece of sheet metal.
The bag can be filled with lead shot like ours or sometimes just plain sand
and shaping metal like this can be downright therapeutic if you're po ed at somebody,
the rounded face of the hammer and the way that the shot gives under pressure allow the metal to be stretched in a controlled manner.
Now, this is just a test piece, but you can see that the compound curve is not that hard to create.
Now, I know not everybody's got a metal break, an English wheel or even a plasma cutter in their own shop. But I'm pretty sure every one of you guys has a hammer and,
and a concrete floor. Now, this is something I learned from one of Ron
Cove's workshops. I'm using a low crown hammer so I can move the metal slowly. And my grid just gives me something to aim for. Ideally, you want to aim for the space between the lines of your grid at first, which is not as easy as Ron made it look, but I'm mostly focusing on the center.
You can see what's starting to happen. It's starting to dome up a little bit right here.
Things may not happen that fast at first, but that's OK. You wanna shape the metal slowly, politely asking it to move instead of yelling at it and telling it where you want it to go,
try to keep your hammer blows as flat to the surface as possible.
You don't wanna have the edge of the hammer digging into the dome. You're creating slow, steady progress will create a smoother shape.
And you can see that we started with a flat piece of steel, a flat floor and an almost flat hammer.
And we ended up with a rounded domed panel. The reason is that with every hammer blow, it stretched the metal and since it can't force the metal outward, it forced it up creating our dome. So that just demonstrates that with the most basic hand tools and a little bit of technique and time you can form metal any way you want.
Hey, welcome back to trucks. Our 66 C 10 driver is coming along nicely. We got a little more surface rust, repair, a lot more paint to soda blast and some filler work to do before it's in the same stage that project H RT is in which is covered in high build primer surface
and ready for the first of many rounds of block sanding
blocking is the final shaping of the panel. And the last stage of your body work you always want to reach for the longest sanding board possible because like a ship on the ocean, a smaller block will ride the surface of the waves leaving some lumps in your panel, but
a large ship on the ocean, like your large sanding block will actually crest those waves, smoothing them out, leaving a very smooth reflection and a very smooth paint job that's not going to make you seasick at your show and shine.
Now you've seen us block the jail coat on this truck once already. And if you pick out a flat panel, well, it's pretty much the same thing. Only this time we're level in the primary.
Now when you're blocking a flat panel, like the back of the cab, there's not too much chance of making mistakes. It's a large flat panel, you can just kind of go for it.
But when you're blocking over a style line like this, you can't just skate over top of it because the edge of your sandpaper is gonna cut grooves, distorting the panel. Well, here's a tip on how to maintain a style line or a valley
masking tape will protect the surface that you don't want to damage and allow you to work up against the tape without the risk of reshaping what's underneath.
Once you're happy with the shape,
you can reverse the tape
and work the opposite side of the valley again. Without the risk of undoing the hard work you've just finished doing.
Now, these vendors have a peak style line that you don't wanna sand flat.
I'm using a dry guy coat that is applied with a sponge
and a flexible block with a straight edge and blocking into the style line. The guy coat makes it easy to see your progress.
Just like Kevin showed you with the tape,
you can regy
coat the primer and work the other side of the peak.
This gives you complete control over the shape and the quality of your work.
Now, hopefully you guys feel like I do the body work and rust repair is a little less intimidating now and the more I learn or the more work Kevin makes me do. Oh, joy.
So keep watching as this truck gets whipped into shape just in time for one of you lucky viewers to take it home in a few months.
Ok. Guys, I know most of you knew Jk Wrangler owners have already added wider tires and wheels. Well, bushwhackers got you covered literally from flying mud and debris with their pocket style fender flares. These give you the look of the cut out style flares without having to drill or cut into your brand new body while the state
steel hardware gives you that bolt on look. Now they come in an OEM matte black finish, but they can easily be painted to match your Jeep Bushwhacker's new pocket style fender flares for 07 and up. Jk Wranglers will run you just over 400 bucks for the front
and 300 for the rears. Thanks for watching trucks. See you guys next week.
Show Full Transcript
Then we're fixing the left over 10 warm scars and even showing you how to make your own patch panels. And finally it's how to block primer the right way. It's all today here on trucks.
Hey, welcome to trucks. Well, today we do battle with one of the age old enemies of every gearhead and restoration freak that's ever lived rust. Now, you've heard the saying rust never sleeps. Well, it happens to be true because unless you do something to stop the rusting process, it's going to keep going until it destroys your vehicle from the inside out.
Now, the Rust repair techniques we're
show you can be used on any vehicle, but what we're going to focus on is our 1966 Chevy C 10 here. Now, if you remember this thing started out as a mostly original V8 3 on the tree two wheel drive long bed truck. And now, well, it's obviously the short bed version. So let's take a look back and get you caught up on what it took to get to this point,
we went to work with one main goal in mine to convert our long bed truck into the more popular short bed version. So we sectioned the frame under the cab
and the bedside at both ends and ended up 20 inches shorter with a factory correct short wheelbase pickup.
Then it was off to have our frame media blasted and powder coated,
followed by a trick air suspension system from air ride technologies.
And since there's nothing wrong with the 283 we pulled out of here,
that's exactly what's going back in
because the 283 is actually a pretty respectable engine. Plus it'll just help retain the character of this truck.
Now, thanks to Mike Cranford, we ended up getting our hands on a truck with almost no rust through, but like most mid sixties 10, there's specific zones that have typical rust and almost every truck that I've seen with this body style has got the typical rust right here at the back of the hood and right down here,
the bottom of both fenders, we're lucky enough to have LM C's premade patch panels for most of the rusty spots on the C 10. But in case you guys are working on a vehicle, you can't get premade patches for. Well, don't worry because later on in the show, we're gonna give you some metal forming tips so you can make your own.
Now, before we start cutting out a bunch of rust. We're gonna strip these panels down because this might look like the original paint job, but you never know for sure until you get it stripped down to bare steel. And one of our favorite media blasting facilities is strip masters. Partly because these guys get creative and they use types of media that don't damage the substrate that you're blasting. They're also socially aware and they use things like recyclable plastic, dry ice and baking soda media that doesn't hurt your lungs and it won't leave a footprint in the environment.
So when we saw this soda blasting kit from the Eastwood company, well, it got us asking some questions and what this system uses as a media is really pretty interesting. It's just baking soda.
Now, the last time I saw somebody eat sand was way back in the second grade and it didn't go so good for that guy. As a matter of fact, I think he rode a different bus to school after that, but baking soda doesn't settle in your lungs like sand.
It won't warp sheet metal like sand, it won't destroy chrome plastic or glass, like sand. But unlike sand, it'll just wash right back into the soil and won't leave an environmental footprint and
tastes pretty good too.
Save some for the trunk. Will you
crap can't taste that good?
Media blasting has been used to remove coatings from vehicles for over 100 years. So it's no surprise that there have been improvements and advancements with this type of equipment,
soda blasting, using bicarbonate of soda ie baking soda was developed in the mid 19 eighties, mainly for the purpose of cleaning the Statue of Liberty without damaging the valuable copper coating.
We're using a small water feed directed at the blast nozzle to help keep the dust
down.
We've also got a honking big compressor that'll give us clean dry air all day long. So this system is rocket. Just remember that the performance of your soda blaster is gonna be tied to the performance of your air delivery and your compressor.
The biggest problem with sand, other than health risks is that it profiles the metal leaving pits in the outside
and digging down into the base metal, which can allow moisture to attack the surface faster than normal.
Now, even though it just started to rain, we're still ok because the baking soda leaves a residue on the metal that takes a lot more than rainfall to wash it off. So we can continue blasting without the danger of flash rusting. Try that with sand.
Another huge benefit is that the soda itself is water soluble,
totally disappearing into the environment without introducing sand, coal or glass into the top soil.
Of course, proper steps need to be taken to clean up any paint particles left over. So be aware that you should sweep up and dispose of any leftover residue responsibly. The original paint that we're blasting is flying off the panel leaving an incredibly smooth surface to the metal.
But on the top of the hood where there's surface rust, it slows down a little.
The Eastwood kit can be modified to accept a more aggressive media in a couple of minutes and using something like silicon carbide or aluminum oxide will cut that surface brush in a hurry but be aware that these medias can warp sheet metal pretty fast.
Now, the soda did a great job. And right here where the paint was still intact. Well, the surface of the metal is perfectly smooth but it didn't do too much with this pitted surface rust. So you got a couple of choices, you can come back and blast with something a little bit more aggressive or you can remove the rust with something mechanical and then treat it.
Now, I like to use these bristle disks better than sandpaper because they won't dull out like sandpaper and the space between the spines keeps the surface of the metal cool.
But check this out. We blasted right over top of this chrome emblem and it didn't even phase it.
And the baking soda residue left behind will keep the sheet metal from rusting pretty much indefinitely, but it's got to be cleaned before any coatings gone over top of it.
And that's no big deal. Just wash it with some hot soapy water, then use some of this Eastwood fast edge to prep the metal. Then you can safely repair and prime anything that needs to be done.
We've got our work cut out for us here
up next, we're fixing what the baking soda couldn't get and what it couldn't get too.
And later, there's only one way to get a smooth foundation for paint. A little sandpaper and a lot of elbow grease stick around.
Hey, welcome back to trucks. Today. We're fighting the good fight against rust that is now before we started cutting out the obvious rust spots, we wanted to see what was under the old paint. So we fired up our Eastwood soda blaster and stripped the doghouse down to bear steel
and let me tell you, there's no TV magic going on here that baking soda stripped all of the paint off, but it left the base metal intact and very, very smooth.
And as a bonus, it didn't damage any of the moldings or the lenses that we left in place. And it told us what we suspected right from the start that this is the original paint job on this truck and that we've got rust in the typical zones. We've got L MC trucks patch panels for our lower fenders here and the stamping is actually pretty accurate,
but just because they give you a panel, this big doesn't mean you have to use it. All.
One of my favorite things is that rust is like an iceberg you only see a third of it from the top.
So make sure you're cutting all the rust out and exposing good metal to patch to
Brian's also prepping the inner brakes with a fiber wheel to help stop further rusting.
All right, with our template cut out, we can use it to trace a pattern on a replacement panel. Now, you can see we got good solid sheet metal here to weld to get rid of all this rust. And that way we can keep as much of the original fender as possible.
Using your rusty metal as a template doesn't just work as a cutting guide.
It also allows you to see how the original metal was stamped and shaped around the braces
and using pretty basic tools. You can recreate the original contours of the sheet metal before it's welded in place.
Well, Ryan's taking care of the fender, check out the hood, obviously, the metals rusted through. We know what to do with that patch. It just like the fender, but look at the other side.
Now, over here on the driver's side in the same spot, the metal looks really solid, but we know why this hood rusts right here. It's because gravity carries all the moisture and junk down in here and packs it in behind this support brace, rusting it from the inside out. So now you have to make a decision. Do you trust what looks like solid metal or do you cut a big giant hole in it just to check. Well, I'm gonna make a couple of you guys mad by cutting a hole in what looks like perfectly good sheet metal.
Remember the iceberg analogy? Well, get ready to see some hidden rot.
You see that?
That's why I don't gamble this rust was gonna eventually come through and it's a heck of a lot easier to fix now than with an expensive paint job on it.
All right, I got my patch panel trimmed using the old sheet metal. I cut out as a template and it's ready to be welded in.
Now, there was no way we were going to cover up this rusty nasty fender brace. That's what caused our rust to in the first place. So after we knocked off the loose rust, we hit it with some of this fast edge which converts the iron oxide rust into zinc phosphate, stopping the corrosion.
Now, this black primer is E coat that stands for electro deposition primer which is bonded to the pores of the metal, not just sprayed on.
So while I've stripped the paint where I'm gonna weld, I'm leaving most of this E coat on to protect it from rusting again
on the exposed metal that we won't be able to get to. Once our patch is welded in this zinc weld through primer helps as a moisture barrier for long lasting repair.
The template from the old metal leaves us with an almost perfect fit.
The new metal gets tacked into place
and then more tacks are spaced apart to keep the metal cool and straight.
The bottom gets plugged well into the inner brace
and the rest of the seam is filled and then ground plush.
We're using the metal edge to stop the ring process on this brace just like we did on the fender brace. So now the next step is to patch the hole and we're not going to use this metal that we cut out because it's just too rusty. We need fresh metal. The problem starts. It's because we don't have a prest patch panel for this because nobody makes one yet. So what do you do? Well, the solution is you make one and if you stick around, you'll find out that making your own patch panels is not as hard as you think.
After the break, we'll show you how to make your own patch panels from simple bends to compound curves. Stay tuned.
Hey, welcome back to trucks. Thanks for sticking with us today. We made some pretty good headway on the doghouse of our 66 Chevy C 10 pickup. We soda blasted the paint down to bare steel and replaced some metal in some common rust zones for these trucks. But we ran into a situation that I'm sure a lot of you guys have run into. What happens if nobody makes patch panels for the rusty places in your truck.
Well, the simple answer is obvious you just make your own. So we're gonna give you some pointers on how to do some basic metal forming. Now, one of the most common shapes you're gonna need to make is a 90 degree bend, which is easily done on an expensive break like this one here. But you can keep that money in your pocket by making your own metal break.
Just use a piece of angle iron and two C clamps to hold your metal to the table. Now, in this case, we're using 20 gauge sheet metal just like we did on our high quality brake, then just bend against the edge of the table
to get your 90
turned out pretty good, didn't it?
But you can also use the same set up to make a contour or a curve
using the clamped metal as leverage.
You can either hand form your work piece like this
or use any number of items like a piece of PV C pipe or even steel tubing to guide your metal into the shape you need.
Now something a little more complicated to make is a panel like this. That's because it curves in two different directions.
But with a little bit of practice and some simple hand tools, you can make those compound curves out of just a plain piece of sheet metal.
The bag can be filled with lead shot like ours or sometimes just plain sand
and shaping metal like this can be downright therapeutic if you're po ed at somebody,
the rounded face of the hammer and the way that the shot gives under pressure allow the metal to be stretched in a controlled manner.
Now, this is just a test piece, but you can see that the compound curve is not that hard to create.
Now, I know not everybody's got a metal break, an English wheel or even a plasma cutter in their own shop. But I'm pretty sure every one of you guys has a hammer and,
and a concrete floor. Now, this is something I learned from one of Ron
Cove's workshops. I'm using a low crown hammer so I can move the metal slowly. And my grid just gives me something to aim for. Ideally, you want to aim for the space between the lines of your grid at first, which is not as easy as Ron made it look, but I'm mostly focusing on the center.
You can see what's starting to happen. It's starting to dome up a little bit right here.
Things may not happen that fast at first, but that's OK. You wanna shape the metal slowly, politely asking it to move instead of yelling at it and telling it where you want it to go,
try to keep your hammer blows as flat to the surface as possible.
You don't wanna have the edge of the hammer digging into the dome. You're creating slow, steady progress will create a smoother shape.
And you can see that we started with a flat piece of steel, a flat floor and an almost flat hammer.
And we ended up with a rounded domed panel. The reason is that with every hammer blow, it stretched the metal and since it can't force the metal outward, it forced it up creating our dome. So that just demonstrates that with the most basic hand tools and a little bit of technique and time you can form metal any way you want.
Hey, welcome back to trucks. Our 66 C 10 driver is coming along nicely. We got a little more surface rust, repair, a lot more paint to soda blast and some filler work to do before it's in the same stage that project H RT is in which is covered in high build primer surface
and ready for the first of many rounds of block sanding
blocking is the final shaping of the panel. And the last stage of your body work you always want to reach for the longest sanding board possible because like a ship on the ocean, a smaller block will ride the surface of the waves leaving some lumps in your panel, but
a large ship on the ocean, like your large sanding block will actually crest those waves, smoothing them out, leaving a very smooth reflection and a very smooth paint job that's not going to make you seasick at your show and shine.
Now you've seen us block the jail coat on this truck once already. And if you pick out a flat panel, well, it's pretty much the same thing. Only this time we're level in the primary.
Now when you're blocking a flat panel, like the back of the cab, there's not too much chance of making mistakes. It's a large flat panel, you can just kind of go for it.
But when you're blocking over a style line like this, you can't just skate over top of it because the edge of your sandpaper is gonna cut grooves, distorting the panel. Well, here's a tip on how to maintain a style line or a valley
masking tape will protect the surface that you don't want to damage and allow you to work up against the tape without the risk of reshaping what's underneath.
Once you're happy with the shape,
you can reverse the tape
and work the opposite side of the valley again. Without the risk of undoing the hard work you've just finished doing.
Now, these vendors have a peak style line that you don't wanna sand flat.
I'm using a dry guy coat that is applied with a sponge
and a flexible block with a straight edge and blocking into the style line. The guy coat makes it easy to see your progress.
Just like Kevin showed you with the tape,
you can regy
coat the primer and work the other side of the peak.
This gives you complete control over the shape and the quality of your work.
Now, hopefully you guys feel like I do the body work and rust repair is a little less intimidating now and the more I learn or the more work Kevin makes me do. Oh, joy.
So keep watching as this truck gets whipped into shape just in time for one of you lucky viewers to take it home in a few months.
Ok. Guys, I know most of you knew Jk Wrangler owners have already added wider tires and wheels. Well, bushwhackers got you covered literally from flying mud and debris with their pocket style fender flares. These give you the look of the cut out style flares without having to drill or cut into your brand new body while the state
steel hardware gives you that bolt on look. Now they come in an OEM matte black finish, but they can easily be painted to match your Jeep Bushwhacker's new pocket style fender flares for 07 and up. Jk Wranglers will run you just over 400 bucks for the front
and 300 for the rears. Thanks for watching trucks. See you guys next week.