More '66 Chevy C-10 Episodes
More One-Half A C-10 Episodes
Trucks! Builds
Want more content like this?
Join the PowerNation Email NewsletterParts Used In This Episode
Design Engineering, Inc. (DEI)
Boom Mat Acoustic Insulation, Boom Mat Spray-On, Versa-Shield, Cool-Tape, & Spark Plug Boot Heat Shield Protectors.
ididit Inc.
1967-1972 Chevy Truck Chrome Tilt Floor Shift Column Deluxe Kit for original harness,
Dynojet Research
Chassis Dyno.
O'Reilly Auto Parts
3/8" Hose Splice
O'Reilly Auto Parts
Fuel Injection Hose 9 Ft., Hose Clamps (20)
Stoner Inc.
Invisible Glass Ultimate Kit with Reach and Clean Tool.
Traxxas
Creation, design, and manufacture hobby-class radio controlled cars, trucks, and boats in both nitro and electric categories.
Video Transcript
Today, it's interior work on our shorten 66 Chevy C 10
and we're doing fuel mileage testing so we can make every single gallon count. It's all today here on trucks.
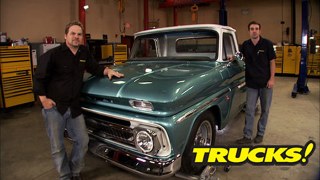
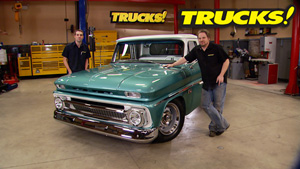
Hey, welcome to trucks. Today, we're back on our 66 Chevy C 10 and now that we've got the body completely assembled. Well, we can focus our attention on the interior.
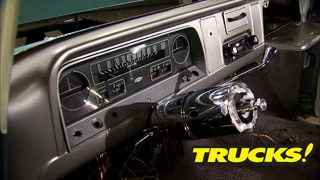
And one of the most important aspects of any interior are the driver controls. For instance, this is the original steering column and steering wheel from our 66 Chevy and just like our 49 Chevy, this truck came from the factory with a three speed on the column. The problem is now our truck is a 700 R four and this does us no good. Plus this has got cracks in the steering wheel. This is going to take a restoration and some handy work with a hacksaw here and it's still not gonna look great, but there's other options.
Now, this column here is an upgrade and an inexpensive one at that. It's a mid seventies Chevy truck column, this tilt and automatic. But the problem is that the ignition is on the column itself, the ignition on our 66 is on the dash. So this is not necessarily the best fit.
So what we decided to do was go with this chrome tilt steering column from I did it. This is a drop in replacement for 67 through 72 trucks, but it's gonna work great in our 66.
Now, this is a column kit. It comes with everything that you see here including wiring connectors and mounting hardware.
It's got cool chrome billet knobs for your tilt and turn signal controls. But here's the coolest thing I did. It gives you a choice when it comes to the automatic transmission that you want. This indicator works perfectly with our 700 R four.
But the reason this column is gonna work in our 66 is that the column tube diameter is the same as the original. That way we can use our same mounting hardware, the same mounting bracket and keep our cool e brake pull handle. But before we throw the column in, there's still a little bit of work to do on the inside of that cab.
All right. Now, before we throw that steering column in here, well, we want to address a couple of issues we have with the pedals. Well, first of all, we've converted to an automatic transmission. So this factory clutch pedal is rather useless and it's gonna get removed. But another issue we have is the factory brake pedal, it's gonna be a little bit too close to the guest
pedal assembly once it's installed. So, what we're gonna do to remedy that problem is use the bottom half of this brake pedal assembly we robbed out of an early eighties, Chevy. We'll cut it off right here and weld it to the top half of the factory brake pedal assembly. That way, we don't have to alter the geometry. Relocate the master cylinder.
Now, we're using an abrasive cut off wheel to eat through the hardened steel of the factory brake pedal, using a bandsaw or a hacksaw will not only keep you there for a while, it'll ruin your blade.
Now, since the brakes are the last thing we want to fail on this truck, we're hitting both the edges of the arm and the brake pedal side with a good bevel
and the V groove that creates gives us plenty of surface area to weld to giving us a nice strong weld. But it also allows us to grind down the top of the weld, giving us a nice clean appearance once it's sanded down and painted over.
Now, here's a perspective you don't often get to see.
Not only can you see the bead flowing into the knots we created? Well, you can see all the spatter flying through the air. So it might answer the question. Where did all those holes come from in my shirt?
I like a lot of vehicles from the sixties, this truck,
needless to say it's just not insulated very well. And unless we do something about that, well, we're gonna have annoying road noise and a lot of drumming in the cab and it's not gonna be as comfortable as it could be. So we're gonna use de I thermal insulation products to take care of the problem. Now, they make a really good starter shield, excellent header wraps. Even these protective boots for your spark plugs and wires, so you don't suffer any thermal damage under the hood.
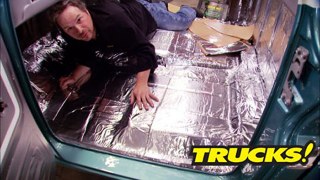
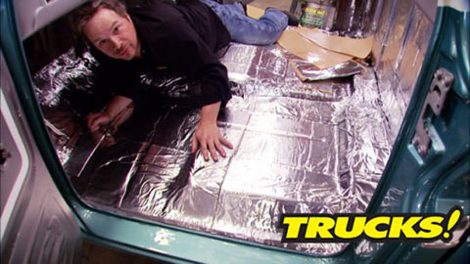
What we're gonna be using under the cab is a combination of their boom mat spray and these boom mat sheets
have an insulating cover on the top and it's a sticky back tile that's incredibly easy to put on. It will take care of all of that drumming.
Now, you guys know you can't expect anything to stick to a dirty greasy rusty surface. So make sure that your interior is clean.
The fresh paint on the back of the cap will serve perfectly for a solid foundation. This stuff is never going to let go.
Now, there's no real strategy for laying in the tiles other than full coverage, I'm using about a quarter inch overlap for a nice uniform appearance.
Now, the only real tool you're gonna need for this installation is some form of a box cutter or a utility knife for trimming.
Another added benefit is that this insulation will enhance the sound of any audio system.
And believe me, we're going to have tunes
cool. The firewall installation will take over from there
now, even though there are plenty of aftermarket hangar and pedal assemblies available. But we thought this was one of the cheapest and easiest solution
and it only took about half hour out of our day
and we think it looks pretty good.
I like the brake pedal. There are options for aftermarket e brake assemblies, but any time you can reuse the original equipment, you not only keep the character of the truck, but you also save money.
I
keep
going little set, screw each side, that'll hold it in place.
Sweet.
Ok. Our great looking chrome tilt I did at column is in place and our factory E brake is right where it needs to be.
And with our brake pedal modification, our gas pedal and brake pedal are the right distance apart. We're not gonna get our feet tangled up. Listen to this.
That's dead. So I'm gonna take the spray on. Boom. Matt. Just do the rest of the cab corners. Touch it up
up next. We're gonna see just how far we can go on a single gallon of gas. Stay tuned.
Hey, welcome back. Like we told you today, we get to do some gas mileage testing. Our test vehicle is this 2009 Chevy Silverado that's on loan to us from Smith Chevrolet
in Idaho Falls, Idaho. It's a full load. ZSE
14 wheel drive with the 53 gas engine. And what we're gonna do is see if we can make some improvements on the combined city and highway 16 mile per gallon. Epa rating. This truck's been given what we've got set up in the bed is an auxiliary fuel system that bypasses the
factory set up. We've got an external tank behind this cover is a regulator and in line fuel pump that feeds the engine directly. That way we can add a meter one gallon of gas at a time.
See how far we go.
Now, this is what we're using to try and boost our fuel economy. This is bully dogs. New GT tuner. You've seen us use bully dog products before in diesel trucks with programmers and downloaders and they make big power. The GT tuner works on gas or diesel vehicles with an OBD two port
and has all
the adjust of other bully dog programmers including the ability to monitor up to 20 different gauge inputs. Now, the GT tuner comes with an internal feature called the Watchdog Driving Coach. And although bully dog claims that you're going to see an increase in fuel economy as well as an extra bump in power just from the programming. But the interesting thing is that the driving coach teaches you a more efficient driving style with visual alerts and audible prompts. So we're going to install this thing on the vehicle and test it out and the first thing we're going to see is how much power it makes.
So with our 09 Chevy strapped down to horsepower's
dyno Jet chassis,
dyno, we averaged out the stock tune on the truck
as well as both the 87 and 93 Octane bully dog tunes.
Ok. Let's take a look at where we started out
on our baseline. We made 224 horsepower.
Now with our bully dog 87 octane tune, we made 230 horsepower
and with the bully dog, 93 octane tune, we had 236.
So we picked up six horsepower on the 87 tune and another six on the 93 tune.
And that gives us a total of 12 horsepower gain when we're running premium fuel. That ain't bad.
Now pay no attention to the upside down numbers on the side of the canister, they're not factoring into our test. What we're doing instead is carefully measuring one gallon of gas into an approved container. So we have a repeatable test.
Now, obviously, this is not a scientific test, but we're gonna do our best to start in the same spot. Drive the same exact route and use the same driving style.
All right, we got our trip odometer reset. We've got a stopwatch running, recording the elapsed time of the entire route.
We're gonna try to drive speed limit and try really hard to drive like the average person.
Now the route we picked out was a good mix of stop and go traffic in town along with a few miles down the highway, as well as some two lane country roads thrown in for good measure.
And we think this will give us a pretty good average of city and highway that we can compare against the truck's window sticker.
All right. Now, here on the highway, we're trying to stay in open traffic and avoid getting stuck behind an 18 wheeler. Well, for one, they tend to slow down as they go up hills and accelerate as they go down. We're trying to maintain an even 72 when you get the draft effect, which can alter the test results
and driving like the average person, it didn't take long at all to burn through a gallon of gas.
Uh,
you got a misfire.
See how long she stays running and we'll just pull over
and the first misfire was a sure sign we weren't gonna make it much further.
Yep, that's all she wrote.
All right, we went 18.2 miles and 23 minutes and 24 seconds on one gallon of gas on the stock tune.
So we're gonna mark our spot. We'll dump a splash of fuel back in the tank so we can get back to the gas station. We'll add one more gallon switch to the bully dog tune.
See how much farther we go
after purging and emptying the tank, we poured in another metered gallon
and then for round two, Ryan uploaded the 87 OC 10 fuel economy tune into the truck,
which only took a couple of minutes.
All right. Well, we got the bully dog tune loaded in. We got another gallon of gas loaded in. We're gonna drive the same loop drive the same style. Let's see how much farther we go.
Welcome back to trucks. We're in the middle of our bully dog fuel economy test. We've got round one under our belt, but Murphy's law is stepping in for round two.
All right. Now, of course, this time around, we're hitting a few more red lights and we're running into a little bit more traffic that may affect the outcome of the test a little bit. But we are running the stop watch so we can account for that too.
And that's because if the engine's running, it's burning fuel, whether we're sitting in traffic or moving.
All right, we got 15 miles on the trip. Odometer. I anticipate we're gonna run out of fuel before too long.
Let's see how much farther we make it.
And despite the traffic issues, well, it looks like we're gonna at least make it back to where we ran out of fuel in the first test.
I see the counts.
We're still under power
and there it goes.
And just like the initial test, the time between the first misfire and completely shutting down wasn't very long at all. All right.
That's it.
No more action.
They're different.
All right. Now, this time we went 18.4 miles and the truck was running for 26 minutes and 17 seconds. So that's 2/10 of a mile farther and three minutes longer the truck was running. So we're more efficient and we're making more power.
Ok. We saw some improvement with the first two gallons, but this third gallon, this is the real test with the driving coach.
Now, unlike our previous two tests, this time, we're going to change our driving style substantially.
All right. Now, the first two trips out we could hear and see the visual and audible alerts coming from the GT tuner reminding us to coast the stop lights and accelerate smoothly and slowly, we ignored them the first two times trying to drive like the average guy would this time we'll pay attention to him.
Now, in addition to the driving coach, we're still running on the upgraded bully dog too.
All right. Now on the watchdog screen,
it basically has a wasted energy bar on either side is deceleration and acceleration. You want to keep it right in the middle,
waste as little energy as possible, maximize efficiency.
And that means staying off the brakes and coasting to stop signs and stop lights instead of staying in the throttle up until the point where you need to brake just makes better use of the truck's momentum. Now,
out on the highway, there's some changes to be made to your driving style there as well.
All right, now is the time you want to follow an 18 wheeler tuck up behind them. Get some of that draft. See if you can maximize your mile per gallon
and obviously staying out of the gas out on the highway or even in town,
it's gonna show you big gains.
All right back on the two lane road. I'm rewarded with another report card. A it didn't like rolling down the highway pushing this big heavy truck through all that wind hurting
arow dynamics.
All right. Well, we just blew past the first cone.
Still running strong.
I think we'll see a pretty substantial gain over 1st and 2nd cones.
Now we're doing good.
There goes the second one,
even passing the second cone, we still hadn't detected the slightest hint of a misfire.
20.2.
It was pretty impressive.
Now, you can see amazing gains by changing your driving style, but inevitably you're gonna run out of gas.
Oh,
I'm starting to miss
on this. Hell,
I think we're getting real low.
Yeah.
And then we're done.
Well,
that's pretty impressive.
All right. Now, check this out this time. We drove 21.1 miles, drove for almost an entire half hour, 29 minutes, 47 seconds on a single gallon of gas.
That's quite an improvement over the 18.2 and 18.4 miles we drove before simply by following the prompts provided by the driving coach.
And at this rate, it's not gonna take very long at all for that piece of gear pay for itself.
Hey, welcome back to trucks.
Well, not only did we pick up a few horsepower and a few more
MPG. Well, here's something else you probably didn't realize
cruising around with a more laid back driving style. Well, it's gonna save your tires, your brakes, just general wear and tear on your entire vehicle.
Yeah. And everybody's pitching pennies nowadays. And we were on the mall crawling for him not too long ago and ran across a post where a guy is bummed out because his DJ is busted and he's complaining to his girlfriend that he just doesn't have enough money to pay for the parts to fix it. So, what does she do? She steps up and buys him a brand new crawling rig, one of
these 110 scale RC hobby trucks. And don't think these are toys either. They're basically just scaled down versions of the real thing.
Heck, they've even got aftermarket support like these vented rotors among other things. And they're available in both nitro and electric power. Enough flapping. Let's go play
tracks as radio controlled vehicles ship to your door, ready to race right out of the box. And they've got a versatile lineup and believe it or not, they're surprisingly affordable.
The Electric Summit can be played with at night with its 10 led light system and our Nitro Slayer does over 50. It can be a handful in the pavement. But off road, these four wheel drives really shine.
See the difference between RC. Wheeling and full size wheeling is if you do that on the trail, you're at the very least in for some body damage and winching or you're going home.
Now, cleaning a windshield is as important as it is obvious, but the outside is only half the picture. You got to clean the inside too. If you want to see,
Stoner makes a great glass cleaner, but they also make this cool reach and clean tool for cleaning the inside of these aggressive heavily ragged windshields in late model vehicles.
The combination of the reach and clean and the glass cleaner make what used to be a time consuming ordeal. A snap.
The reach and clean can get to any angle and comes as a kid with three different bonnets, one micro fiber and two others. For more aggressive cleaning, you can find out where to get these products at Invisible glass.com.
Now, obviously this is a boatload of fun. So if you're on a budget and you still wanna go four wheeling, well, you may wanna consider one of these if you've got any questions about anything you've seen on today's show,
Go to Power Blog, tv.com.
Hey guys. Thanks for watching trucks. See you guys next week.
Show Full Transcript
and we're doing fuel mileage testing so we can make every single gallon count. It's all today here on trucks.
Hey, welcome to trucks. Today, we're back on our 66 Chevy C 10 and now that we've got the body completely assembled. Well, we can focus our attention on the interior.
And one of the most important aspects of any interior are the driver controls. For instance, this is the original steering column and steering wheel from our 66 Chevy and just like our 49 Chevy, this truck came from the factory with a three speed on the column. The problem is now our truck is a 700 R four and this does us no good. Plus this has got cracks in the steering wheel. This is going to take a restoration and some handy work with a hacksaw here and it's still not gonna look great, but there's other options.
Now, this column here is an upgrade and an inexpensive one at that. It's a mid seventies Chevy truck column, this tilt and automatic. But the problem is that the ignition is on the column itself, the ignition on our 66 is on the dash. So this is not necessarily the best fit.
So what we decided to do was go with this chrome tilt steering column from I did it. This is a drop in replacement for 67 through 72 trucks, but it's gonna work great in our 66.
Now, this is a column kit. It comes with everything that you see here including wiring connectors and mounting hardware.
It's got cool chrome billet knobs for your tilt and turn signal controls. But here's the coolest thing I did. It gives you a choice when it comes to the automatic transmission that you want. This indicator works perfectly with our 700 R four.
But the reason this column is gonna work in our 66 is that the column tube diameter is the same as the original. That way we can use our same mounting hardware, the same mounting bracket and keep our cool e brake pull handle. But before we throw the column in, there's still a little bit of work to do on the inside of that cab.
All right. Now, before we throw that steering column in here, well, we want to address a couple of issues we have with the pedals. Well, first of all, we've converted to an automatic transmission. So this factory clutch pedal is rather useless and it's gonna get removed. But another issue we have is the factory brake pedal, it's gonna be a little bit too close to the guest
pedal assembly once it's installed. So, what we're gonna do to remedy that problem is use the bottom half of this brake pedal assembly we robbed out of an early eighties, Chevy. We'll cut it off right here and weld it to the top half of the factory brake pedal assembly. That way, we don't have to alter the geometry. Relocate the master cylinder.
Now, we're using an abrasive cut off wheel to eat through the hardened steel of the factory brake pedal, using a bandsaw or a hacksaw will not only keep you there for a while, it'll ruin your blade.
Now, since the brakes are the last thing we want to fail on this truck, we're hitting both the edges of the arm and the brake pedal side with a good bevel
and the V groove that creates gives us plenty of surface area to weld to giving us a nice strong weld. But it also allows us to grind down the top of the weld, giving us a nice clean appearance once it's sanded down and painted over.
Now, here's a perspective you don't often get to see.
Not only can you see the bead flowing into the knots we created? Well, you can see all the spatter flying through the air. So it might answer the question. Where did all those holes come from in my shirt?
I like a lot of vehicles from the sixties, this truck,
needless to say it's just not insulated very well. And unless we do something about that, well, we're gonna have annoying road noise and a lot of drumming in the cab and it's not gonna be as comfortable as it could be. So we're gonna use de I thermal insulation products to take care of the problem. Now, they make a really good starter shield, excellent header wraps. Even these protective boots for your spark plugs and wires, so you don't suffer any thermal damage under the hood.
What we're gonna be using under the cab is a combination of their boom mat spray and these boom mat sheets
have an insulating cover on the top and it's a sticky back tile that's incredibly easy to put on. It will take care of all of that drumming.
Now, you guys know you can't expect anything to stick to a dirty greasy rusty surface. So make sure that your interior is clean.
The fresh paint on the back of the cap will serve perfectly for a solid foundation. This stuff is never going to let go.
Now, there's no real strategy for laying in the tiles other than full coverage, I'm using about a quarter inch overlap for a nice uniform appearance.
Now, the only real tool you're gonna need for this installation is some form of a box cutter or a utility knife for trimming.
Another added benefit is that this insulation will enhance the sound of any audio system.
And believe me, we're going to have tunes
cool. The firewall installation will take over from there
now, even though there are plenty of aftermarket hangar and pedal assemblies available. But we thought this was one of the cheapest and easiest solution
and it only took about half hour out of our day
and we think it looks pretty good.
I like the brake pedal. There are options for aftermarket e brake assemblies, but any time you can reuse the original equipment, you not only keep the character of the truck, but you also save money.
I
keep
going little set, screw each side, that'll hold it in place.
Sweet.
Ok. Our great looking chrome tilt I did at column is in place and our factory E brake is right where it needs to be.
And with our brake pedal modification, our gas pedal and brake pedal are the right distance apart. We're not gonna get our feet tangled up. Listen to this.
That's dead. So I'm gonna take the spray on. Boom. Matt. Just do the rest of the cab corners. Touch it up
up next. We're gonna see just how far we can go on a single gallon of gas. Stay tuned.
Hey, welcome back. Like we told you today, we get to do some gas mileage testing. Our test vehicle is this 2009 Chevy Silverado that's on loan to us from Smith Chevrolet
in Idaho Falls, Idaho. It's a full load. ZSE
14 wheel drive with the 53 gas engine. And what we're gonna do is see if we can make some improvements on the combined city and highway 16 mile per gallon. Epa rating. This truck's been given what we've got set up in the bed is an auxiliary fuel system that bypasses the
factory set up. We've got an external tank behind this cover is a regulator and in line fuel pump that feeds the engine directly. That way we can add a meter one gallon of gas at a time.
See how far we go.
Now, this is what we're using to try and boost our fuel economy. This is bully dogs. New GT tuner. You've seen us use bully dog products before in diesel trucks with programmers and downloaders and they make big power. The GT tuner works on gas or diesel vehicles with an OBD two port
and has all
the adjust of other bully dog programmers including the ability to monitor up to 20 different gauge inputs. Now, the GT tuner comes with an internal feature called the Watchdog Driving Coach. And although bully dog claims that you're going to see an increase in fuel economy as well as an extra bump in power just from the programming. But the interesting thing is that the driving coach teaches you a more efficient driving style with visual alerts and audible prompts. So we're going to install this thing on the vehicle and test it out and the first thing we're going to see is how much power it makes.
So with our 09 Chevy strapped down to horsepower's
dyno Jet chassis,
dyno, we averaged out the stock tune on the truck
as well as both the 87 and 93 Octane bully dog tunes.
Ok. Let's take a look at where we started out
on our baseline. We made 224 horsepower.
Now with our bully dog 87 octane tune, we made 230 horsepower
and with the bully dog, 93 octane tune, we had 236.
So we picked up six horsepower on the 87 tune and another six on the 93 tune.
And that gives us a total of 12 horsepower gain when we're running premium fuel. That ain't bad.
Now pay no attention to the upside down numbers on the side of the canister, they're not factoring into our test. What we're doing instead is carefully measuring one gallon of gas into an approved container. So we have a repeatable test.
Now, obviously, this is not a scientific test, but we're gonna do our best to start in the same spot. Drive the same exact route and use the same driving style.
All right, we got our trip odometer reset. We've got a stopwatch running, recording the elapsed time of the entire route.
We're gonna try to drive speed limit and try really hard to drive like the average person.
Now the route we picked out was a good mix of stop and go traffic in town along with a few miles down the highway, as well as some two lane country roads thrown in for good measure.
And we think this will give us a pretty good average of city and highway that we can compare against the truck's window sticker.
All right. Now, here on the highway, we're trying to stay in open traffic and avoid getting stuck behind an 18 wheeler. Well, for one, they tend to slow down as they go up hills and accelerate as they go down. We're trying to maintain an even 72 when you get the draft effect, which can alter the test results
and driving like the average person, it didn't take long at all to burn through a gallon of gas.
Uh,
you got a misfire.
See how long she stays running and we'll just pull over
and the first misfire was a sure sign we weren't gonna make it much further.
Yep, that's all she wrote.
All right, we went 18.2 miles and 23 minutes and 24 seconds on one gallon of gas on the stock tune.
So we're gonna mark our spot. We'll dump a splash of fuel back in the tank so we can get back to the gas station. We'll add one more gallon switch to the bully dog tune.
See how much farther we go
after purging and emptying the tank, we poured in another metered gallon
and then for round two, Ryan uploaded the 87 OC 10 fuel economy tune into the truck,
which only took a couple of minutes.
All right. Well, we got the bully dog tune loaded in. We got another gallon of gas loaded in. We're gonna drive the same loop drive the same style. Let's see how much farther we go.
Welcome back to trucks. We're in the middle of our bully dog fuel economy test. We've got round one under our belt, but Murphy's law is stepping in for round two.
All right. Now, of course, this time around, we're hitting a few more red lights and we're running into a little bit more traffic that may affect the outcome of the test a little bit. But we are running the stop watch so we can account for that too.
And that's because if the engine's running, it's burning fuel, whether we're sitting in traffic or moving.
All right, we got 15 miles on the trip. Odometer. I anticipate we're gonna run out of fuel before too long.
Let's see how much farther we make it.
And despite the traffic issues, well, it looks like we're gonna at least make it back to where we ran out of fuel in the first test.
I see the counts.
We're still under power
and there it goes.
And just like the initial test, the time between the first misfire and completely shutting down wasn't very long at all. All right.
That's it.
No more action.
They're different.
All right. Now, this time we went 18.4 miles and the truck was running for 26 minutes and 17 seconds. So that's 2/10 of a mile farther and three minutes longer the truck was running. So we're more efficient and we're making more power.
Ok. We saw some improvement with the first two gallons, but this third gallon, this is the real test with the driving coach.
Now, unlike our previous two tests, this time, we're going to change our driving style substantially.
All right. Now, the first two trips out we could hear and see the visual and audible alerts coming from the GT tuner reminding us to coast the stop lights and accelerate smoothly and slowly, we ignored them the first two times trying to drive like the average guy would this time we'll pay attention to him.
Now, in addition to the driving coach, we're still running on the upgraded bully dog too.
All right. Now on the watchdog screen,
it basically has a wasted energy bar on either side is deceleration and acceleration. You want to keep it right in the middle,
waste as little energy as possible, maximize efficiency.
And that means staying off the brakes and coasting to stop signs and stop lights instead of staying in the throttle up until the point where you need to brake just makes better use of the truck's momentum. Now,
out on the highway, there's some changes to be made to your driving style there as well.
All right, now is the time you want to follow an 18 wheeler tuck up behind them. Get some of that draft. See if you can maximize your mile per gallon
and obviously staying out of the gas out on the highway or even in town,
it's gonna show you big gains.
All right back on the two lane road. I'm rewarded with another report card. A it didn't like rolling down the highway pushing this big heavy truck through all that wind hurting
arow dynamics.
All right. Well, we just blew past the first cone.
Still running strong.
I think we'll see a pretty substantial gain over 1st and 2nd cones.
Now we're doing good.
There goes the second one,
even passing the second cone, we still hadn't detected the slightest hint of a misfire.
20.2.
It was pretty impressive.
Now, you can see amazing gains by changing your driving style, but inevitably you're gonna run out of gas.
Oh,
I'm starting to miss
on this. Hell,
I think we're getting real low.
Yeah.
And then we're done.
Well,
that's pretty impressive.
All right. Now, check this out this time. We drove 21.1 miles, drove for almost an entire half hour, 29 minutes, 47 seconds on a single gallon of gas.
That's quite an improvement over the 18.2 and 18.4 miles we drove before simply by following the prompts provided by the driving coach.
And at this rate, it's not gonna take very long at all for that piece of gear pay for itself.
Hey, welcome back to trucks.
Well, not only did we pick up a few horsepower and a few more
MPG. Well, here's something else you probably didn't realize
cruising around with a more laid back driving style. Well, it's gonna save your tires, your brakes, just general wear and tear on your entire vehicle.
Yeah. And everybody's pitching pennies nowadays. And we were on the mall crawling for him not too long ago and ran across a post where a guy is bummed out because his DJ is busted and he's complaining to his girlfriend that he just doesn't have enough money to pay for the parts to fix it. So, what does she do? She steps up and buys him a brand new crawling rig, one of
these 110 scale RC hobby trucks. And don't think these are toys either. They're basically just scaled down versions of the real thing.
Heck, they've even got aftermarket support like these vented rotors among other things. And they're available in both nitro and electric power. Enough flapping. Let's go play
tracks as radio controlled vehicles ship to your door, ready to race right out of the box. And they've got a versatile lineup and believe it or not, they're surprisingly affordable.
The Electric Summit can be played with at night with its 10 led light system and our Nitro Slayer does over 50. It can be a handful in the pavement. But off road, these four wheel drives really shine.
See the difference between RC. Wheeling and full size wheeling is if you do that on the trail, you're at the very least in for some body damage and winching or you're going home.
Now, cleaning a windshield is as important as it is obvious, but the outside is only half the picture. You got to clean the inside too. If you want to see,
Stoner makes a great glass cleaner, but they also make this cool reach and clean tool for cleaning the inside of these aggressive heavily ragged windshields in late model vehicles.
The combination of the reach and clean and the glass cleaner make what used to be a time consuming ordeal. A snap.
The reach and clean can get to any angle and comes as a kid with three different bonnets, one micro fiber and two others. For more aggressive cleaning, you can find out where to get these products at Invisible glass.com.
Now, obviously this is a boatload of fun. So if you're on a budget and you still wanna go four wheeling, well, you may wanna consider one of these if you've got any questions about anything you've seen on today's show,
Go to Power Blog, tv.com.
Hey guys. Thanks for watching trucks. See you guys next week.