More Super Dually Episodes
Trucks! Builds
Want more content like this?
Join the PowerNation Email NewsletterParts Used In This Episode
ATS Diesel Performance, Inc.
High RPM Governor Spring Kit, TST Air-Fuel Control (AFC) Spring Kit.
South Bend Clutch
Dyna Max 13" ETH Clutch Pressure Plate and Organic Faced Disc with Flywheel,Throwout Bearing and Alignment Tool.
Bully Dog Technologies, LLC
Boost and Pyrometer guages.
Industrial Injection & Turbo Service
Delivery Valves With Washers And Gaskets (Complete Kit).
Matco Tools
4-5/16" - 4-3/4" Oil Filter Wrench, American Diesel Compression Kit,Fan Clutch Wrench Set, Engine Rotating Tool Bit, Filter Socket Set.
Napa Auto Parts
3/8" Fuel Hose, 5/16" Fuel Hose. 25 FT each
O'Reilly Auto Parts
Oil Filter, Air Filter, Fuel Filter
O'Reilly Auto Parts
Conversion Set, Valve cover gaskets (6), Pushrod cover set, Thermostat housing gasket
O'Reilly Auto Parts
Timing Cover Gasket
O'Reilly Auto Parts
Miscellaneous
O'Reilly Auto Parts
Case of Brake Clean
O'Reilly Auto Parts
Shell Rotella 15W40 (3)
O'Reilly Auto Parts
Transmission output shaft seal
O'Reilly Auto Parts
Transmission Seal
O'Reilly Auto Parts
Thermostat
O'Reilly Auto Parts
GM Manual Gear Lube NV 4500 Transmissions (4)
O'Reilly Auto Parts
New Water Pump, Accessory Belt
Video Transcript
Today, we're tweaking our 59 comments to make more power for project super duly
and we're going to show you how to take care of
the killer
doll.
It's all today here on trucks.
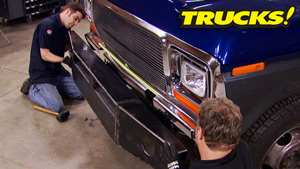
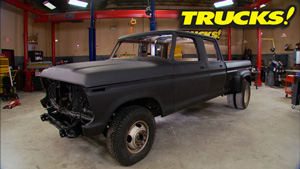
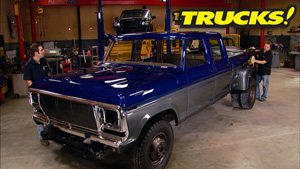
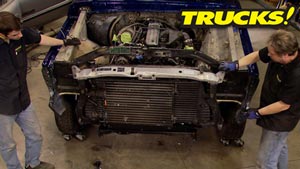
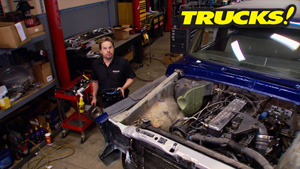
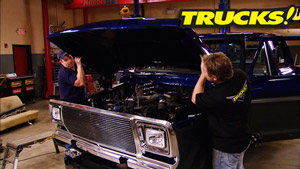
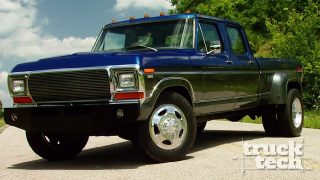
Hey guys, welcome to trucks. Well, if you're following this project along, well, then you know that this is the body for our project super duly, a 79 Ford four door cab that we're dropping down on a 97 Dodge chassis
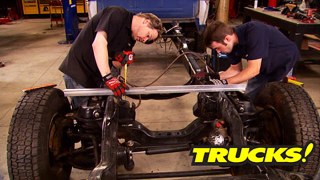
and as much as I'm chomping at the bit to get started on a cool paint scheme for this truck. Well, the truth is we're just not ready to start the body work. However, we have had the body on and off of the chassis several times,
pick up body mounts and figuring out that we needed to set our engine and transmission back a good 5.5 inches. Well, we took care of that problem but it created another problem, typical hot rotting. Now, the turbo comes into contact with the heater housing. Well, we want to keep this heater housing because we're also keeping the stock heater controls inside the cap.
Well, we think we've got this figured out and it may be easier than you think. And it won't cost a dime.
That's because what we plan on doing is taking this exhaust manifold and simply turning it over that way, the turbo sit just a little bit higher in the engine bay and hopefully it will give us the clearance we need between the turbo and the heater box. That way we can keep it
now to make sure the Turbo's oil feed and return line are in the right place where we're just gonna index the front half of the turbo.
That way it'll be in the correct location. Now, if you guys don't really like wrenching on a late model truck just due to the overly complex nature of all the under hood electronics and you'd rather tinker with an older truck with a carburetor just for simplicity. Well, you need to take a look at some of these early model diesels. You can make all sorts of adjustments and changes to get these things to run just like you want. You can control how much fuel gets dumped into the engine before the Turbos spool up. You can limit the amount of turbo boost you make and you can extend the RPM range in which these things make power
just by turning a few screws and swapping some springs out.
Now, these early 59 comments can easily put down three or 400 horsepower and six or 700 pound feet of torque to the wheels and still retain its daily drivability. Plus you got enough power underneath your right foot to tow a gigantic trailer down the street and still get 20
MPG out on the highway unloaded. Of course. So today we're going to show you how to unleash some of that power.
Now, luckily, for us, the exhaust manifold ports are symmetrical. So it's just a matter of flipping the exhaust manifold over
short of relocating a couple of brackets. Well, there aren't gonna be any drawbacks to doing this
now to get our turbo to sit correctly on the exhaust manifold, we need to remove a little bit of metal and we don't wanna get too carried away here because this manifold gets really, really hot and we don't want to create any weak points.
We use the same treatment on the turbo housing itself.
And with that done, we'll blow out all the metal shavings, then it's just a matter of clocking the front half of our turbo. So everything lines up,
just be careful around the impeller blades. You don't want to break them.
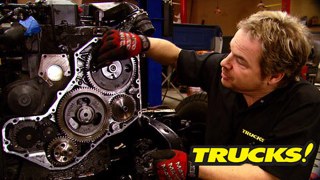
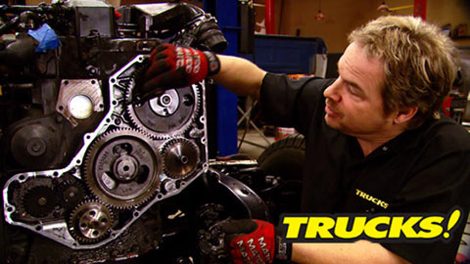
Now, before we get carried away with our power upgrades, there's something that we need to check you guys that are familiar with the 59 commons. What you know about the killer dowel pin. Basically, there's a dow pin that's pressed into the block that locates the time and cover case. Now, this thing can work its way loose over time and can cause you some serious heartache.
Now, if you're unbelievably lucky, the killer dal pin will just fall to the bottom of the engine and you'll never know it. So that's when you pack up and head to Vegas.
Now, this job is still easy to do with the body on the vehicle, but you do have to remove the fan shrout and the clutch fan.
All right. What do we got?
Now, this is what you're looking for. You can see the dow pin starting to work its way out of the case.
This guy is,
especially when he gets loose.
Now, you can imagine the consequences if this pin falls out. If you're lucky, it falls right down in that hall falls to the bottom of the case like Kevin said, but more than likely it's gonna get grabbed by this gear and forced in between the gear and the timing case, creating a big hole right here and a massive leak. And if you're really unlucky, well, it's gonna fall all the way down to the bottom. Get stuck in between the crank and the cam gears
cause big, big trouble.
Now, for all the havoc that little guy can wreak the fix is unbelievably simple. All you need to do is make a tab that fits under this bolt and holds the killer dial pin in place permanently. Now, a quick internet search will lead you to a couple of kits that you can buy but check this out. We found this in our junk drawer. So just like we're gonna do,
you can make one
with a hammer and a small drift, just drive the pin back into its place.
Yep.
But with the dow pin back at its Happy Home
Hall
is once again, right with the universe. Now, we can do something about keeping him there,
which is easily accomplished, utilizing the bolt location right next to the dow pin.
Now, using our scrap piece, we've simply cut a tab and drill a hole in it.
We'll install the tab with a slightly longer bolt to compensate for the metal thickness and use lock tight to keep it where we put it.
All right, with our dow pin secure, we're almost ready to start making some changes so we can increase the power output of our 59 diesel. Now, we picked up a couple of gauges from bully dog so we can monitor the boost and the exhaust gas temperatures from inside the cab. Now,
before we finalize the turbo installation, we're gonna go ahead and drill and tap the manifold for this EGT probe.
Now, there's a couple of different spots you can choose from to drill and tap for an EGT probe.
We stuff some paper towels into the manifold to minimize the amount of metal shavings that get left behind.
After drilling an eight inch pilot hole,
we used a 5/16 bit to finish the job.
And with the hole drilled, we used an eight inch pipe tap to provide a mounting location for the EGT probe
that this job can be accomplished with the turbo and the manifold in the truck.
It's just a little bit easier with it off. If you are doing it on the truck pack, the flutes of the tap with grease to help retain any metal shavings.
There is a piece of trivia that you guys probably wouldn't know. But up next, Jack Rausch stopped by the shop for a little trivia and later we've got a heavy duty replacement for our weak clutch. Stay tuned.
Hey, welcome back to the shop. Well, powerful diesel engines and light duty trucks are commonplace nowadays, but it wasn't always like that.
Jack Rush stopped by the shop recently shared a little history with us.
There is a piece of trivia that you guys probably wouldn't know. But
do you know who the person was that put the first uh cummings diesel engine in a pickup truck?
Me
about uh 20 years ago Chrysler came to me and said that uh you know, that they wanted to explore the prospect of putting a diesel six cylinder engine in a pickup truck.
And uh
so what, what they had was an industrial engine. It wasn't a truck engine,
heavy, heavy equipment, diesel engine. And uh it made so much noise that it was not, it was not uh well, not feasible. So we had to put a sound deader in the firewall and, and sound deadened in the oil pan and do some other things to make a package reasonable. But we did the first one
for Chrysler.
That's neat.
Well, there you go from the man himself. It's pretty cool to be around a pioneer like that. Well, what we've had the chance to do is throw some new gaskets on, adjust the valves, clean a little bit of schmutz off the front of this engine. And since it's so easy to do with the body off the frame, what we threw a new water pump on just because with that done now we can focus on turning up the wick.
Now, one of the easiest ways to add big power to one of these early comings is what
fairly small parts
like this stage, four torque plate we picked up from Bully Dog.
Now this part controls the maximum amount of fuel delivered to the engine at a certain RPM.
Then you combine this with a couple of other mechanical upgrades we're gonna make will easily be in the 300 horse in 700 pound feet of torque range. Now, the kit also comes with a valve to alter the signal to the waist gate to increase boost pressure to match the increase in fuel.
Now, the torque plate is located under the AFC housing
and based on the marks on the screw heads was pretty obvious to us. Somebody's been in here before making some adjustments.
Now, before we install the new torque plate, we wanna install a 3000 RPM governor spring kit, we picked up from a TS diesel
and after getting a baseline measurement of the stick out link to the governor spring stem, we removed the lock nut, the retainer
and the two inner springs
along with a couple of shims,
no, a magnet and a pick come in real handy when doing fine tedious work like this.
And if you've ever played the game operation as a kid,
well, you're already prepared.
So to keep any buzzers from going off or keep you from inventing new words and chasing,
make sure you don't drop anything into the injection pump housing. Now, the installation is pretty easy. It's the factory spring seat,
the new A TS spring inside the factory spring, followed by the retainer and the lock nut. Just verify your measurements are the same.
Now, we've got one more spring kit to install from A TS, but this time it's going in the AFC or Ana Roid fuel control. And what this does is control how much fuel gets delivered to the engine in a low boost situation.
Now, the governor spring kit we just installed is gonna allow our engine to fuel to about 3000 or 3200 RPM as opposed to the factory setting of about 2200 RPM.
Now,
this AFC spring kit changes things a little bit differently.
Now, by installing a lighter AFC spring, it's going to allow more fuel into the engine in a low boost situation,
which is going to make more power and make the engine more responsive at lower RPM.
All right. Well, we're almost ready to install our modified AFC housing.
But before we do that,
we finally need to install our new torque plate.
Now, the kit does come with an installation template, but since ours has already been tinkered with, we're gonna install our fuel plate at almost the full forward position, which will allow for near maximum fuel rack travel.
Now, we had picked up some 191 delivery valves from industrial injection to help boost the power output of this engine.
But we're going to hold off on the installation until we get the truck up and running. Now, the delivery valve basically helps meter how much fuel gets injected into the cylinder. Now, if you're going to do this job, you need to remove the delivery valve holder to gain access and that requires a special socket.
This isn't the only special tool we picked up to work on this diesel either.
That's right. And you've heard us say over and over again that having the right tool for the job can save you time, money, even parts. And that delivery valve socket is a perfect example of that. Now, in the Matco tool catalog, there are several diesel specific tools including this filter socket set,
a clutch fan wrench
and this barring tool, this is designed to sit in a port in the transmission adapter case and allows you to spin over that high compression engine with nothing more than a 38 ratchet. This thing comes in handy. They also offer diesel specific filter wrenches, even this diesel compression testing kit, which is pretty much a necessity if you've got serious engine problems to diagnose.
So it's nice to know that no matter what you're working on Matco,
I got the tool for you.
Hey, welcome back to trucks. Well, so far, all the engine projects on super duly have gone without any trouble. Now it's time to move some big chunks.
All right. Now that we know we're gonna be making more power, we need to make sure it actually gets to the ground.
Now, with the increase in torque. Well, it's obviously more than a stock type clutch can handle. So we've got a heavy duty replacement. Now, who knows what we're gonna find when we take this transmission off because obviously somebody's been in here before and incorrectly install this bracket here. It's sandwiched in between the bell housing and the block adapter. But either way we're gonna take this transmission off, find out what's inside and make an upgrade.
Ok. Here's the clutch, pressure plate and flywheel. We pulled out of the big dodge. Now, it's not hard to see that the clutch and pressure plate have been recently replaced. The problem is it's a stock replacement and it's a cheap offshore replacement at that.
And we're just not going to trust the so clutch with our power upgrades.
The other issue is this check out the fly wheel. It
has not been surfaced. There's glazing and hot spots all over the place. So they got a brand new clutch on a flywheel that hasn't been resurfaced. Well, that's just goofy.
Now, the first time I ever put a clutch in a vehicle, I was 16 or 17. It was a 63 Ford F 103 on the tree standard shift. And I did the same thing. I put a new clutch and didn't bother to have the flywheel resurfaced and it was all glazed over. The thing chattered so hard when you let the clutch out that it wanted to shake you out of the vehicle. Well, my excuse is I was young and stupid back then and we learned from our mistakes. Hopefully, the other thing that we're gonna do is pull this tail housing off and see if that problematic fifth gear nut issue has been addressed.
Now, we don't need any more proof than that right there that a stock type clutch assembly ain't gonna cut it behind our torque straight six. It's pretty obvious that the previous clutch that was installed got shredded to pieces. So to us, at least going back with the stalker was just a waste of time and money, especially considering we're gonna be making
power improvements to the engine. So we might as well upgrade the clutch as well. That's why we're installing a South Bend clutch. Now, this Dyn
Max clutch kit we got from South Bend can handle up to 450 horsepower and 1000 pound feet of torque. And that should easily cover our power improvements as well as offer up some room for upgrades in the future.
Now, this flywheel has been red drilled to accommodate a slightly larger pressure plate and that'll let us use a 13 inch clutch disk which is an improvement over the stock 12 and a quarter inch diameter. Now, the flywheel also uses a sealed roller bearing instead of the stock needle bearing setup which is exposed of contamination.
Now, this pressure plate is 5/8 of an inch larger than the stalker and improves clamping force as well. Now, the disc got some improvements too. They swapped out some of the torsional coil springs in favor of these neoprene dampers which will stiffen up the disk allowing it to handle more horsepower and torque.
And the kit also includes a new throw up bearing and the necessary alignment tool. Now, in between the clutch diameter increase and the choice of clutch material linings, what we're going to eliminate early clutch disc failure and still have nice smooth pedal engagement
after installing the flywheel onto the end of the crank shaft using lock tight and 100 ft pounds of torque. The alignment tool allows you to perfectly center the clutch disc. Then you're ready for the pressure plate which is installed using lock tight and the bolts snug down in a star pattern.
Now, be careful not to run the bolts in with too much pressure because the final torque spec is only 20 ft pounds and again is torque down using a star pattern to ensure an even clamp load.
Hey, welcome back to the shop. Well, we've already made some power upgrades, dealt with some maintenance issues and installed a heavy duty clutch behind our diesel engine. We're almost ready to reinstall our manual transmission.
But before we do that, we want to pull this rear tail housing off and see if the problematic fifth gear nut issue has been dealt with already.
I've already removed the PTO cover and drained the fluid so we wouldn't make a mess on our bench top.
Now, this silver piece here is actually the fifth gear retaining nut. And what happens is the fifth gear on the main shaft actually rocks back and forth on the spines a little bit allowing the nut to back off, letting this fifth gear assembly slide back and once it slides back on the main shaft far enough to clear the fifth gear on the counter shaft. Well, you're basically left with a four speed transmission, a repair to make and a few options
and what we're gonna do to fix that is weld it.
Now, we're using a big clamp to provide a good ground on the retaining nut before welding
along with a glove to keep spatter off the gears.
Now, we're using the four notches on the retaining nut as a guide on where to place our tax that's to not throw the shaft out of balance.
Now, I know a lot of you guys are saying, well, you just ruin those threads and you're probably right. It will be a pain in the neck to remove that fifth gear nut. But if we've got to go inside the case and deal with sink rows or replace bearings, we're gonna be replacing the factory main shaft anyway, because it's the root of the fifth year problem. It doesn't allow for full fifth year sply engagement. So an aftermarket unit will allow for full engagement and eliminate the fifth year problem anyway. So this main shaft is sacrificial and at least this way, well, we know we're not going to lose our overdrive.
Hey, guys, if you're shopping for a tuer for your late model truck, well, you need to check out edge products, new evolution CTS in cab monitor and gauge display. It's got a four by three full color touch screen, multiple power levels for mileage performance and
towing. And it even has a video import that you can hook up to a backup camera.
It will also monitor and display your diesel particulate filter status. So to add power without getting your hands dirty, check out edge products, evolution. CTS tuner
got one last bit of business
tap in a new tail shaft seal, fill the transmission up with the recommended fluid. We're gonna call this thing done. Now, if you got any questions about today's show, check us out online at power block tv.com. Thanks for watching trucks. See you next time.
Show Full Transcript
and we're going to show you how to take care of
the killer
doll.
It's all today here on trucks.
Hey guys, welcome to trucks. Well, if you're following this project along, well, then you know that this is the body for our project super duly, a 79 Ford four door cab that we're dropping down on a 97 Dodge chassis
and as much as I'm chomping at the bit to get started on a cool paint scheme for this truck. Well, the truth is we're just not ready to start the body work. However, we have had the body on and off of the chassis several times,
pick up body mounts and figuring out that we needed to set our engine and transmission back a good 5.5 inches. Well, we took care of that problem but it created another problem, typical hot rotting. Now, the turbo comes into contact with the heater housing. Well, we want to keep this heater housing because we're also keeping the stock heater controls inside the cap.
Well, we think we've got this figured out and it may be easier than you think. And it won't cost a dime.
That's because what we plan on doing is taking this exhaust manifold and simply turning it over that way, the turbo sit just a little bit higher in the engine bay and hopefully it will give us the clearance we need between the turbo and the heater box. That way we can keep it
now to make sure the Turbo's oil feed and return line are in the right place where we're just gonna index the front half of the turbo.
That way it'll be in the correct location. Now, if you guys don't really like wrenching on a late model truck just due to the overly complex nature of all the under hood electronics and you'd rather tinker with an older truck with a carburetor just for simplicity. Well, you need to take a look at some of these early model diesels. You can make all sorts of adjustments and changes to get these things to run just like you want. You can control how much fuel gets dumped into the engine before the Turbos spool up. You can limit the amount of turbo boost you make and you can extend the RPM range in which these things make power
just by turning a few screws and swapping some springs out.
Now, these early 59 comments can easily put down three or 400 horsepower and six or 700 pound feet of torque to the wheels and still retain its daily drivability. Plus you got enough power underneath your right foot to tow a gigantic trailer down the street and still get 20
MPG out on the highway unloaded. Of course. So today we're going to show you how to unleash some of that power.
Now, luckily, for us, the exhaust manifold ports are symmetrical. So it's just a matter of flipping the exhaust manifold over
short of relocating a couple of brackets. Well, there aren't gonna be any drawbacks to doing this
now to get our turbo to sit correctly on the exhaust manifold, we need to remove a little bit of metal and we don't wanna get too carried away here because this manifold gets really, really hot and we don't want to create any weak points.
We use the same treatment on the turbo housing itself.
And with that done, we'll blow out all the metal shavings, then it's just a matter of clocking the front half of our turbo. So everything lines up,
just be careful around the impeller blades. You don't want to break them.
Now, before we get carried away with our power upgrades, there's something that we need to check you guys that are familiar with the 59 commons. What you know about the killer dowel pin. Basically, there's a dow pin that's pressed into the block that locates the time and cover case. Now, this thing can work its way loose over time and can cause you some serious heartache.
Now, if you're unbelievably lucky, the killer dal pin will just fall to the bottom of the engine and you'll never know it. So that's when you pack up and head to Vegas.
Now, this job is still easy to do with the body on the vehicle, but you do have to remove the fan shrout and the clutch fan.
All right. What do we got?
Now, this is what you're looking for. You can see the dow pin starting to work its way out of the case.
This guy is,
especially when he gets loose.
Now, you can imagine the consequences if this pin falls out. If you're lucky, it falls right down in that hall falls to the bottom of the case like Kevin said, but more than likely it's gonna get grabbed by this gear and forced in between the gear and the timing case, creating a big hole right here and a massive leak. And if you're really unlucky, well, it's gonna fall all the way down to the bottom. Get stuck in between the crank and the cam gears
cause big, big trouble.
Now, for all the havoc that little guy can wreak the fix is unbelievably simple. All you need to do is make a tab that fits under this bolt and holds the killer dial pin in place permanently. Now, a quick internet search will lead you to a couple of kits that you can buy but check this out. We found this in our junk drawer. So just like we're gonna do,
you can make one
with a hammer and a small drift, just drive the pin back into its place.
Yep.
But with the dow pin back at its Happy Home
Hall
is once again, right with the universe. Now, we can do something about keeping him there,
which is easily accomplished, utilizing the bolt location right next to the dow pin.
Now, using our scrap piece, we've simply cut a tab and drill a hole in it.
We'll install the tab with a slightly longer bolt to compensate for the metal thickness and use lock tight to keep it where we put it.
All right, with our dow pin secure, we're almost ready to start making some changes so we can increase the power output of our 59 diesel. Now, we picked up a couple of gauges from bully dog so we can monitor the boost and the exhaust gas temperatures from inside the cab. Now,
before we finalize the turbo installation, we're gonna go ahead and drill and tap the manifold for this EGT probe.
Now, there's a couple of different spots you can choose from to drill and tap for an EGT probe.
We stuff some paper towels into the manifold to minimize the amount of metal shavings that get left behind.
After drilling an eight inch pilot hole,
we used a 5/16 bit to finish the job.
And with the hole drilled, we used an eight inch pipe tap to provide a mounting location for the EGT probe
that this job can be accomplished with the turbo and the manifold in the truck.
It's just a little bit easier with it off. If you are doing it on the truck pack, the flutes of the tap with grease to help retain any metal shavings.
There is a piece of trivia that you guys probably wouldn't know. But up next, Jack Rausch stopped by the shop for a little trivia and later we've got a heavy duty replacement for our weak clutch. Stay tuned.
Hey, welcome back to the shop. Well, powerful diesel engines and light duty trucks are commonplace nowadays, but it wasn't always like that.
Jack Rush stopped by the shop recently shared a little history with us.
There is a piece of trivia that you guys probably wouldn't know. But
do you know who the person was that put the first uh cummings diesel engine in a pickup truck?
Me
about uh 20 years ago Chrysler came to me and said that uh you know, that they wanted to explore the prospect of putting a diesel six cylinder engine in a pickup truck.
And uh
so what, what they had was an industrial engine. It wasn't a truck engine,
heavy, heavy equipment, diesel engine. And uh it made so much noise that it was not, it was not uh well, not feasible. So we had to put a sound deader in the firewall and, and sound deadened in the oil pan and do some other things to make a package reasonable. But we did the first one
for Chrysler.
That's neat.
Well, there you go from the man himself. It's pretty cool to be around a pioneer like that. Well, what we've had the chance to do is throw some new gaskets on, adjust the valves, clean a little bit of schmutz off the front of this engine. And since it's so easy to do with the body off the frame, what we threw a new water pump on just because with that done now we can focus on turning up the wick.
Now, one of the easiest ways to add big power to one of these early comings is what
fairly small parts
like this stage, four torque plate we picked up from Bully Dog.
Now this part controls the maximum amount of fuel delivered to the engine at a certain RPM.
Then you combine this with a couple of other mechanical upgrades we're gonna make will easily be in the 300 horse in 700 pound feet of torque range. Now, the kit also comes with a valve to alter the signal to the waist gate to increase boost pressure to match the increase in fuel.
Now, the torque plate is located under the AFC housing
and based on the marks on the screw heads was pretty obvious to us. Somebody's been in here before making some adjustments.
Now, before we install the new torque plate, we wanna install a 3000 RPM governor spring kit, we picked up from a TS diesel
and after getting a baseline measurement of the stick out link to the governor spring stem, we removed the lock nut, the retainer
and the two inner springs
along with a couple of shims,
no, a magnet and a pick come in real handy when doing fine tedious work like this.
And if you've ever played the game operation as a kid,
well, you're already prepared.
So to keep any buzzers from going off or keep you from inventing new words and chasing,
make sure you don't drop anything into the injection pump housing. Now, the installation is pretty easy. It's the factory spring seat,
the new A TS spring inside the factory spring, followed by the retainer and the lock nut. Just verify your measurements are the same.
Now, we've got one more spring kit to install from A TS, but this time it's going in the AFC or Ana Roid fuel control. And what this does is control how much fuel gets delivered to the engine in a low boost situation.
Now, the governor spring kit we just installed is gonna allow our engine to fuel to about 3000 or 3200 RPM as opposed to the factory setting of about 2200 RPM.
Now,
this AFC spring kit changes things a little bit differently.
Now, by installing a lighter AFC spring, it's going to allow more fuel into the engine in a low boost situation,
which is going to make more power and make the engine more responsive at lower RPM.
All right. Well, we're almost ready to install our modified AFC housing.
But before we do that,
we finally need to install our new torque plate.
Now, the kit does come with an installation template, but since ours has already been tinkered with, we're gonna install our fuel plate at almost the full forward position, which will allow for near maximum fuel rack travel.
Now, we had picked up some 191 delivery valves from industrial injection to help boost the power output of this engine.
But we're going to hold off on the installation until we get the truck up and running. Now, the delivery valve basically helps meter how much fuel gets injected into the cylinder. Now, if you're going to do this job, you need to remove the delivery valve holder to gain access and that requires a special socket.
This isn't the only special tool we picked up to work on this diesel either.
That's right. And you've heard us say over and over again that having the right tool for the job can save you time, money, even parts. And that delivery valve socket is a perfect example of that. Now, in the Matco tool catalog, there are several diesel specific tools including this filter socket set,
a clutch fan wrench
and this barring tool, this is designed to sit in a port in the transmission adapter case and allows you to spin over that high compression engine with nothing more than a 38 ratchet. This thing comes in handy. They also offer diesel specific filter wrenches, even this diesel compression testing kit, which is pretty much a necessity if you've got serious engine problems to diagnose.
So it's nice to know that no matter what you're working on Matco,
I got the tool for you.
Hey, welcome back to trucks. Well, so far, all the engine projects on super duly have gone without any trouble. Now it's time to move some big chunks.
All right. Now that we know we're gonna be making more power, we need to make sure it actually gets to the ground.
Now, with the increase in torque. Well, it's obviously more than a stock type clutch can handle. So we've got a heavy duty replacement. Now, who knows what we're gonna find when we take this transmission off because obviously somebody's been in here before and incorrectly install this bracket here. It's sandwiched in between the bell housing and the block adapter. But either way we're gonna take this transmission off, find out what's inside and make an upgrade.
Ok. Here's the clutch, pressure plate and flywheel. We pulled out of the big dodge. Now, it's not hard to see that the clutch and pressure plate have been recently replaced. The problem is it's a stock replacement and it's a cheap offshore replacement at that.
And we're just not going to trust the so clutch with our power upgrades.
The other issue is this check out the fly wheel. It
has not been surfaced. There's glazing and hot spots all over the place. So they got a brand new clutch on a flywheel that hasn't been resurfaced. Well, that's just goofy.
Now, the first time I ever put a clutch in a vehicle, I was 16 or 17. It was a 63 Ford F 103 on the tree standard shift. And I did the same thing. I put a new clutch and didn't bother to have the flywheel resurfaced and it was all glazed over. The thing chattered so hard when you let the clutch out that it wanted to shake you out of the vehicle. Well, my excuse is I was young and stupid back then and we learned from our mistakes. Hopefully, the other thing that we're gonna do is pull this tail housing off and see if that problematic fifth gear nut issue has been addressed.
Now, we don't need any more proof than that right there that a stock type clutch assembly ain't gonna cut it behind our torque straight six. It's pretty obvious that the previous clutch that was installed got shredded to pieces. So to us, at least going back with the stalker was just a waste of time and money, especially considering we're gonna be making
power improvements to the engine. So we might as well upgrade the clutch as well. That's why we're installing a South Bend clutch. Now, this Dyn
Max clutch kit we got from South Bend can handle up to 450 horsepower and 1000 pound feet of torque. And that should easily cover our power improvements as well as offer up some room for upgrades in the future.
Now, this flywheel has been red drilled to accommodate a slightly larger pressure plate and that'll let us use a 13 inch clutch disk which is an improvement over the stock 12 and a quarter inch diameter. Now, the flywheel also uses a sealed roller bearing instead of the stock needle bearing setup which is exposed of contamination.
Now, this pressure plate is 5/8 of an inch larger than the stalker and improves clamping force as well. Now, the disc got some improvements too. They swapped out some of the torsional coil springs in favor of these neoprene dampers which will stiffen up the disk allowing it to handle more horsepower and torque.
And the kit also includes a new throw up bearing and the necessary alignment tool. Now, in between the clutch diameter increase and the choice of clutch material linings, what we're going to eliminate early clutch disc failure and still have nice smooth pedal engagement
after installing the flywheel onto the end of the crank shaft using lock tight and 100 ft pounds of torque. The alignment tool allows you to perfectly center the clutch disc. Then you're ready for the pressure plate which is installed using lock tight and the bolts snug down in a star pattern.
Now, be careful not to run the bolts in with too much pressure because the final torque spec is only 20 ft pounds and again is torque down using a star pattern to ensure an even clamp load.
Hey, welcome back to the shop. Well, we've already made some power upgrades, dealt with some maintenance issues and installed a heavy duty clutch behind our diesel engine. We're almost ready to reinstall our manual transmission.
But before we do that, we want to pull this rear tail housing off and see if the problematic fifth gear nut issue has been dealt with already.
I've already removed the PTO cover and drained the fluid so we wouldn't make a mess on our bench top.
Now, this silver piece here is actually the fifth gear retaining nut. And what happens is the fifth gear on the main shaft actually rocks back and forth on the spines a little bit allowing the nut to back off, letting this fifth gear assembly slide back and once it slides back on the main shaft far enough to clear the fifth gear on the counter shaft. Well, you're basically left with a four speed transmission, a repair to make and a few options
and what we're gonna do to fix that is weld it.
Now, we're using a big clamp to provide a good ground on the retaining nut before welding
along with a glove to keep spatter off the gears.
Now, we're using the four notches on the retaining nut as a guide on where to place our tax that's to not throw the shaft out of balance.
Now, I know a lot of you guys are saying, well, you just ruin those threads and you're probably right. It will be a pain in the neck to remove that fifth gear nut. But if we've got to go inside the case and deal with sink rows or replace bearings, we're gonna be replacing the factory main shaft anyway, because it's the root of the fifth year problem. It doesn't allow for full fifth year sply engagement. So an aftermarket unit will allow for full engagement and eliminate the fifth year problem anyway. So this main shaft is sacrificial and at least this way, well, we know we're not going to lose our overdrive.
Hey, guys, if you're shopping for a tuer for your late model truck, well, you need to check out edge products, new evolution CTS in cab monitor and gauge display. It's got a four by three full color touch screen, multiple power levels for mileage performance and
towing. And it even has a video import that you can hook up to a backup camera.
It will also monitor and display your diesel particulate filter status. So to add power without getting your hands dirty, check out edge products, evolution. CTS tuner
got one last bit of business
tap in a new tail shaft seal, fill the transmission up with the recommended fluid. We're gonna call this thing done. Now, if you got any questions about today's show, check us out online at power block tv.com. Thanks for watching trucks. See you next time.