More Formula Toy Episodes
Xtreme 4x4 Builds
Want more content like this?
Join the PowerNation Email NewsletterParts Used In This Episode
12 Volt Guy
Custom Electrical Switch Panel - aircraft switches winch, ignition, start will do custom stickers.
4 Wheel Parts
X-Terrain Tires.
Advance Adapters
Reduction housing & trail-tamer gears.
All-Pro Off-Road
High Steer Kit - heavy duty links and upper arms.
All-Pro Off-Road
Springs and shackle kits.
Auto Meter
C2 gauges - water, volt, oil pressure, tach - light up blue LED.
Crane Cams
Fireball Ignition System - high power ignition box, coil , wires.
Crown Performance
Flexible Brake Lines.
Detroit Locker
Locker.
DJ Saftey
SFI Comp Certified 5-point Harnesses.
Edelbrock
Steel Braided Fuel Lines and Fuel Fittings.
Flowmaster
Super 40 Muffler and a couple pieces from a Universal Tailpipe Kit.
Hendrix Motorsports Tube Chassi
Tube Chassis.
Howe Performance
Hydraulic Assist System for a Modified Scout II Steering Box, Power Steering Reservoir, Hydraulic Ram, Micro Steering Pump.
Inchworm Gear Box
Double kit.
Jaz Products
Plastic Fuel Cell
LC Engineering
Full length header (came with motor).
LC Engineering
Stroker Stage II 22R engine.
Matco Tools
Gloves.
Moroso
Quick Disconnect Steering Wheel.
Pirate 4X4
Extreme Off-Road Website - Founders of the Formula Toy Class.
Poly Performace
Axles & Birfs.
Prairie City OHV
Off-Road Park just south of Sacramento, CA
PRP Seats
Suspension seats with Camel Back Pouches.
Ramsey
XXX 6000 - 3 stage planetary motor, automatic load holding feature, remote.
Roundeyes
Rock Lights
Royal Purple
Max ATF Oil.
Superior Axle and Gear
Ring & Pinion.
Walker Evans Wheels
Bead Lock wheels.
WyoTech
Automotive Technical School-Sacramento, CA
Video Transcript
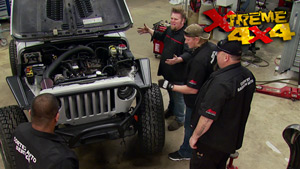
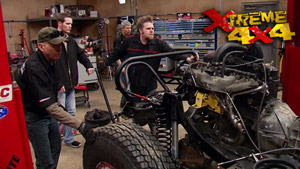
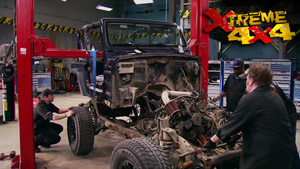
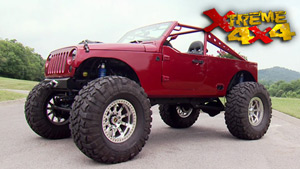
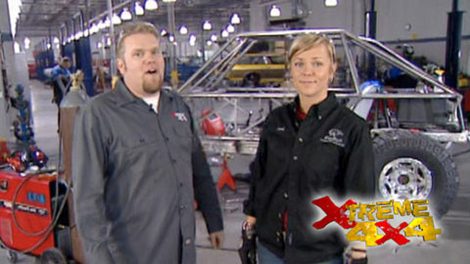
Our off road build team grows by 10 as these students finish and race in our extreme formula toy challenge. Will they pass or fail their final exam? Find out today on Xtreme 4x4,
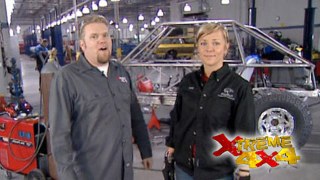
welcome to Xtreme 4x4. And if you recognize where we are, either you went to school here or you were watching a few weeks ago when we started building this formula to rock buggy that we're calling the
Yo Crawler.
It's a funny name.
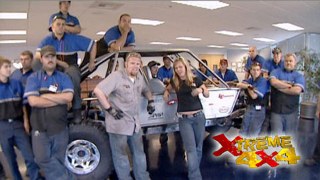
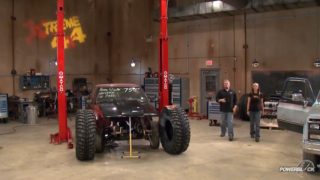
But instead of Jessi and I building this truck ourselves, we chose two dozen of Wyo
Tech's top students.
These guys were well into their semester of chassis fabrication. So the skills they learned over the last 10 weeks were immediately put to the test.
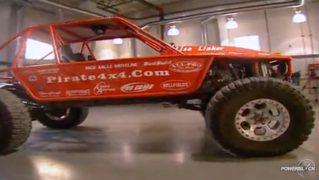
First camel from pirate four by four, brought in champion Lisa Linker rig to show them what they were building.
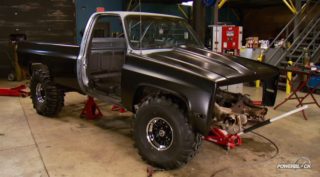
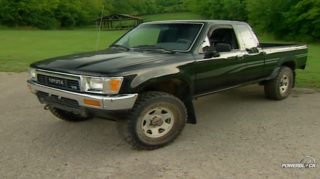
They started with a stock 1982 Toyota pickup, stripped it. Barrett started to build.
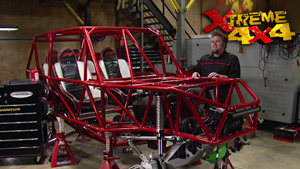
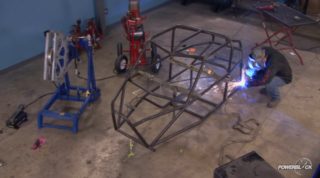
Then it all began with a Hendrix Motorsports chassis and an LC engineering 22 hour engine.
Our brand group took on the task of building one of the first ever Toyota automatic transmission to twin gear driven transfer cases using
informs double
kit,
plus they installed advanced adapters reduction housing and trail tamer gears.
The entire drive train was then dropped into the frame and at either end, the students rebuilt two Toyota dips with Detroit lockers, superior gears and of course poly performance axles and birds.
Then we had a rolling chassis with Walker Evans, Belock wheels and pro
X terrain tires, all sitting on all pro off road screens and shackle kits. After checking the flexibility of our new crawler, it was pushed into a place of honor in the lobby of Wyotech Campus.
And now we're back with nine new students and one veteran to finish this thing off and have it on the rocks by the end of the show.
The first thing we have to do to this truck is the steering and Matt and Brandon are going to take us on. Come on in guys, we'll show what we got.
Now, we got a high steer kit from All Pro Op Road that comes with heavy duty links and new upper arms to move the crossover bar and Ty Rod from the bottom side of the leaf spring to the top as you know, but the one that makes this kit a little bit different is we're going to be using this scout box mounted on the outside of the frame rail. Now, we're going to have to install this box cycle the suspension and mark the location of this pitman arm. Then we're going to take that steering box and ship it down to how performance steering because they're going to install internal stops in that box to match the hydraulic assists that they basically are building just for this truck. That's sort of what they do, they match it specific to each vehicle. So right now you get to install all these parts and then take it all back apart
once the box is matter and the links are connected.
Brandon will cycle the steering from side to side and mark the location of the pitman arm.
Then Matt can measure the distance the ram will be traveling.
Then we can take all this information
box up the steering box and send it off to how.
All right. Well, those guys are finishing up the steering. You guys are gonna be plumbing this right.
Ok.
All starts with this jazz fuel set that we got.
And then we're gonna be using these steel braided lines and these fuel fittings that we got from Russell.
Then you can go ahead and run these flex braided lines that we got from crown performance and you can measure for all your hard lines for the brakes.
Cool.
All right, let's get this in there.
Make sure it's in center and it's not getting in the way of anything.
A fuel cell is required to compete in most rock crawling competitions.
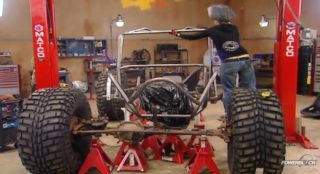
The nice thing about a plastic cell is that it can take some abuse on the trail. And bounce.
If this truck had an electric fuel pump, we would use high pressure a
fittings. But LC engineering suggested using the stock mechanical pump which would be just fine using worm gear
with fuel getting to the engine up here, we can start to concentrate on the exhaust. Now, our LC engineering motor came with its full length header and with the assistance of the super 40 muffler from Flowmaster and a couple of pieces from their universal tailpipe kit. This motor is gonna breathe
ready.
That's good right there. Tack that in
before
we can breathe life into this engine. We need to have ignition so we're going to be installing this crane fireball ignition system. It comes with a high power
ignition box coil and wires
and dr
here is going to fabricate up a mountain place so we can get all of this mountain right?
Cool.
Need anything
hauler
up next. The formula toy build continues culminating in this a trip to the rocks to see who's got the right stuff to be crowned champion. Stay tuned.
Welcome back to Xtreme 4x4. As you can see the students have really started to tear into part two of the formula toy bill. Oh,
yeah. It's not gonna be long before we can feel it up and take it for a spin.
Don't tell any of the instructors, but I think we're gonna put her at the wall.
Now, the last time we were here it wasn't all work and no play either.
Have you ever seen anything like this? These are front wheel drive, clip cars that the school uses to teach engine troubleshooting.
They're also great for
TV. Host to make
of themselves.
Front,
we need Doris
Car is much cooler than mine.
What?
Look at this,
what cooler, Defender,
your car's cooler.
It's got much more curb appeal,
air bags.
And we are supposed to tell you that
the wild tech official policy is that clip cars are for instructional purposes, only. Students are permitted to troubleshoot, diagnose and repair these vehicles only and are prohibited from driving them in any manner.
No,
I'm just
curious.
It's always nice to have suspension seats in your rig and we got this set from PR PC.
It comes fully equipped
with a steel welded frame
webbing
and
it's got these cool little pouches for your camel back. So when you get thirsty, you always have something to drink
what those in
and then to keep us in. We're gonna be using these SF I comp certified five point harnesses that we got from DJ. Safety
Raus
has already got some of the mountain, right? You wanna tell us about it,
right? If you can see, I did a drill and tap
and then I uh inserted the uh eye eye bolts.
I weld them in for uh
for extra durability as well as you can strap it in
ready to go.
All right. Probably the biggest job. Time consuming wise on this project is gonna be wiring this thing. Now, it's not as hard as wiring uh actual complete car because it's just a buggy.
But there are some stuff that we are gonna have to address when we put this thing together.
I'm gonna have to power up electric fan for the radiator.
We obviously have the electric fan on top of our Hayden transmission cooler. We got some rock lights uh from round eyes and we need to be able to switch all this. So we went ahead and ordered a custom panel from 12 volt guy.
Now this panel will just fit in our dash
and has these aircraft switches
that's going to allow us to run the winch from inside the cab. We have two switches to run our rock lights. One just for fun, an ignition and a start and you can order this panel with any numbers
is
and pretty much any number of stickers or design a sticker that you want. You. It'll even do some custom ones for you if you want.
Now, when we last left this truck here, it was looking really good, like the last group did a really good job on it.
And so it was starting to turn into a showcase for your school. So when it came to gauges, we decided that we'd step up a little bit and we actually pick these auto meter C two gauges and you started building this great center console for them. We just got three simple gauges. We got
water and a bolt
and an oil pressure because that's pretty much all we need to monitor on this engine. And then of course, we got the big monster t,
now, the coolest thing about these
is how they light up, considering everything on this buggy has been blue and, and silver and since the coolest colors are kind of blue, they light up with that blue Killer led. That's why we picked them.
Is that cool or what? That's awesome.
All right.
So do you guys have any questions about how we're gonna tackle this thing or?
Oh, I was wondering uh
where we were going to decide to put the transmission cooler.
Well,
on a, if you're, it's, it's actually a good question because if it's like a street rod or something, you'd put this right up front, like right in front of the radiator to get a lot of airflow. But on something like this, we'll probably mount it as close to the transmission as we can
and just up at a harm's way just above the frame rail. And that's why we get these ones with these little integrated fans. This is normally what we always install. So it doesn't really matter where you install it, it's always gonna get airflow.
Andrew will go ahead and finish loading the gauge panel.
Then he and Thomas will attack it to the chassis where everything can get wired up
one thing.
And I noticed throughout both phases of this field is the personal pride these students are putting into the task at hand as we showed you in part one, this is not a rig, just slap together.
These guys are taking their time, not taking shortcuts. They know that going the extra mile on our project could not only earn them a good grade and chassis fabrication but maybe help them land a decent job upon graduation.
Competition. Crawlers use wins in a different way. And this Ramsey Triple X 6000 has a three stage planetary motor and an automatic load holding feature
to hook it up to our act
so we can
from our suspension giving us better approach and departure angles.
Plus this one has a remote function. And as soon as we get that finish,
we go ahead and get it mounted.
We're back on extreme from the campus of Wyotech
in Sacramento, California.
That one wasn't in all the way
where the students are in the final phase of our formulator rock crawler build
with the modified scout two power steering box back from how performance we can mount it to the frame.
We're using A B
and you join in solid three quarter inch steel rod with a moroso quick wheel disconnect.
We mount the power steering reservoir. So it's the highest part in the hydraulic system preventing any air pockets
with the cylinder positioned on the axle it could be welded to the All Pro crossover steering rod.
Brandon will fab up a bracket for a house steering micro
pump,
then bolt it to the motor,
hook up all the lines.
This is Tom
Arie. He's working on our square drive shafts. You wanna tell us how it's going. It's going great. Jesse's just got finished. Well in the square tubing to the uh U joint,
we had to grind off some material off of this U joint shaft as well as this one
grind off some of their so we could fit this square tubing over it.
And then we put the two together.
We got,
look at
all that
travel. See
that's the benefit of having square drive shops because you get that extra movement which you really need on a competition crawler. Plus they're really cheap to make and they're super easy to rebuild. Now, they're ready to go. Right.
All right. Here it goes. You ready? Yeah. Yeah. Yeah.
Yeah. Yeah,
it looks good. I like the, I like the expanded metal, the dash. It's small. It fits, it's perfect, man. Yeah, everything went. Uh, exactly. The plan hides all these wires so you don't have to see anything
and, uh,
centers everything towards the driver. So it's good, man. It looks good. Too.
Cool. Good job, man. Thank you.
Now, a lot of late nights and a lot of cold pizza, you really get to know the people you're working with this guy right here is Matt Barton, but we don't call him out. We got a nickname for him. We call him Mr Incredible. Because who do you think he looks like
we
got a few times?
And what have you been working on up here? Matt? I've been working on this skid plate here to protect the front and the radiator. I love the, the speed holes, man signature piece. Thank you. Now, what else you got? We got a brake pedal over here for the uh the driver compartment.
So what did you start with on this? Well, I started this with this uh hold up, return spring and this double needle bearing pillow block and then you build all the rest. Yeah. And I made it right here to fit underneath the dashboard. Show me.
Oh, that's sweet.
I love
you.
That fits great, man.
I'm so tired. Every muscle in my body hurts.
I
think it's gonna go a long way. Hopefully.
Oh, it should, it should we put a lot of effort into the truck?
It's crunch time. Everybody's tired
and it's so easy just to overlook something minor, ground straps, teflon tape, uh post clamps being tight, you know, and
that's all things that come back to the end and bite you. You know, as far as having ignition problems or a leak that you can't quite find bad oil pressure just right now.
Some not quite slow down, but just step back
and make sure you're really not missing anything
more.
Hey, Jesse's
a bed going on
about who's the first one,
to roll up the crawler over.
I
want my money. That might be you.
I'm not gonna try and roll it over. No.
Where are we at? I'm putting this wheel on and then we're gonna
roll it over and make sure we got, uh, fuel
and then we're gonna see if it starts
and if it doesn't start, we'll make it start.
Not only will it start? Watch the formula toy make its inaugural run when Xtreme 4x4 continues.
Now it's time to guess.
Oh,
you wide open.
Give me a little bit of starter option there, Mr
Yeah, let's kick it back down and see what happens.
We finally made it and wasted no time getting to Prairie City. Ohv, outside Sacramento.
Here we rock Ceo Rich Klein set up a course for our students
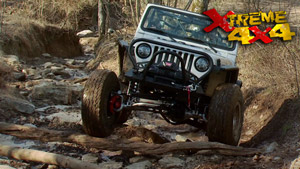
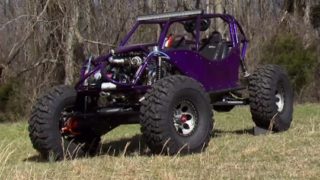
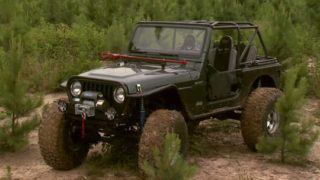
and here is the fruit of their labor. The latest buggy in the formula toy class.
And I took it on a little shakedown run. It was the students turn
with five teams at two, a coin flip, determined the driver and the spotter. First up, spotter Andrew with Kevin behind the wheel.
Oh, those mistakes will cost them.
Ok, Kevin on your score through the course there, you have a maximum of 10 minutes to make the course. If you don't make it within 10 minutes, you get 40 points, which is a maximum score for attempting minus one point for each cone. We call those progression points. You guys ended up with 10 minutes and 10 seconds, but you got four progression points taken off of that 40 so you're at 36 points
next Michael and Brandon,
not only did they run out of time, big penalties for spilling coolant because of an overheated motor
Nader and Jeremy didn't get very far and were deed
for having to get winched off the course
and
didn't fare much better.
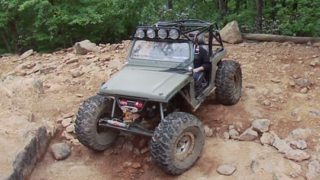
The last boulder turned out to be the hardest obstacle for all the teams except one
spotter,
Rago and Mr Incredible worked as a team chose their own line to make it over the hump.
Bye.
So with that 11 and then minus the four you have, um, a total of seven points. Excellent.
Thank you. Seven.
It started with a plan and some parts and after 100 and 80 hours of hard labor, we had an amazing buggy and some victors of the trail.
But in the end all were winners in our extreme wild tech experience.
You guys are awesome.
Show Full Transcript
welcome to Xtreme 4x4. And if you recognize where we are, either you went to school here or you were watching a few weeks ago when we started building this formula to rock buggy that we're calling the
Yo Crawler.
It's a funny name.
But instead of Jessi and I building this truck ourselves, we chose two dozen of Wyo
Tech's top students.
These guys were well into their semester of chassis fabrication. So the skills they learned over the last 10 weeks were immediately put to the test.
First camel from pirate four by four, brought in champion Lisa Linker rig to show them what they were building.
They started with a stock 1982 Toyota pickup, stripped it. Barrett started to build.
Then it all began with a Hendrix Motorsports chassis and an LC engineering 22 hour engine.
Our brand group took on the task of building one of the first ever Toyota automatic transmission to twin gear driven transfer cases using
informs double
kit,
plus they installed advanced adapters reduction housing and trail tamer gears.
The entire drive train was then dropped into the frame and at either end, the students rebuilt two Toyota dips with Detroit lockers, superior gears and of course poly performance axles and birds.
Then we had a rolling chassis with Walker Evans, Belock wheels and pro
X terrain tires, all sitting on all pro off road screens and shackle kits. After checking the flexibility of our new crawler, it was pushed into a place of honor in the lobby of Wyotech Campus.
And now we're back with nine new students and one veteran to finish this thing off and have it on the rocks by the end of the show.
The first thing we have to do to this truck is the steering and Matt and Brandon are going to take us on. Come on in guys, we'll show what we got.
Now, we got a high steer kit from All Pro Op Road that comes with heavy duty links and new upper arms to move the crossover bar and Ty Rod from the bottom side of the leaf spring to the top as you know, but the one that makes this kit a little bit different is we're going to be using this scout box mounted on the outside of the frame rail. Now, we're going to have to install this box cycle the suspension and mark the location of this pitman arm. Then we're going to take that steering box and ship it down to how performance steering because they're going to install internal stops in that box to match the hydraulic assists that they basically are building just for this truck. That's sort of what they do, they match it specific to each vehicle. So right now you get to install all these parts and then take it all back apart
once the box is matter and the links are connected.
Brandon will cycle the steering from side to side and mark the location of the pitman arm.
Then Matt can measure the distance the ram will be traveling.
Then we can take all this information
box up the steering box and send it off to how.
All right. Well, those guys are finishing up the steering. You guys are gonna be plumbing this right.
Ok.
All starts with this jazz fuel set that we got.
And then we're gonna be using these steel braided lines and these fuel fittings that we got from Russell.
Then you can go ahead and run these flex braided lines that we got from crown performance and you can measure for all your hard lines for the brakes.
Cool.
All right, let's get this in there.
Make sure it's in center and it's not getting in the way of anything.
A fuel cell is required to compete in most rock crawling competitions.
The nice thing about a plastic cell is that it can take some abuse on the trail. And bounce.
If this truck had an electric fuel pump, we would use high pressure a
fittings. But LC engineering suggested using the stock mechanical pump which would be just fine using worm gear
with fuel getting to the engine up here, we can start to concentrate on the exhaust. Now, our LC engineering motor came with its full length header and with the assistance of the super 40 muffler from Flowmaster and a couple of pieces from their universal tailpipe kit. This motor is gonna breathe
ready.
That's good right there. Tack that in
before
we can breathe life into this engine. We need to have ignition so we're going to be installing this crane fireball ignition system. It comes with a high power
ignition box coil and wires
and dr
here is going to fabricate up a mountain place so we can get all of this mountain right?
Cool.
Need anything
hauler
up next. The formula toy build continues culminating in this a trip to the rocks to see who's got the right stuff to be crowned champion. Stay tuned.
Welcome back to Xtreme 4x4. As you can see the students have really started to tear into part two of the formula toy bill. Oh,
yeah. It's not gonna be long before we can feel it up and take it for a spin.
Don't tell any of the instructors, but I think we're gonna put her at the wall.
Now, the last time we were here it wasn't all work and no play either.
Have you ever seen anything like this? These are front wheel drive, clip cars that the school uses to teach engine troubleshooting.
They're also great for
TV. Host to make
of themselves.
Front,
we need Doris
Car is much cooler than mine.
What?
Look at this,
what cooler, Defender,
your car's cooler.
It's got much more curb appeal,
air bags.
And we are supposed to tell you that
the wild tech official policy is that clip cars are for instructional purposes, only. Students are permitted to troubleshoot, diagnose and repair these vehicles only and are prohibited from driving them in any manner.
No,
I'm just
curious.
It's always nice to have suspension seats in your rig and we got this set from PR PC.
It comes fully equipped
with a steel welded frame
webbing
and
it's got these cool little pouches for your camel back. So when you get thirsty, you always have something to drink
what those in
and then to keep us in. We're gonna be using these SF I comp certified five point harnesses that we got from DJ. Safety
Raus
has already got some of the mountain, right? You wanna tell us about it,
right? If you can see, I did a drill and tap
and then I uh inserted the uh eye eye bolts.
I weld them in for uh
for extra durability as well as you can strap it in
ready to go.
All right. Probably the biggest job. Time consuming wise on this project is gonna be wiring this thing. Now, it's not as hard as wiring uh actual complete car because it's just a buggy.
But there are some stuff that we are gonna have to address when we put this thing together.
I'm gonna have to power up electric fan for the radiator.
We obviously have the electric fan on top of our Hayden transmission cooler. We got some rock lights uh from round eyes and we need to be able to switch all this. So we went ahead and ordered a custom panel from 12 volt guy.
Now this panel will just fit in our dash
and has these aircraft switches
that's going to allow us to run the winch from inside the cab. We have two switches to run our rock lights. One just for fun, an ignition and a start and you can order this panel with any numbers
is
and pretty much any number of stickers or design a sticker that you want. You. It'll even do some custom ones for you if you want.
Now, when we last left this truck here, it was looking really good, like the last group did a really good job on it.
And so it was starting to turn into a showcase for your school. So when it came to gauges, we decided that we'd step up a little bit and we actually pick these auto meter C two gauges and you started building this great center console for them. We just got three simple gauges. We got
water and a bolt
and an oil pressure because that's pretty much all we need to monitor on this engine. And then of course, we got the big monster t,
now, the coolest thing about these
is how they light up, considering everything on this buggy has been blue and, and silver and since the coolest colors are kind of blue, they light up with that blue Killer led. That's why we picked them.
Is that cool or what? That's awesome.
All right.
So do you guys have any questions about how we're gonna tackle this thing or?
Oh, I was wondering uh
where we were going to decide to put the transmission cooler.
Well,
on a, if you're, it's, it's actually a good question because if it's like a street rod or something, you'd put this right up front, like right in front of the radiator to get a lot of airflow. But on something like this, we'll probably mount it as close to the transmission as we can
and just up at a harm's way just above the frame rail. And that's why we get these ones with these little integrated fans. This is normally what we always install. So it doesn't really matter where you install it, it's always gonna get airflow.
Andrew will go ahead and finish loading the gauge panel.
Then he and Thomas will attack it to the chassis where everything can get wired up
one thing.
And I noticed throughout both phases of this field is the personal pride these students are putting into the task at hand as we showed you in part one, this is not a rig, just slap together.
These guys are taking their time, not taking shortcuts. They know that going the extra mile on our project could not only earn them a good grade and chassis fabrication but maybe help them land a decent job upon graduation.
Competition. Crawlers use wins in a different way. And this Ramsey Triple X 6000 has a three stage planetary motor and an automatic load holding feature
to hook it up to our act
so we can
from our suspension giving us better approach and departure angles.
Plus this one has a remote function. And as soon as we get that finish,
we go ahead and get it mounted.
We're back on extreme from the campus of Wyotech
in Sacramento, California.
That one wasn't in all the way
where the students are in the final phase of our formulator rock crawler build
with the modified scout two power steering box back from how performance we can mount it to the frame.
We're using A B
and you join in solid three quarter inch steel rod with a moroso quick wheel disconnect.
We mount the power steering reservoir. So it's the highest part in the hydraulic system preventing any air pockets
with the cylinder positioned on the axle it could be welded to the All Pro crossover steering rod.
Brandon will fab up a bracket for a house steering micro
pump,
then bolt it to the motor,
hook up all the lines.
This is Tom
Arie. He's working on our square drive shafts. You wanna tell us how it's going. It's going great. Jesse's just got finished. Well in the square tubing to the uh U joint,
we had to grind off some material off of this U joint shaft as well as this one
grind off some of their so we could fit this square tubing over it.
And then we put the two together.
We got,
look at
all that
travel. See
that's the benefit of having square drive shops because you get that extra movement which you really need on a competition crawler. Plus they're really cheap to make and they're super easy to rebuild. Now, they're ready to go. Right.
All right. Here it goes. You ready? Yeah. Yeah. Yeah.
Yeah. Yeah,
it looks good. I like the, I like the expanded metal, the dash. It's small. It fits, it's perfect, man. Yeah, everything went. Uh, exactly. The plan hides all these wires so you don't have to see anything
and, uh,
centers everything towards the driver. So it's good, man. It looks good. Too.
Cool. Good job, man. Thank you.
Now, a lot of late nights and a lot of cold pizza, you really get to know the people you're working with this guy right here is Matt Barton, but we don't call him out. We got a nickname for him. We call him Mr Incredible. Because who do you think he looks like
we
got a few times?
And what have you been working on up here? Matt? I've been working on this skid plate here to protect the front and the radiator. I love the, the speed holes, man signature piece. Thank you. Now, what else you got? We got a brake pedal over here for the uh the driver compartment.
So what did you start with on this? Well, I started this with this uh hold up, return spring and this double needle bearing pillow block and then you build all the rest. Yeah. And I made it right here to fit underneath the dashboard. Show me.
Oh, that's sweet.
I love
you.
That fits great, man.
I'm so tired. Every muscle in my body hurts.
I
think it's gonna go a long way. Hopefully.
Oh, it should, it should we put a lot of effort into the truck?
It's crunch time. Everybody's tired
and it's so easy just to overlook something minor, ground straps, teflon tape, uh post clamps being tight, you know, and
that's all things that come back to the end and bite you. You know, as far as having ignition problems or a leak that you can't quite find bad oil pressure just right now.
Some not quite slow down, but just step back
and make sure you're really not missing anything
more.
Hey, Jesse's
a bed going on
about who's the first one,
to roll up the crawler over.
I
want my money. That might be you.
I'm not gonna try and roll it over. No.
Where are we at? I'm putting this wheel on and then we're gonna
roll it over and make sure we got, uh, fuel
and then we're gonna see if it starts
and if it doesn't start, we'll make it start.
Not only will it start? Watch the formula toy make its inaugural run when Xtreme 4x4 continues.
Now it's time to guess.
Oh,
you wide open.
Give me a little bit of starter option there, Mr
Yeah, let's kick it back down and see what happens.
We finally made it and wasted no time getting to Prairie City. Ohv, outside Sacramento.
Here we rock Ceo Rich Klein set up a course for our students
and here is the fruit of their labor. The latest buggy in the formula toy class.
And I took it on a little shakedown run. It was the students turn
with five teams at two, a coin flip, determined the driver and the spotter. First up, spotter Andrew with Kevin behind the wheel.
Oh, those mistakes will cost them.
Ok, Kevin on your score through the course there, you have a maximum of 10 minutes to make the course. If you don't make it within 10 minutes, you get 40 points, which is a maximum score for attempting minus one point for each cone. We call those progression points. You guys ended up with 10 minutes and 10 seconds, but you got four progression points taken off of that 40 so you're at 36 points
next Michael and Brandon,
not only did they run out of time, big penalties for spilling coolant because of an overheated motor
Nader and Jeremy didn't get very far and were deed
for having to get winched off the course
and
didn't fare much better.
The last boulder turned out to be the hardest obstacle for all the teams except one
spotter,
Rago and Mr Incredible worked as a team chose their own line to make it over the hump.
Bye.
So with that 11 and then minus the four you have, um, a total of seven points. Excellent.
Thank you. Seven.
It started with a plan and some parts and after 100 and 80 hours of hard labor, we had an amazing buggy and some victors of the trail.
But in the end all were winners in our extreme wild tech experience.
You guys are awesome.