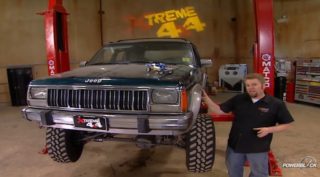
Xtreme 4x4 Builds
Want more content like this?
Join the PowerNation Email NewsletterParts Used In This Episode
Copperhead Fab
Hydraulic conversion kit for manual bender, available for all popular types of horizontal benders.
KnKut Performance Drills
135 degree split point drill bits, designed to create less heat when cutting. Step Drills designed to slowly enlarge drilled hole until desired size is reached.
Lincoln Electric
Electric Arc Welder.
Matco Tools
Oxygen/Acetylene Torch Kit, used for cutting, brazing and welding. 4.5" Electric and Air powered grinders. 2.5" small air powered grinder/sander combo.
Miller Electric Manufacturing Co.
220 V wire feed MIG welder, ideal for all types of welding from sheet metal to structural components. 220 V plasma cutter, for cutting all types of steel, and aluminum. Tungsten Inert Gas welder (TIG) precise welder used for high qualtiy, high control welds, ideal when working with Chrom Moly Tubing due to the ability to control the heat input into the metal.
Pro-Tools
Pro Tools Model 105 Manual Bender. First level of high end fab shop bender, manual ratchet type bender made from high qualty steel and well machined dies, with degree ring and stand.
Tube Shark
Shark Pool, bending notching station. Air over Hydraulic bender with ability to perfrom 180 degree bends on all types of tubing square and round.
Williams Lowbuck Tools, Inc.
1.5" Low Buck hydraulic bender.
Video Transcript
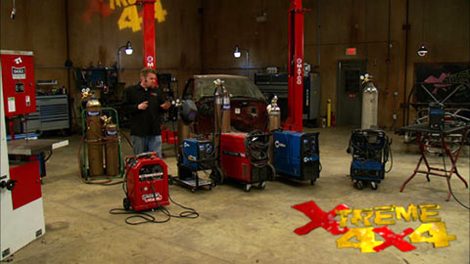
We tell you it's easy. Then you see us build these outrageous rigs that do amazing things on the trail. And you say to yourself, there's no way I can do that. Well, yes, you can. Because today on Xtreme 4x4, we're getting back to the basics of metal fabrication, the tools you need and how to use them.
Now, whether you're building a high end druggy or just a simple budget Weekend Wheeler, when you boil it down to its basics, you're just working with steel in some form or another. Now, that's a topic that a lot of you guys have asked for more information about. Well, today is your lucky day. We're gonna spend the whole day today talking about tubing and steel, how to weld it, cut it, grind it, finish it, shape it, the tools you need to do it and how those tools work.
Now, although the theory of welding can seem pretty complicated, it's actually very simple. If you had two ice cubes, one in each hand, held them together until they melted into one, you've basically welded that ice together. Now, one of the oldest forms of welding out there is what's called torch welding. And this is a pretty typical torch welding pit. You'll have one cylinder filled with pure oxygen and a set of regulators up top. Another cylinder is filled with a
simple liquid called
acetylene. And it also has a set of regulators on top.
Now, these flow out to the torch handle themselves and mix inside what's called a mixing chamber right in here. And then they come out to the tip where they're lit.
The
acetylene is set at five P si and it is the first one that becomes lit and the oxygen is set at 35 and is added to create what's called a carbonizing flak.
Now, you simply heat up the parent metal with the torch itself and then add filler rod with your free hand.
And when it comes to electric welders, there's a bunch of different models from many different manufacturers with names we've all heard before like Mig
Tig and Arc, but they all fit underneath a larger umbrella of what's called shielded metal arc welders or small.
And one of the original ones in that group is the good old fashioned arc or stick welder. Now, this bad boy right here takes electricity from the wall and runs it through a transformer that boosts the
age that sent down the
cable into the electrode holder in the electrode holder. We place an electrode that is consumed during welding. Now, on the outside of the electrode is a substance that's called flux. Now, as you weld with the arc welder, you strike an arc on the end
and weld away the flux itself melts off of the electrode and protects the weld when it's in its molten state.
And when you're finished welding, you simply chip off that flux to reveal a good finished weld.
Now, the next type of welding we're going to look at is Mig welding. Now, Mig stands for metal inert gas and the welder itself can operate in two different modes, either with gas or without. Now, if it doesn't have a gas cylinder, the wire itself will have a flux in the middle of it that just like the arc welder will melt and protect the well. But if it's set up like this one here with a gas kit, the wire is just mild steel. Now, since we
need to protect the weld in the molten state, the gas is stored at the back of the welder in a cylinder. In our case, this is a mixture of argon and carbon dioxide.
The welder itself works just like the arc welder using the electrical arc coming out of the tip when it hits the metal to melt and cause the weld, the gas flows through the nozzle to protect it in its molten state.
All that happens when you press the trigger,
turn it on
now to weld with a mig welder, you simply get the torch into the correct position and pull the trigger
wire is fed out from the inside of the machine
and the gas from the cylinder will protect the molten welds by dissipating any impurities in the air. It also has a high balance of positive electrons to help stimulate the earth
when you're done, just let go of the trigger and your weld is finished.
Now, a form of welding that's become very popular lately is tig welding. Now, tig stands for Tungsten inert gas welding. And it's kind of a combination of everything we've looked at so far today, just like a mig welder. It uses a noble gas in most cases are
gone that exits through the nozzle to protect the tungsten electrode as well as the molten puddle.
But like the torch, you have to add filler material with your free hand. Now, it is possibly one of the most precise welders available because you can control the upper 15% of your voltage with a foot pedal to control the molten puddle. Now, to weld with a tig welder, you simply get the head in position and keep the tungsten
off of the metal, strike the arc by pushing down on the pedal and move it along the bead, adding filler material as you go. Now, when you get to the end of the weld, simply remove the filler material, but don't move the torch. When you let off on the pedal, it's going to stop the arc, but the gas will still flow to protect the tungsten as well as the cooling metal.
Now, no matter what kind of welder you choose to use what you wear is just as important. A good welding helmet will protect your eyes and face and you can pick up a very good auto darkening helmet with huge viewing window nowadays for just over 200 bucks. Now, the auto darkening feature will shut the window down as soon as you strike the arc. Now, when using a tig welder
want to keep it up a little bit higher around 12 to 14 for me
and arc, you run to a 10 to 11 and for the torch, you can run it just at a straight five. Now, a good set of gloves is a must.
Mig welding gloves will usually be thicker with lots of insulation on the back to protect your hand from the spatter. Well, tig welding gloves usually just have one layer of leather and then the back is opened up to allow your hand to breathe because you don't have the spatter from the tig welder. And the last thing you wanna get is a good welding jacket. Now, this is flame resistant cotton from BS X. Now, this stuff here is nice and light and breeze, so you don't get too hot, but it'll also keep the spatter out of your shirt and keep all the UV rays off your arm. So you don't get sunburned while you're welcome.
Now, when it comes to cutting steel in the shop, there's really only two players in the game. You have your oxyacetylene torch, which works the exact same way as when we were welding with it, except we have a cutting head on the end.
And a plasma cutter which uses compressed air as well as an electrified arc to ignite a plasma arc out the tip to burn through the metal.
Now, either tool does a great job cutting through the steel.
The plasma cutter is just a little faster
later on more tool tips for first time fabricators. But up next, everything's hot at this off road smorgasbord
in extreme four by fours event of the week. It's everything off road at this expo extravaganza.
Over 400 vendors came out to the Pomona Fairgrounds for the eighth annual off road expo. We grow this show every year. Uh Steady growth is currently around 55 60,000 people that we expect through the gates here today
which make it the largest off road consumer show in the nation where the parts are the stars of the show. Well, we got our Chamber Pro Race wheel right now. We have something for everyone. A new product here. Ryan HD, 100% complete tea case ready to bolt in
having the sweetest parts and
slick rig is all good.
But take it from me, you need to look styling on the trail as well.
I like that
honoring all the brave soldiers fighting overseas. Proc
stepped up with a full build for a true American hero. This vehicle belongs to
staff Sergeant Massimino in the Marine Corps.
He was injured in the war in Iraq. And we're trying to do this build up for him to show how much we appreciate his sacrifice for us. We've gone through
build up over the last two days including
pro comp suspension, pro comp wheels and tires, magna flow, stainless steel exhaust
JB A headers DZ toolbox tire gate bumper, you name it, everything is going on this vehicle and everybody here is totally proud of the sacrifice that these soldiers are making. And we're proud to be a part of such projects from autograph signings and racing action to local bands jamming at the barbecue. It's not hard to get worn out at the expo.
Bully dog is the leader in diesel performance. We're all about making your truck go faster, get better fuel economy. And their
dyno
competition was one of the most popular attractions at Pomona. The object here at offered expo with the
dyno competition is you can bring your vehicle in,
throw it on the
dyno,
get your baseline numbers, whether it's stocked or already modified.
And then with our technicians
get fine tuned Dan Whales a ride with his 2000 Ford excursion.
We just finished putting this truck together, spent about a year in the making to put a Cummins diesel into a Ford and I was just curious. I wanted to see what kind of, uh, power it's gonna put out on
a dyno diesels have been known to hit 800 horses. Dan's expectations were more modest. I'd like to see
anywhere in the 450 to 500 horsepower range would make me very happy considering the truck. He is a daily driver. Andy Wick has broken more hearts than a high school cheerleader. Yeah, we've, we've uh given a few uh heart breaks in our day. A dyno
technician. He's run close to 1000 tests. We brought our uh mobile 248 dyno Jet chassis,
dyno out. I will measure 1800 horsepower, 1800 ft pounds of torque just to see what the diesel guys got. This test is a simple one. We usually run these in overdrive. It'll help load the load the turbo and everything as hard as we can so we can get the best numbers out of it.
What we're going to watch, we'll watch your boost gauge. Our trans temp, make sure the trans temp isn't going to get heated up. And then our pyro
corn
burger locks up,
start loading the
loading the turbo a little bit
starter ball.
There we go. 420 horsepower, 670 ft pounds of torque all in all for its first
dyno
run. I'm happy. It's not, it's not quite the numbers I was really hoping for, but it
is the first run and I'm driving it home. So that's good, Dan wasn't the first to be surprised by the numbers, but the good folks at bully dog were standing by ready to show Dan the way,
you know, a lot of guys, they, you know, they might be disappointed when they stand in front of the screen. When they say,
you know, how come it only made this much power, something's wrong, but they'll come and talk to you after uh after the show or a little bit later on and say, ok, well, it's been, been acting funny the whole time. What do I need to do to fix it? And that's what, that's what the machines for. That's what a dyno is really going to tell you. Rather than just test the numbers
coming up, you can build a roll cage without a big buck bender. More budget fab tips when Xtreme 4x4 continues.
Now, can you tell me what roll cages, bumpers, rock sliders, roof racks, light bars, tire carriers and bed cages all have in common? Well, they're all made out of steel. More importantly, they're made out of tube steel and that's what today's show is all about. And the next thing we're gonna look at is bending tubing. Now, bending tubing without a bender has been done all the time. It's ok for things like light bars, maybe a bumper, but definitely not a roll cage. All you need is a brake rotor strong bench
and a good torch.
Bye.
Using a Rosebud tip on the torch, simply heat up the tube and bend it around the brake rotor. On the reason you don't want to do this for a roll cage or a chassis is you're compromising the strength of the tube itself.
This joint in a roll cage, if it rolled over, it's going to fail and you're in a mess.
Now, when you're ready to build that roll cage or chassis of your dreams, you're gonna have to buy a bender. Now, don't be fooled by those cheap $199 benders that have a bottle jack and two rollers, they'll just kink the tube. A bender's secret is in its dye.
Now, this one here is pretty typical and has a dye that goes around almost half of the circumference of the tube
and a roller that supports the tube right at the point where it's gonna bend, uh dye and roller work together to keep the tube from kinking and keeping it strong. Now, I've looked around and I found that one of the most economical benders out there is this one from Williams low
buck tools. It's just a simple radial pole bender that uses a small bottle jack to drive the dye.
What are you?
Now, the next bender we're gonna look at could be considered the first level of professional series benders. That's what you're gonna see out there in most heavy duty fab shops. This is a pro tools, 105 manual ratchet bender. It's sometimes referred to as a hoss field bender. It has a dye that works in a horizontal plane and a shoe that holds the back of it to keep it from
has a very precise degree wheel. So you know exactly how much bend you're getting out of your piece of tubing. Now, this is a manual bender. So you're gonna be pulling on the handle for a while. You build a chassis with one of these. You don't have to hit the gym for a month. Now, companies do make conversion kits to convert the bender over to hydraulic, but it's not that bad. Once you get used to it, it's just like a rowing machine.
One.
Sure.
Oh,
now if you have the room in your shop and obviously the money in your wallet, you really can't beat the two shark shark pool station. Now, it has their popular bender that works on a vertical access and it's a rotary draw type bender. But because it's mounted vertically, you don't have to worry about any kickouts hitting the floor like you would on a horizontal. Plus the tubing dye itself is capable of bending a true 180 degree be
without any problems. Now, the nice the thing is, is it's an air over hydraulic bender. So the only effort you have to exert is your right foot. You can bend tube all day long without getting tired.
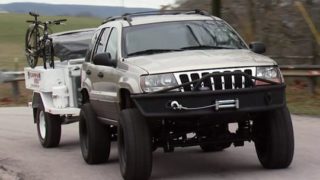
The car itself has provisions to hold all your dyes and your tools and matted on the other end is their popular tube shark notch.
Now, this is a heavy duty drill motor that runs on ball bearing guides. So you can go ahead and notch tubing with this easy as pie making this whole package your one stop bending notching station.
We're back on extreme where we've been taking some time today to talk about all the different tools that you need to do. The kind of fabrication we do here every single day. We've already talked about all the different welding options. You have as well as some two bending choices. And now we're gonna talk about some tools that often get overlooked. Just basic hand tools like good grinders, drills and drill bits.
And when it comes to metal finishing, you're gonna have a grinder in your hands a lot. There's lots of different choices out there. But the two main players in the game are gonna be an air powered grinder or an electric powered grinder and there's lots of different stone options, but the two that you'll find to use the most are gonna be first, this one here, a pure stone disk that we use for that first initial grind and then you can finish it off with one of these flap wheels. He's coming
grits, 50 or a 36 grip when you're done grinding with one of these, you'll never know the steel was cut or welded. You can even use one of these small little 4.5 inch cut off wheels and turn your hand grinder into sort of a mini chop saw.
Now, size does count and the 4.5 inch grinder works great. But what's nice to have is one of these small air powered three inch units. You can get these little scotch bright pads, which were great for
cleaning up welds and you can also get a grinding disk that's good when you gotta get into nice tight spaces.
Now, another tool you wanna get your hands on is a good Sawzall.
These were great when you're back half in trucks or just cutting out some unwanted tubing.
You can even take a Sawzall
blade grind the teeth off it and sharpen it like a knife and use your Sawzall
for cutting tires for better off road traction.
Now, the next tool you wanna pack into your box will be a good drill motor and a good set of drill bits. Now, cordless drills like this one are great, but it's just as important to have a good electric drill back up because it never fails. 90% of the time when you pick this up, you have forgotten to charge the battery. Now, air drills are also handy, but they're only as good as the air compressor providing the air to them. And when it comes to drill bits.
We've had really good luck lately with these new bits available from can
CP, they're 100 and 35 degrees split tip and they tend to start really well on the steel as well as bite into it. But you can't go wrong with a couple of these bad boys right here. These are units
a small and a large with a couple of these in your toolbox and a good drill. You can pretty much drill a hole in just about anything.
Well, there you go, guys. A brief look into some of the tools that we use here at extreme every day. As you can see, there's lots of options out there. So pick what works best for you get into the shop, cut some steel grind on your junk, build a sick off road truck.
It's that easy.
Yeah.
Show Full Transcript
Now, whether you're building a high end druggy or just a simple budget Weekend Wheeler, when you boil it down to its basics, you're just working with steel in some form or another. Now, that's a topic that a lot of you guys have asked for more information about. Well, today is your lucky day. We're gonna spend the whole day today talking about tubing and steel, how to weld it, cut it, grind it, finish it, shape it, the tools you need to do it and how those tools work.
Now, although the theory of welding can seem pretty complicated, it's actually very simple. If you had two ice cubes, one in each hand, held them together until they melted into one, you've basically welded that ice together. Now, one of the oldest forms of welding out there is what's called torch welding. And this is a pretty typical torch welding pit. You'll have one cylinder filled with pure oxygen and a set of regulators up top. Another cylinder is filled with a
simple liquid called
acetylene. And it also has a set of regulators on top.
Now, these flow out to the torch handle themselves and mix inside what's called a mixing chamber right in here. And then they come out to the tip where they're lit.
The
acetylene is set at five P si and it is the first one that becomes lit and the oxygen is set at 35 and is added to create what's called a carbonizing flak.
Now, you simply heat up the parent metal with the torch itself and then add filler rod with your free hand.
And when it comes to electric welders, there's a bunch of different models from many different manufacturers with names we've all heard before like Mig
Tig and Arc, but they all fit underneath a larger umbrella of what's called shielded metal arc welders or small.
And one of the original ones in that group is the good old fashioned arc or stick welder. Now, this bad boy right here takes electricity from the wall and runs it through a transformer that boosts the
age that sent down the
cable into the electrode holder in the electrode holder. We place an electrode that is consumed during welding. Now, on the outside of the electrode is a substance that's called flux. Now, as you weld with the arc welder, you strike an arc on the end
and weld away the flux itself melts off of the electrode and protects the weld when it's in its molten state.
And when you're finished welding, you simply chip off that flux to reveal a good finished weld.
Now, the next type of welding we're going to look at is Mig welding. Now, Mig stands for metal inert gas and the welder itself can operate in two different modes, either with gas or without. Now, if it doesn't have a gas cylinder, the wire itself will have a flux in the middle of it that just like the arc welder will melt and protect the well. But if it's set up like this one here with a gas kit, the wire is just mild steel. Now, since we
need to protect the weld in the molten state, the gas is stored at the back of the welder in a cylinder. In our case, this is a mixture of argon and carbon dioxide.
The welder itself works just like the arc welder using the electrical arc coming out of the tip when it hits the metal to melt and cause the weld, the gas flows through the nozzle to protect it in its molten state.
All that happens when you press the trigger,
turn it on
now to weld with a mig welder, you simply get the torch into the correct position and pull the trigger
wire is fed out from the inside of the machine
and the gas from the cylinder will protect the molten welds by dissipating any impurities in the air. It also has a high balance of positive electrons to help stimulate the earth
when you're done, just let go of the trigger and your weld is finished.
Now, a form of welding that's become very popular lately is tig welding. Now, tig stands for Tungsten inert gas welding. And it's kind of a combination of everything we've looked at so far today, just like a mig welder. It uses a noble gas in most cases are
gone that exits through the nozzle to protect the tungsten electrode as well as the molten puddle.
But like the torch, you have to add filler material with your free hand. Now, it is possibly one of the most precise welders available because you can control the upper 15% of your voltage with a foot pedal to control the molten puddle. Now, to weld with a tig welder, you simply get the head in position and keep the tungsten
off of the metal, strike the arc by pushing down on the pedal and move it along the bead, adding filler material as you go. Now, when you get to the end of the weld, simply remove the filler material, but don't move the torch. When you let off on the pedal, it's going to stop the arc, but the gas will still flow to protect the tungsten as well as the cooling metal.
Now, no matter what kind of welder you choose to use what you wear is just as important. A good welding helmet will protect your eyes and face and you can pick up a very good auto darkening helmet with huge viewing window nowadays for just over 200 bucks. Now, the auto darkening feature will shut the window down as soon as you strike the arc. Now, when using a tig welder
want to keep it up a little bit higher around 12 to 14 for me
and arc, you run to a 10 to 11 and for the torch, you can run it just at a straight five. Now, a good set of gloves is a must.
Mig welding gloves will usually be thicker with lots of insulation on the back to protect your hand from the spatter. Well, tig welding gloves usually just have one layer of leather and then the back is opened up to allow your hand to breathe because you don't have the spatter from the tig welder. And the last thing you wanna get is a good welding jacket. Now, this is flame resistant cotton from BS X. Now, this stuff here is nice and light and breeze, so you don't get too hot, but it'll also keep the spatter out of your shirt and keep all the UV rays off your arm. So you don't get sunburned while you're welcome.
Now, when it comes to cutting steel in the shop, there's really only two players in the game. You have your oxyacetylene torch, which works the exact same way as when we were welding with it, except we have a cutting head on the end.
And a plasma cutter which uses compressed air as well as an electrified arc to ignite a plasma arc out the tip to burn through the metal.
Now, either tool does a great job cutting through the steel.
The plasma cutter is just a little faster
later on more tool tips for first time fabricators. But up next, everything's hot at this off road smorgasbord
in extreme four by fours event of the week. It's everything off road at this expo extravaganza.
Over 400 vendors came out to the Pomona Fairgrounds for the eighth annual off road expo. We grow this show every year. Uh Steady growth is currently around 55 60,000 people that we expect through the gates here today
which make it the largest off road consumer show in the nation where the parts are the stars of the show. Well, we got our Chamber Pro Race wheel right now. We have something for everyone. A new product here. Ryan HD, 100% complete tea case ready to bolt in
having the sweetest parts and
slick rig is all good.
But take it from me, you need to look styling on the trail as well.
I like that
honoring all the brave soldiers fighting overseas. Proc
stepped up with a full build for a true American hero. This vehicle belongs to
staff Sergeant Massimino in the Marine Corps.
He was injured in the war in Iraq. And we're trying to do this build up for him to show how much we appreciate his sacrifice for us. We've gone through
build up over the last two days including
pro comp suspension, pro comp wheels and tires, magna flow, stainless steel exhaust
JB A headers DZ toolbox tire gate bumper, you name it, everything is going on this vehicle and everybody here is totally proud of the sacrifice that these soldiers are making. And we're proud to be a part of such projects from autograph signings and racing action to local bands jamming at the barbecue. It's not hard to get worn out at the expo.
Bully dog is the leader in diesel performance. We're all about making your truck go faster, get better fuel economy. And their
dyno
competition was one of the most popular attractions at Pomona. The object here at offered expo with the
dyno competition is you can bring your vehicle in,
throw it on the
dyno,
get your baseline numbers, whether it's stocked or already modified.
And then with our technicians
get fine tuned Dan Whales a ride with his 2000 Ford excursion.
We just finished putting this truck together, spent about a year in the making to put a Cummins diesel into a Ford and I was just curious. I wanted to see what kind of, uh, power it's gonna put out on
a dyno diesels have been known to hit 800 horses. Dan's expectations were more modest. I'd like to see
anywhere in the 450 to 500 horsepower range would make me very happy considering the truck. He is a daily driver. Andy Wick has broken more hearts than a high school cheerleader. Yeah, we've, we've uh given a few uh heart breaks in our day. A dyno
technician. He's run close to 1000 tests. We brought our uh mobile 248 dyno Jet chassis,
dyno out. I will measure 1800 horsepower, 1800 ft pounds of torque just to see what the diesel guys got. This test is a simple one. We usually run these in overdrive. It'll help load the load the turbo and everything as hard as we can so we can get the best numbers out of it.
What we're going to watch, we'll watch your boost gauge. Our trans temp, make sure the trans temp isn't going to get heated up. And then our pyro
corn
burger locks up,
start loading the
loading the turbo a little bit
starter ball.
There we go. 420 horsepower, 670 ft pounds of torque all in all for its first
dyno
run. I'm happy. It's not, it's not quite the numbers I was really hoping for, but it
is the first run and I'm driving it home. So that's good, Dan wasn't the first to be surprised by the numbers, but the good folks at bully dog were standing by ready to show Dan the way,
you know, a lot of guys, they, you know, they might be disappointed when they stand in front of the screen. When they say,
you know, how come it only made this much power, something's wrong, but they'll come and talk to you after uh after the show or a little bit later on and say, ok, well, it's been, been acting funny the whole time. What do I need to do to fix it? And that's what, that's what the machines for. That's what a dyno is really going to tell you. Rather than just test the numbers
coming up, you can build a roll cage without a big buck bender. More budget fab tips when Xtreme 4x4 continues.
Now, can you tell me what roll cages, bumpers, rock sliders, roof racks, light bars, tire carriers and bed cages all have in common? Well, they're all made out of steel. More importantly, they're made out of tube steel and that's what today's show is all about. And the next thing we're gonna look at is bending tubing. Now, bending tubing without a bender has been done all the time. It's ok for things like light bars, maybe a bumper, but definitely not a roll cage. All you need is a brake rotor strong bench
and a good torch.
Bye.
Using a Rosebud tip on the torch, simply heat up the tube and bend it around the brake rotor. On the reason you don't want to do this for a roll cage or a chassis is you're compromising the strength of the tube itself.
This joint in a roll cage, if it rolled over, it's going to fail and you're in a mess.
Now, when you're ready to build that roll cage or chassis of your dreams, you're gonna have to buy a bender. Now, don't be fooled by those cheap $199 benders that have a bottle jack and two rollers, they'll just kink the tube. A bender's secret is in its dye.
Now, this one here is pretty typical and has a dye that goes around almost half of the circumference of the tube
and a roller that supports the tube right at the point where it's gonna bend, uh dye and roller work together to keep the tube from kinking and keeping it strong. Now, I've looked around and I found that one of the most economical benders out there is this one from Williams low
buck tools. It's just a simple radial pole bender that uses a small bottle jack to drive the dye.
What are you?
Now, the next bender we're gonna look at could be considered the first level of professional series benders. That's what you're gonna see out there in most heavy duty fab shops. This is a pro tools, 105 manual ratchet bender. It's sometimes referred to as a hoss field bender. It has a dye that works in a horizontal plane and a shoe that holds the back of it to keep it from
has a very precise degree wheel. So you know exactly how much bend you're getting out of your piece of tubing. Now, this is a manual bender. So you're gonna be pulling on the handle for a while. You build a chassis with one of these. You don't have to hit the gym for a month. Now, companies do make conversion kits to convert the bender over to hydraulic, but it's not that bad. Once you get used to it, it's just like a rowing machine.
One.
Sure.
Oh,
now if you have the room in your shop and obviously the money in your wallet, you really can't beat the two shark shark pool station. Now, it has their popular bender that works on a vertical access and it's a rotary draw type bender. But because it's mounted vertically, you don't have to worry about any kickouts hitting the floor like you would on a horizontal. Plus the tubing dye itself is capable of bending a true 180 degree be
without any problems. Now, the nice the thing is, is it's an air over hydraulic bender. So the only effort you have to exert is your right foot. You can bend tube all day long without getting tired.
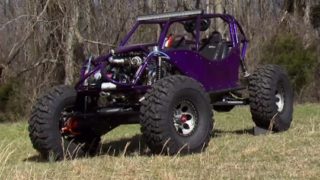
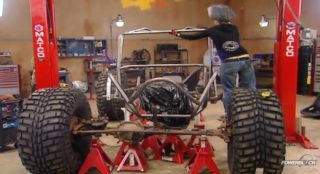
The car itself has provisions to hold all your dyes and your tools and matted on the other end is their popular tube shark notch.
Now, this is a heavy duty drill motor that runs on ball bearing guides. So you can go ahead and notch tubing with this easy as pie making this whole package your one stop bending notching station.
We're back on extreme where we've been taking some time today to talk about all the different tools that you need to do. The kind of fabrication we do here every single day. We've already talked about all the different welding options. You have as well as some two bending choices. And now we're gonna talk about some tools that often get overlooked. Just basic hand tools like good grinders, drills and drill bits.
And when it comes to metal finishing, you're gonna have a grinder in your hands a lot. There's lots of different choices out there. But the two main players in the game are gonna be an air powered grinder or an electric powered grinder and there's lots of different stone options, but the two that you'll find to use the most are gonna be first, this one here, a pure stone disk that we use for that first initial grind and then you can finish it off with one of these flap wheels. He's coming
grits, 50 or a 36 grip when you're done grinding with one of these, you'll never know the steel was cut or welded. You can even use one of these small little 4.5 inch cut off wheels and turn your hand grinder into sort of a mini chop saw.
Now, size does count and the 4.5 inch grinder works great. But what's nice to have is one of these small air powered three inch units. You can get these little scotch bright pads, which were great for
cleaning up welds and you can also get a grinding disk that's good when you gotta get into nice tight spaces.
Now, another tool you wanna get your hands on is a good Sawzall.
These were great when you're back half in trucks or just cutting out some unwanted tubing.
You can even take a Sawzall
blade grind the teeth off it and sharpen it like a knife and use your Sawzall
for cutting tires for better off road traction.
Now, the next tool you wanna pack into your box will be a good drill motor and a good set of drill bits. Now, cordless drills like this one are great, but it's just as important to have a good electric drill back up because it never fails. 90% of the time when you pick this up, you have forgotten to charge the battery. Now, air drills are also handy, but they're only as good as the air compressor providing the air to them. And when it comes to drill bits.
We've had really good luck lately with these new bits available from can
CP, they're 100 and 35 degrees split tip and they tend to start really well on the steel as well as bite into it. But you can't go wrong with a couple of these bad boys right here. These are units
a small and a large with a couple of these in your toolbox and a good drill. You can pretty much drill a hole in just about anything.
Well, there you go, guys. A brief look into some of the tools that we use here at extreme every day. As you can see, there's lots of options out there. So pick what works best for you get into the shop, cut some steel grind on your junk, build a sick off road truck.
It's that easy.
Yeah.