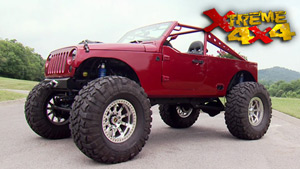
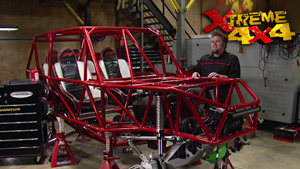
More CJ8 Scrambler Episodes
Xtreme 4x4 Builds
Want more content like this?
Join the PowerNation Email NewsletterParts Used In This Episode
Auto Meter
COBRA Vintage Sport Series speedometer, tachometer, water temperature, fuel level, oil pressure, & fuel level sending unit.
Currie Enterprises
The Currie anti-rock Sway Bar provides balanced performance of front and rear suspension for rugged off-road conditions. It gives the driver increased traction by balancing and distributing the weight over all four tires. The Antirock┬о Off-Road sway bar is designed to replace the stock Jeep sway bar.
Dupli-Color
Dupli-Color Truck Bed Coating. Dupli-Color Aerosol Truck Bed Coating. Dupli-Color Truck Bed Coating Roller Kit.
Lokar
Hi-Tech Trans Dipstick TH-400 Firewall Mount, Flexible Engine Dipstick SB Chevy 1980 & later, Hi-Tech TH-400 Electric Kickdown, Throttle pedal assembly.
Made For You Products
Designed for the requirements of professional racing and hi-performance applications, where strength and light weight are critical. Each kit contains larger sized T-Clamps (from 7/16" to 15/16") for mounting braided pressure lines, hoses, and cables.
QA1
With over 5,000 sizes, styles and materials in QA1 rod ends to choose from, QA1 manufactures a rod end for virtually every application.
Russell Performance
1-1/2" Fuel pressure guage, Proclassic hose, Proflex hose, full flow hose ends, full flow swivel hose ends, adapter fittings.
C & M Performance Machine
Machined finned aluminum covers for transfer case.
Davey’s Jeeps & Parts
Used pedal assembly and Brake booster/master cylinder unit.
Doc's Blocks
Custom radiator and fan package with custom radiator cap.
Got Propane?
Dual fuel kits for carbureted V-8 and V-6 motors.
J.E. Reel Drive Line Specialists
Custom built fully balanced DOM driveshafts. Rear shaft upgraded with Cornay CV joint assembly to prevent vibrations and provide longer life.
Monster Transmission and Performance
Custom built turbo 400 transmission, with upgraded components and low stall speed converter.
Nitro-Plate
Coating of exhaust pipe and muffler sysytem.
O'Reilly Auto Parts
Replacement oil pan.
PSC Motorsports
Full hydraulic steering kit. 2.5 Ram with orbital valve, steering linkage, hi flow pump, and reservoir.
Sniper Fabworks LLC
U-Weld bumper kit, ready to weld winch bumper kit all pieces precut and bent.
Video Transcript
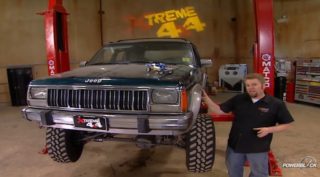
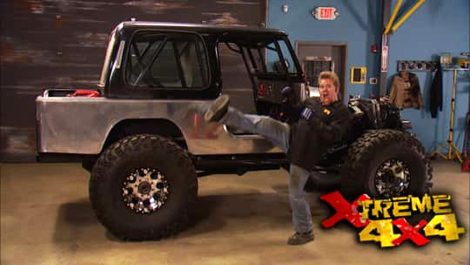
Why is Ian out of breath? Because the guys just tore down the scrambler to add wiring gauges, exhaust and oil pan transmission, sway bar, drive shafts, wicked U joints, dual fuel propane bumper, a trick winch that cools itself, brakes and cables. This show is hot.
Hey, guys and girls, welcome to another wonderful day here in the extreme neighborhood. Now, today we brought one of our favorite projects back into our small two car garage for another day of work. And you know, when you head out into your garage, it's just an exciting way to spend the afternoon. You change into your work clothes and sometimes it just kinda changes your attitude towards things. You get all ready to work and you just wanna grab a grinder and you gotta grind on stuff and make a cool truck.
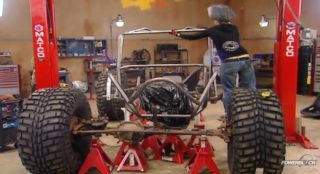
The last time we worked on our Jeep Scrambler project, we blew the entire project apart so we could line the inside of our tubs and our frame with some duplicate
bed liner.
We located and wired up the harness,
installed the dash and tossed in a fuel tank.
They built some custom exhaust and installed the radiator.
Now before we roll our chassis back underneath our mezzanine, our small two car garage space we put together here at extreme. We need to deal with the clearance issue we've got on our small block Chevy engine,
deep sump pans like the one that came on. Our used motor are great for street engines,
but on our Jeep, we're gonna have a slight interference with the drive shaft.
So a stock steel pan from o'reilly auto parts will take its place
behind our small block. We're gonna be putting a turbo 400 instead of rebuilding one out of a junkyard, the guys from monster transmission hooked us up with this complete crate unit.
Now, we let you guys pick the drive train for this project and you picked the Turbo 400
the 203205 combo and we mocked up one that we pulled out of a junkyard last time and we honestly planned on rebuilding it. But we changed our plan. When we started to inspect the transmission,
we found the back of our junkyard transmission had a crack right here at the back of the housing, but that's pretty common in these four hundreds when you have that big 203 hanging off the back.
The problem there is we already had 100 and $50 into that transmission. We go buy another one from a junkyard for another 150. There's 300 bucks the rebuild kit to rebuild this 400 to match this crate transmission costs $600 right there. We're at $900 total. Now, this crate transmission comes in at just over 1000. So it's a little bit more money, but we get a full warranty complete bolt in unit
monster transmission built this 400 specifically for RG,
utilizing an upgraded pump,
new direct reverse input drum, heavy duty accumulators and a reprogrammed shift kit
that will help this thing tear into the dirt.
And our new heavy duty low stall speed converter will lock up just below 2200 RPM.
Now, last time we went ahead and mocked our exhaust system into place and we took it all out, welded it and sent it out to get coated at nitro plate. Now, the nitro plate coating does a couple of things for it.
It keeps the heat inside the exhaust and let it flow out. The tailpipe, less heat is radiated out of the exhaust system and it won't get into the past
your compartment. It'll keep our exhaust system nice and rust free for a long period of time. Plus it just looks good.
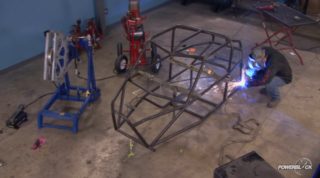
Now, while we're under here dressing things up, we also dressed up our transfer cases with some thin aluminum covers that we got from CNM machine just because we're working in a small two car garage and we're gonna put a body on top of all this stuff doesn't mean we're cutting any corners.
Now, drive shafts, front, rear on this Jeep are both from Je Real Drive line service. Now on the rear, we're using a new type of constant velocity joint called a cor
a joint. Now, there's some technology here a little bit different than a standard CV. And you can really tell the difference when you compare the two, our front shaft is just a standard CV joint because it doesn't see as much rotation. It only turns when we're info,
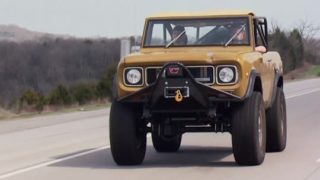
you can see there's a large build up area right here designed to attach the two joints. Now that has to be there to hold the joint together. But the downfall of that is that mass is on the outside edge of the shaft. So as it turns, it can actually start to whip and vibrate. The coronate joint has taken the attachment and moved it down to the inside of the joint itself and there's a little cam push and pull here to attach the
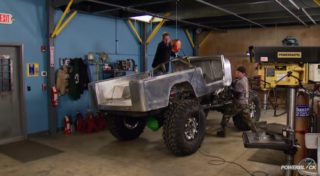
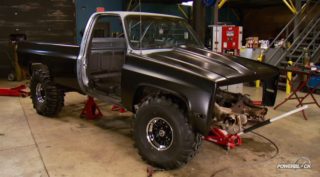
and that should keep this thing from vibrating as much. Now, the design around these U joints, as you can see this mass right here is designed to pull the heat out of the needle bearings as these things turn around, the needle bearings in there can actually get pretty hot, having that little extra beef there helps draw the heat out and helps take it out and radiate it out and cool it off. The joint provides less vibration and lasts a lot longer.
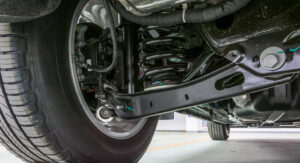
Now, not too long ago, sway bars were considered bad news when you were wheeling, it would really limit the articulation of the front axle. So guys were disconnecting them. We're just taking them off and throwing them away. Now, a better solution is to install an off road specific sway bar like this curry enterprises, anti rock bar. Now, this is a bolt in kit for a Jeep TJ and it has a lightweight torsion rod that fits through the front of the frame. Now, keep our body roll to a minimum but still allow us to articulate when we're on the trail.
More to come on our Jeep scrambler plus a little fire safety lesson. Stay tuned.
Welcome back to Xtreme 4x4. If you guys remember the plan for this, Jeep is to build a one of a kind truck, but do it in a small two car garage space, not using all the fancy tools and the fancy machinery that we have in the rest of the shop, but then not hold back on the custom touches, make it be able to lay the smack down on the trail and also look good while doing it. Things like our steering 14 bolt front axle. I think it's definitely one of a kind and yet indestructible. Now, we're going to add a piece of induction to the top of our engine that's just one more custom touch.
Now, there is no question that propane injection is cool. And it really benefits us when we're out there doing hardcore wheeling when the truck is leaned over or even upside down, still delivering that fuel to the engine to keep it running. But when you're out there just doing easy wheeling mile trails or driving on a fire road, we're actually wasting that benefit. Now, with this new system that we got from got propane, we have the ability to run a dual fuel setup. That means that when we're just out there easy wheeling or driving a fire road, we can run on gasoline. But when we need to hit the hardcore trails with a flip of a switch, we can have propane injection. Thanks to this mixing hat that goes on top of our carburetor.
The propane system uses a pressurized cylinder
so we don't have to have a fuel pump and we don't have to worry about spilling fuel when the truck is off. Camber.
The mixing hat installs over our carb in place of the air cleaner
and the fuel line is hooked to the top
before getting to the mixer. Fuel travels through a regulator as well as a blow off valve to prevent excessive pressure in the lines.
An in line filter keeps the fuel clean
and then finally, the hook up is added for the tank.
Now, the key to making this dual fuel system work is this small solenoid and this three position switch when we want to run our Jeep on gasoline, we'll simply put the switch in the lower on position. I'll turn on our electric fuel pump and bring fuel up to the carburetor just like normal. When we're getting ready to switch over to propane, we'll go ahead and turn the switch to the middle position, that'll turn off our electric fuel pump and it will also close this solenoid that'll be mounted in that fuel line that'll block off any fuel from possibly getting to the carburetor and the carburetor will still have some gas in it. We'll just burn that off and when we start to feel the motor run rough, we'll go ahead and turn the switch to the up position. Now that will activate the propane solenoid propane will flow from the tank up to the mixing hat. And we have an ejected engine
with the Edelbrock
electric fuel pump mounted inside the skid plate for protection.
We'll fasten the fuel line to the frame rail with some made for you plastic clamps.
While we're running braided hose, we'll go ahead and add 2-6 hoses to our transmission fluid outputs,
attach them to the chassis using the same clamps
and then hook them up to a Hayden Trans cooler mounted at the back of the frame.
The Hayden cooler has an integrated fan to help keep the fluid cool
that makes it ideal for this type of installation.
Now, the gasoline side of our dual fuel setup is actually pretty simple. And we've already gone ahead and installed one of these electric fuel pumps down inside our skid plate and this is an Edelbrock carbureted electric fuel pump. Now, we chose the electric pump so we could switch it off and not deliver any fuel when we're on the propane setup. Now, when we get that fuel up to the back of the motor, we need to run it through a regulator or the fuel just overpower the needle and seat in the carburetor and cause the engine to flood. So we're using one of these Edelbrock carbureted regulators, the fuel will come in one port and then out to the carburetor itself and you adjust the pressure with this little knob on the top. Now, this is not a bypass style regulator like you can see with an EFIK, a bypass has a secondary line that goes all the way back to the tank to keep the fuel circulating and keep the pump cool.
And when it comes to steering on our project CJ eight scrambler, we had a couple of different ways we could go. We could use a very common mechanical set up and that would include this steering box like this that we got from PSC. It is drilled in tap for hydraulic assist and that would help make the steering a little bit easier even with 42 inch tile tires. Now, there's a downfall to this set up the box mounts on the frame and there's a tie rod that goes off the pitman arm down to the high steer arm on the axle. Now, that tie rod can limit the articulation of the axle when we're off road.
Now, we're after true off road performance here. So we're not going to run this set up. I'm gonna run something that's a little more common in the crawling crowd and that is full hydraulic steering. Now, the heart from a full hydraulic steering setup is this steering ramp. Now, this is a 2.5 inch ra M that we got from PSC. It will mount to the axle and to the tie rod that connects the two upper high steer arms together. And the nice thing about this setup is as long as the fluid lines are attached to this RM, the axle can articulate as far as it wants. We'll always have full steering control
with a piece of tubing cut to link. We'll build a tie rod using some tubing adapters and some Q A one rod ends,
then we'll mark
and drill our high steer army.
The cylinder will mount to the same bracket as the panhard bar
and then connect directly to the tie
rod.
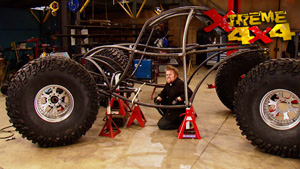
Now, our rolling chassis for a Jeep is pretty much all taken care of and now we can start to put a body back on top of it. We're going to start right at the front bumper and move through to the back Now, for the front bumper on this truck, we decided to go with a sniper fab winch bumper. Now they come in two different varieties. You can get a fully welded, ready to bolt on bumper made out of three
16 plate, or you can have them break it apart and send it to you in a kit that you weld together yourself. Now, we chose the kit that we'd weld together ourselves for a couple of reasons. Number one, our frame is custom. So we knew we'd be modifying this mounting plate. But more importantly, we got to choose a new cut out in the front
and that just seemed to make better sense.
The frame tube on our TDK frame is slightly narrower than a stock TJ.
So we'll test fit the side pieces,
pack them in place with our 110 volt welder.
Little bit of trimming with a cut off wheel
AM
save me on my
phone
and then finally weld the entire thing together
and painted a nice coat of black.
Now, a winch project like this for you guys working in a two car garage is a great first time fabrication project. All the heavy lifting is done, all the cutting and bending and measuring all you have to do is weld it together even with the small 110 volt make and it turns out great. Now, we chose this bumper mainly because it's a winch style bumper and we're gonna be putting a winch on the front of our Jeep that is very unique. Now, Warren has just come out with this brand new 12.0 endurance style winch, uh just like all worn winches. It has a high quality electric motor, 100 and 56 to 1 planetary gear set pre
spooled with aircraft cable and this thing can handle a 12,000 pound single line pull, which is pretty impressive for the size of this winch. But the very interesting feature is this little motor right here. Now, this is a small electric fan motor that you mount elsewhere on your vehicle. It'll bring in cool dry air through this filter and then pump it out through this fitting.
It'll travel down a typical heater hose to a small elbow on the backside of the electric motor. Now that'll flow cool air all over the electric motor while you're using the winch. Now, what that means is you'll be able to run that motor longer. So on those long poles, your winch won't overheat. That's why this winch earns the name endurance.
And with the winch bolted onto our new bumper, we can finally get our Jeep looking more like a Jeep.
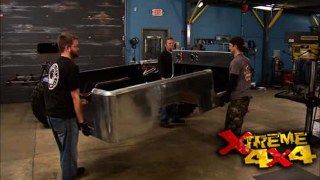
Welcome back to extreme and our Jeep scrambler with the chassis taking shape, we can get the body back onto the frame and make our truck look a little bit like a Jeep again.
Mhm.
Now our braking power is gonna come from a couple of stock used components that we got from Davey's Jeeps. Now Davey's Jeeps is a wrecking yard specializing in used Jeep parts and we asked them to keep an eye out for a good used master cylinder booster and bracket assembly. And after some time, this is what they put together for us. Now, obviously, it's in pretty good shape. So it was probably replaced by the previous owner. We know it's gonna work fine on our Jeep. Now, the pedal assembly, it's in a little rougher shape. It'll obviously need a coat of paint and it is out of a standard transmission shift. Jeep. All that means is the brake pad is a little bit smaller, but once we clean this up, it'll bolt right onto our firewall.
Our
Aquilo body comes scribe with the location for the booster on the firewall.
Once we drill out the mounting holes,
cut a spot for the brake rod,
our master cylinder bolts right up
and we picked up a pile of parts for our Jeep all from low car. We got the usual flexible transmission dipstick as well as an engine dipstick. We got a throttle pedal that will mount to the floor as well as a throttle cable and a kick down cable. Now, for the Turbo 400 the kick down cable is fairly unique and a lot of people don't really understand how the kick down cable works. So I went ahead and mocked one up on this carburetor in the vice. Now an older non computer controlled transmissions, when you accelerate, you're basically pulling back the throttle cable with the gas pedal. At the same time, the carburetor is pulling out on what often is referred to as the kick down cable. Now, the transmission calls this the throttle pressure cable. Now, what that does is it tells the transmission how hard you're pressing on the gas and that will determine when the transmission shifts or down shifts, when you pull it to past somebody. Now, on a turbo 400 it's pretty unique
because instead of hooking up to a valve inside the valve body, it activates this small switch on the side of the transmission. Now, that's no big deal for a car that came with a Turbo 400 because it usually had a switch right on the gas pedal. But when you swap a turbo 400 into a vehicle like our Jeep, we don't have that switch. We need this little box that we got from low car. Now, inside this box is a micro switch, we'll have 12 volts applied to one side of the switch
and then the other side will go out to that transmission switch. When we step on the gas, a barrel valve will come along and activate the micro switch and tell our transmission to downshift. If we didn't have this installed on the 400 our transmission would never downshift and we stepped on the gas unless we pulled it back manually. Even then the pressure inside the valve body would be less because it doesn't know that we're at full throttle
that could cause premature clutch failure and even transmission damage.
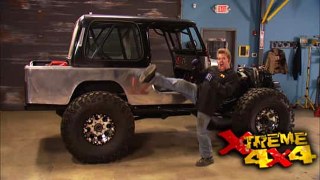
Now, the next time the jeeps in the shop will be taking care of all the little things and then firing this beast up for the first time. But before we head out today, we want to drop the hard top on to give it that last custom touch.
Show Full Transcript
Hey, guys and girls, welcome to another wonderful day here in the extreme neighborhood. Now, today we brought one of our favorite projects back into our small two car garage for another day of work. And you know, when you head out into your garage, it's just an exciting way to spend the afternoon. You change into your work clothes and sometimes it just kinda changes your attitude towards things. You get all ready to work and you just wanna grab a grinder and you gotta grind on stuff and make a cool truck.
The last time we worked on our Jeep Scrambler project, we blew the entire project apart so we could line the inside of our tubs and our frame with some duplicate
bed liner.
We located and wired up the harness,
installed the dash and tossed in a fuel tank.
They built some custom exhaust and installed the radiator.
Now before we roll our chassis back underneath our mezzanine, our small two car garage space we put together here at extreme. We need to deal with the clearance issue we've got on our small block Chevy engine,
deep sump pans like the one that came on. Our used motor are great for street engines,
but on our Jeep, we're gonna have a slight interference with the drive shaft.
So a stock steel pan from o'reilly auto parts will take its place
behind our small block. We're gonna be putting a turbo 400 instead of rebuilding one out of a junkyard, the guys from monster transmission hooked us up with this complete crate unit.
Now, we let you guys pick the drive train for this project and you picked the Turbo 400
the 203205 combo and we mocked up one that we pulled out of a junkyard last time and we honestly planned on rebuilding it. But we changed our plan. When we started to inspect the transmission,
we found the back of our junkyard transmission had a crack right here at the back of the housing, but that's pretty common in these four hundreds when you have that big 203 hanging off the back.
The problem there is we already had 100 and $50 into that transmission. We go buy another one from a junkyard for another 150. There's 300 bucks the rebuild kit to rebuild this 400 to match this crate transmission costs $600 right there. We're at $900 total. Now, this crate transmission comes in at just over 1000. So it's a little bit more money, but we get a full warranty complete bolt in unit
monster transmission built this 400 specifically for RG,
utilizing an upgraded pump,
new direct reverse input drum, heavy duty accumulators and a reprogrammed shift kit
that will help this thing tear into the dirt.
And our new heavy duty low stall speed converter will lock up just below 2200 RPM.
Now, last time we went ahead and mocked our exhaust system into place and we took it all out, welded it and sent it out to get coated at nitro plate. Now, the nitro plate coating does a couple of things for it.
It keeps the heat inside the exhaust and let it flow out. The tailpipe, less heat is radiated out of the exhaust system and it won't get into the past
your compartment. It'll keep our exhaust system nice and rust free for a long period of time. Plus it just looks good.
Now, while we're under here dressing things up, we also dressed up our transfer cases with some thin aluminum covers that we got from CNM machine just because we're working in a small two car garage and we're gonna put a body on top of all this stuff doesn't mean we're cutting any corners.
Now, drive shafts, front, rear on this Jeep are both from Je Real Drive line service. Now on the rear, we're using a new type of constant velocity joint called a cor
a joint. Now, there's some technology here a little bit different than a standard CV. And you can really tell the difference when you compare the two, our front shaft is just a standard CV joint because it doesn't see as much rotation. It only turns when we're info,
you can see there's a large build up area right here designed to attach the two joints. Now that has to be there to hold the joint together. But the downfall of that is that mass is on the outside edge of the shaft. So as it turns, it can actually start to whip and vibrate. The coronate joint has taken the attachment and moved it down to the inside of the joint itself and there's a little cam push and pull here to attach the
and that should keep this thing from vibrating as much. Now, the design around these U joints, as you can see this mass right here is designed to pull the heat out of the needle bearings as these things turn around, the needle bearings in there can actually get pretty hot, having that little extra beef there helps draw the heat out and helps take it out and radiate it out and cool it off. The joint provides less vibration and lasts a lot longer.
Now, not too long ago, sway bars were considered bad news when you were wheeling, it would really limit the articulation of the front axle. So guys were disconnecting them. We're just taking them off and throwing them away. Now, a better solution is to install an off road specific sway bar like this curry enterprises, anti rock bar. Now, this is a bolt in kit for a Jeep TJ and it has a lightweight torsion rod that fits through the front of the frame. Now, keep our body roll to a minimum but still allow us to articulate when we're on the trail.
More to come on our Jeep scrambler plus a little fire safety lesson. Stay tuned.
Welcome back to Xtreme 4x4. If you guys remember the plan for this, Jeep is to build a one of a kind truck, but do it in a small two car garage space, not using all the fancy tools and the fancy machinery that we have in the rest of the shop, but then not hold back on the custom touches, make it be able to lay the smack down on the trail and also look good while doing it. Things like our steering 14 bolt front axle. I think it's definitely one of a kind and yet indestructible. Now, we're going to add a piece of induction to the top of our engine that's just one more custom touch.
Now, there is no question that propane injection is cool. And it really benefits us when we're out there doing hardcore wheeling when the truck is leaned over or even upside down, still delivering that fuel to the engine to keep it running. But when you're out there just doing easy wheeling mile trails or driving on a fire road, we're actually wasting that benefit. Now, with this new system that we got from got propane, we have the ability to run a dual fuel setup. That means that when we're just out there easy wheeling or driving a fire road, we can run on gasoline. But when we need to hit the hardcore trails with a flip of a switch, we can have propane injection. Thanks to this mixing hat that goes on top of our carburetor.
The propane system uses a pressurized cylinder
so we don't have to have a fuel pump and we don't have to worry about spilling fuel when the truck is off. Camber.
The mixing hat installs over our carb in place of the air cleaner
and the fuel line is hooked to the top
before getting to the mixer. Fuel travels through a regulator as well as a blow off valve to prevent excessive pressure in the lines.
An in line filter keeps the fuel clean
and then finally, the hook up is added for the tank.
Now, the key to making this dual fuel system work is this small solenoid and this three position switch when we want to run our Jeep on gasoline, we'll simply put the switch in the lower on position. I'll turn on our electric fuel pump and bring fuel up to the carburetor just like normal. When we're getting ready to switch over to propane, we'll go ahead and turn the switch to the middle position, that'll turn off our electric fuel pump and it will also close this solenoid that'll be mounted in that fuel line that'll block off any fuel from possibly getting to the carburetor and the carburetor will still have some gas in it. We'll just burn that off and when we start to feel the motor run rough, we'll go ahead and turn the switch to the up position. Now that will activate the propane solenoid propane will flow from the tank up to the mixing hat. And we have an ejected engine
with the Edelbrock
electric fuel pump mounted inside the skid plate for protection.
We'll fasten the fuel line to the frame rail with some made for you plastic clamps.
While we're running braided hose, we'll go ahead and add 2-6 hoses to our transmission fluid outputs,
attach them to the chassis using the same clamps
and then hook them up to a Hayden Trans cooler mounted at the back of the frame.
The Hayden cooler has an integrated fan to help keep the fluid cool
that makes it ideal for this type of installation.
Now, the gasoline side of our dual fuel setup is actually pretty simple. And we've already gone ahead and installed one of these electric fuel pumps down inside our skid plate and this is an Edelbrock carbureted electric fuel pump. Now, we chose the electric pump so we could switch it off and not deliver any fuel when we're on the propane setup. Now, when we get that fuel up to the back of the motor, we need to run it through a regulator or the fuel just overpower the needle and seat in the carburetor and cause the engine to flood. So we're using one of these Edelbrock carbureted regulators, the fuel will come in one port and then out to the carburetor itself and you adjust the pressure with this little knob on the top. Now, this is not a bypass style regulator like you can see with an EFIK, a bypass has a secondary line that goes all the way back to the tank to keep the fuel circulating and keep the pump cool.
And when it comes to steering on our project CJ eight scrambler, we had a couple of different ways we could go. We could use a very common mechanical set up and that would include this steering box like this that we got from PSC. It is drilled in tap for hydraulic assist and that would help make the steering a little bit easier even with 42 inch tile tires. Now, there's a downfall to this set up the box mounts on the frame and there's a tie rod that goes off the pitman arm down to the high steer arm on the axle. Now, that tie rod can limit the articulation of the axle when we're off road.
Now, we're after true off road performance here. So we're not going to run this set up. I'm gonna run something that's a little more common in the crawling crowd and that is full hydraulic steering. Now, the heart from a full hydraulic steering setup is this steering ramp. Now, this is a 2.5 inch ra M that we got from PSC. It will mount to the axle and to the tie rod that connects the two upper high steer arms together. And the nice thing about this setup is as long as the fluid lines are attached to this RM, the axle can articulate as far as it wants. We'll always have full steering control
with a piece of tubing cut to link. We'll build a tie rod using some tubing adapters and some Q A one rod ends,
then we'll mark
and drill our high steer army.
The cylinder will mount to the same bracket as the panhard bar
and then connect directly to the tie
rod.
Now, our rolling chassis for a Jeep is pretty much all taken care of and now we can start to put a body back on top of it. We're going to start right at the front bumper and move through to the back Now, for the front bumper on this truck, we decided to go with a sniper fab winch bumper. Now they come in two different varieties. You can get a fully welded, ready to bolt on bumper made out of three
16 plate, or you can have them break it apart and send it to you in a kit that you weld together yourself. Now, we chose the kit that we'd weld together ourselves for a couple of reasons. Number one, our frame is custom. So we knew we'd be modifying this mounting plate. But more importantly, we got to choose a new cut out in the front
and that just seemed to make better sense.
The frame tube on our TDK frame is slightly narrower than a stock TJ.
So we'll test fit the side pieces,
pack them in place with our 110 volt welder.
Little bit of trimming with a cut off wheel
AM
save me on my
phone
and then finally weld the entire thing together
and painted a nice coat of black.
Now, a winch project like this for you guys working in a two car garage is a great first time fabrication project. All the heavy lifting is done, all the cutting and bending and measuring all you have to do is weld it together even with the small 110 volt make and it turns out great. Now, we chose this bumper mainly because it's a winch style bumper and we're gonna be putting a winch on the front of our Jeep that is very unique. Now, Warren has just come out with this brand new 12.0 endurance style winch, uh just like all worn winches. It has a high quality electric motor, 100 and 56 to 1 planetary gear set pre
spooled with aircraft cable and this thing can handle a 12,000 pound single line pull, which is pretty impressive for the size of this winch. But the very interesting feature is this little motor right here. Now, this is a small electric fan motor that you mount elsewhere on your vehicle. It'll bring in cool dry air through this filter and then pump it out through this fitting.
It'll travel down a typical heater hose to a small elbow on the backside of the electric motor. Now that'll flow cool air all over the electric motor while you're using the winch. Now, what that means is you'll be able to run that motor longer. So on those long poles, your winch won't overheat. That's why this winch earns the name endurance.
And with the winch bolted onto our new bumper, we can finally get our Jeep looking more like a Jeep.
Welcome back to extreme and our Jeep scrambler with the chassis taking shape, we can get the body back onto the frame and make our truck look a little bit like a Jeep again.
Mhm.
Now our braking power is gonna come from a couple of stock used components that we got from Davey's Jeeps. Now Davey's Jeeps is a wrecking yard specializing in used Jeep parts and we asked them to keep an eye out for a good used master cylinder booster and bracket assembly. And after some time, this is what they put together for us. Now, obviously, it's in pretty good shape. So it was probably replaced by the previous owner. We know it's gonna work fine on our Jeep. Now, the pedal assembly, it's in a little rougher shape. It'll obviously need a coat of paint and it is out of a standard transmission shift. Jeep. All that means is the brake pad is a little bit smaller, but once we clean this up, it'll bolt right onto our firewall.
Our
Aquilo body comes scribe with the location for the booster on the firewall.
Once we drill out the mounting holes,
cut a spot for the brake rod,
our master cylinder bolts right up
and we picked up a pile of parts for our Jeep all from low car. We got the usual flexible transmission dipstick as well as an engine dipstick. We got a throttle pedal that will mount to the floor as well as a throttle cable and a kick down cable. Now, for the Turbo 400 the kick down cable is fairly unique and a lot of people don't really understand how the kick down cable works. So I went ahead and mocked one up on this carburetor in the vice. Now an older non computer controlled transmissions, when you accelerate, you're basically pulling back the throttle cable with the gas pedal. At the same time, the carburetor is pulling out on what often is referred to as the kick down cable. Now, the transmission calls this the throttle pressure cable. Now, what that does is it tells the transmission how hard you're pressing on the gas and that will determine when the transmission shifts or down shifts, when you pull it to past somebody. Now, on a turbo 400 it's pretty unique
because instead of hooking up to a valve inside the valve body, it activates this small switch on the side of the transmission. Now, that's no big deal for a car that came with a Turbo 400 because it usually had a switch right on the gas pedal. But when you swap a turbo 400 into a vehicle like our Jeep, we don't have that switch. We need this little box that we got from low car. Now, inside this box is a micro switch, we'll have 12 volts applied to one side of the switch
and then the other side will go out to that transmission switch. When we step on the gas, a barrel valve will come along and activate the micro switch and tell our transmission to downshift. If we didn't have this installed on the 400 our transmission would never downshift and we stepped on the gas unless we pulled it back manually. Even then the pressure inside the valve body would be less because it doesn't know that we're at full throttle
that could cause premature clutch failure and even transmission damage.
Now, the next time the jeeps in the shop will be taking care of all the little things and then firing this beast up for the first time. But before we head out today, we want to drop the hard top on to give it that last custom touch.